You’ll dramatically improve your sourdough by placing ¼ cup uncooked white Basmati rice on your Dutch oven‘s base before baking. The rice absorbs excess thermal energy, eliminating bottom scorching while distributing heat uniformly for even browning. Preheat empty for 30 minutes at 450-500°F, add rice with parchment, then bake covered at 475°F for 15 minutes before revealing for 25 minutes. This thermal buffering technique enhances crust quality and crumb structure. The nuances of material selection and optimization strategies merit further exploration.
Rice as a Heat Buffer
Because uncooked rice possesses a high heat capacity relative to air, it’ll absorb and store thermal energy from your Dutch oven’s base and heating elements during preheating and the initial bake stage. This heat absorption mechanism creates effective temperature regulation within your baking environment. The rice layer acts as a thermal buffer, dampening localized hot spots that’d otherwise scorch your loaf’s bottom. As your oven reaches operating temperature, the rice granules gradually warm, distributing absorbed heat gradually across the contact surface rather than concentrating it at a single point. This diffusion effect produces more uniform underside heating and prevents excessive browning. You’ll notice rice grains darken or char before your crust burns—evidence of active thermal energy absorption occurring throughout your bake’s critical early minutes. Similar to how oxygen removal preserves food quality during storage, the rice buffer’s protection against localized heat damage preserves your bread’s quality during baking. Maintaining your oven temperature range between 80°-90°F during initial heat distribution ensures the rice buffer performs optimally without prematurely charring. For optimal results, use approximately ¼ cup uncooked white rice in your Dutch oven to ensure adequate heat buffering throughout the baking process.
Practical Implementation Steps
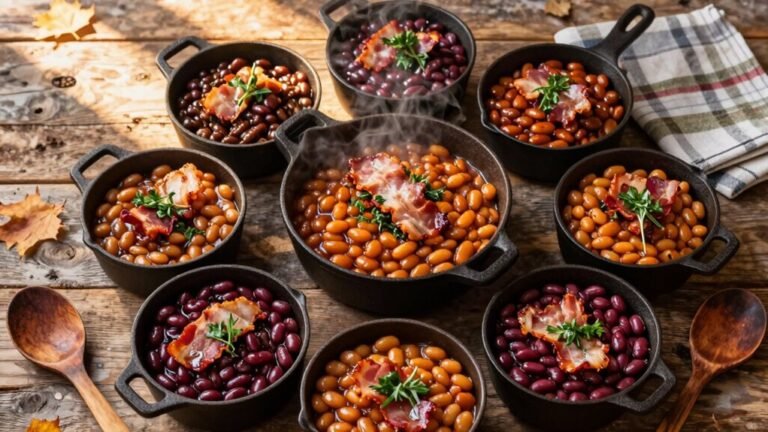
Now that you understand rice’s thermal buffering mechanism, translating this principle into consistent results requires methodical preparation and precise execution. You’ll preheat your Dutch oven empty for 30 minutes at 450-500°F, then add ¼ cup uncooked white Basmati rice to the bottom. After flipping your proofed dough onto parchment paper seam-side down, you’ll lightly spray it with water to generate initial steam and enhance dough moisture development. Position the parchment directly over the rice layer, then place the lidded Dutch oven into your preheated oven at 475°F for 15 minutes. The rice texture will darken progressively as it absorbs excess bottom heat. After removing the lid, continue baking exposed for 25 minutes until your loaf achieves even browning. The crispy golden crust that develops during this phase results from the steam trapped in the Dutch oven during the initial covered baking period, which mirrors the same mechanism that professional bakers rely on for authentic artisan results. The Dutch oven’s heavy construction and tight-fitting lid work together to ensure consistent heat distribution throughout the baking process. For optimal results with smaller loaves, consider using a 5-quart Dutch oven which provides ideal proportions and faster preheating times compared to larger vessels. The long fermentation period of 12-18 hours that precedes baking allows complex flavors to develop and creates the distinctive open crumb structure characteristic of artisan bread. Discard the darkened rice after each use.
Effects on Crust, Crumb, and Bake Timing
By buffering excess bottom heat, the rice layer fundamentally transforms your loaf’s final texture and appearance across all three structural components. You’ll achieve crust improvement through even browning while rice absorbs intense direct heat, preventing burns. The darkened rice sacrifices itself, protecting your loaf’s base. Just as superior heat retention in specialized cookware creates perfectly seared results, your rice layer maintains consistent temperature distribution throughout the baking process.
For crumb quality, moisture retention becomes critical. Reduced bottom heat transfer preserves internal moisture, preventing dense structure while supporting ideal oven spring. Misting dough before covering enhances this effect, creating open, airy crumbs. The steam trapped during this initial covered phase works similarly to how Dutch ovens create bakery-quality results by developing superior crust structure. The tight-fitting lid of quality Dutch ovens locks in steam just as your covered baking vessel does, creating optimal moisture conditions for bread development. Like traditional Dutch oven baking, scaling down recipes ensures your rice-lined vessel operates at optimal capacity without overcrowding. For additional texture control, some bakers dust their baking surface with coarse cornmeal or semolina to further prevent sticking and reduce burning risk.
Your bake timing follows this sequence: preheat your Dutch oven 30 minutes, bake covered at 475°F for 15 minutes, then uncovered for 25 minutes. If removing from the pot, finish at 385°F for 13-14 minutes. This 25°F temperature reduction compared to standard loaf pan recipes prevents overbaking while maximizing oven spring benefits. Consider using lighter color enamel Dutch Ovens, as they absorb less heat and work synergistically with rice insulation to further reduce burnt bottom risks.
Safety, Sanitation, and Flavor Considerations
While rice’s thermal benefits transform your sourdough’s structure, you’ll need to address food-safety, sanitation, and flavor concerns that arise from using it in an enclosed Dutch oven. Bacillus cereus spores can persist on reused rice; discard rice after each bake to prevent microbial accumulation. Clean your Dutch oven thoroughly with hot water and detergent, mechanically scrubbing charred residues that harbor microbes or rancid lipids. Select neutral white rice varieties rather than aromatic types like basmati or jasmine, which transfer unintended aromas. Stale or previously charred rice imparts bitter off-flavors; use fresh rice exclusively. Consider placing rice in a foil tray or beneath parchment to minimize direct contact, simplifying sanitation while preserving your intended flavor profile. Just as browning beef develops a rich crust that deepens flavor complexity, preheating the Dutch oven to 230C (450F) ensures that rice particles distribute evenly and contribute to consistent steam generation throughout the baking process.
Alternatives and Comparative Methods
If you’re seeking alternatives to rice for thermal buffering in your Dutch oven, you’ll find several materials that trade off cost, durability, and thermal performance in distinct ways. Play sand delivers substantially greater heat capacity and stability than rice but adds significant weight and requires food-safe designation. Dried beans offer comparable bulk heat capacity yet risk cracking or discoloring under repeated high-temperature cycles. Ceramic baking beads provide engineered thermal inertia with superior reusability and predictability, though they command higher upfront cost. Each alternate material shifts your baking outcomes differently—sand reduces base scorching most effectively, while ceramic beads optimize consistent heat distribution. Since steam is critical for optimal ovenspring, proper moisture management becomes essential regardless of your thermal buffering material choice. A fitted lid helps maintain consistent moisture levels throughout the baking process, ensuring your thermal buffering strategy performs optimally. Like maintaining a sourdough starter, thermal buffering materials require routine attention and consistent feeding schedules to preserve their effectiveness across multiple baking cycles. You can also enhance your Dutch oven’s heat retention properties by applying non-stick seasoning layers to the interior surfaces before use. When storing these materials between baking sessions, oxygen exposure can cause degradation and affect their thermal properties over time. While specialized thermal buffering materials designed for food-safe use are preferable, ensure that any plastic storage containers used are made from food-grade polyethylene or polypropylene to prevent harmful additives from leaching into your baking environment. To further extend the lifespan of your thermal buffering materials, consider vacuum sealing them when not in use to prevent moisture absorption and degradation. Your choice depends on balancing expense, handling convenience, and desired crust characteristics across multiple bakes.
Limitations, Testing Notes, and Recommendations
Although rice provides measurable thermal buffering benefits, you’ll encounter several practical constraints that require careful management. Uncooked rice darkens substantially when exposed to extreme heat, necessitating rice disposal after each bake for food-safety and flavor integrity. Reusing rice risks absorbing moisture and transferring off-flavors into your baking cavity, similar to how proper packaging prevents unwanted flavor transfer in other food preservation methods. For commercial applications, vacuum sealing offers superior extended food shelf life compared to traditional storage methods. Just as alternative sealing methods like the water displacement method can effectively prevent air exposure in other cooking techniques, proper rice management maintains the integrity of your baking environment.
Testing confirms that 1/4 cup white rice placed beneath your loaf reduces bottom scorching while maintaining standard bake timing. However, this method produces a lighter bottom crust. If you prefer deeper browning, transfer your loaf to an upper rack for the final 10–20 minutes after removing it from the pot. For optimal results, consider using metal handles on your Dutch oven to ensure the vessel can safely withstand repeated high-temperature baking sessions without degradation. To ensure accuracy in monitoring your bake, familiarize yourself with the distance-to-spot ratio of any infrared thermometer you use to check internal temperatures.
For heat retention optimization, maintain parchment beneath your loaf to provide minimal additional insulation between loaf and rice, enhancing thermal performance throughout your bake. Protecting your Dutch oven’s cooking surface with gentle tools prevents damage to the enamel coating during repeated use and extends the vessel’s lifespan.