You’ll master Thanksgiving dinner using one Dutch oven for your entire menu. Dry-brine your turkey for 24–48 hours, then braise it with aromatics until it reaches 165°F internally. Simultaneously, you can roast caramelized vegetables, bake cornbread with steam-retained moisture, and prepare braised greens. Layer dump cakes with pumpkin filling and cake mix for effortless desserts. Strategic timing and heat management across your oven space frees capacity while delivering moist proteins, concentrated vegetable flavors, and evenly baked breads. Uncover how proper sequencing transforms your holiday preparation.
Dutch-Oven Mains: Turkey and One-Pot Proteins
Because a Dutch oven traps heat and moisture beneath its lid, you’ll achieve moist, evenly cooked turkey with reduced cooking time compared to conventional roasting. For best results, place aromatics—onion, apple, and herbs—in the cavity and beneath the bird to infuse flavor while preventing direct contact with the pot base. Aim for an internal temperature of 165°F before removing from heat.
Smaller whole turkeys (9–11 lb) suit larger Dutch ovens, while bone-in breasts (4–6 lb) work well in medium sizes. If your Dutch oven turkey doesn’t fit whole, consider spatchcocking or using breast-only cuts. To enhance moisture retention and flavor, rub garlic sage butter under the turkey skin before cooking. An oval-shaped Dutch oven is preferable to ensure proper heat circulation around the bird. For those without a Dutch oven, you can achieve similar results by creating a hot and humid environment in your oven using alternative steaming methods.
Beyond Dutch oven turkey, one pot proteins like beef chuck pot roast offer hearty alternatives. Braise beef for 2–4 hours until fork-tender, creating a complete Thanksgiving main without multiple vessels. The rich, flavorful gravy that develops from deglazing with red wine complements traditional holiday sides beautifully. For optimal results, dry brine your turkey for 24 to 48 hours in the refrigerator before roasting to ensure deeply seasoned, tender meat throughout. Consider preheating your Dutch oven with butter in the bottom to develop a flavorful crust on your turkey similar to achieving crispy edges in cast iron cooking. If you’re preparing turkey ahead of time, vacuum seal prepared portions to preserve moisture and flavor until you’re ready to cook.
Vegetable Sides and Starches
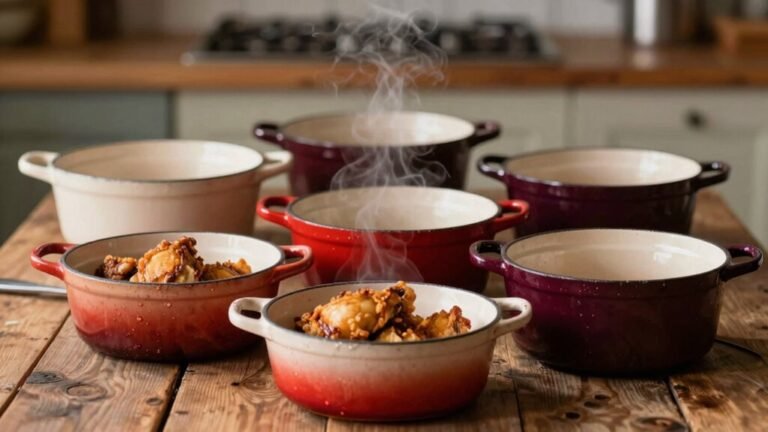
While your Dutch oven turkey or braised protein forms the centerpiece, thoughtfully composed vegetable sides and starches round out a balanced Thanksgiving plate. Roasted vegetables like carrots, parsnips, and Brussels sprouts develop caramelized flavor and hold well for service. Braised greens—collards, kale, or cabbage—braise in stock or wine, concentrating flavors and reducing oven demand. Creamy gratins featuring potatoes, butternut squash, or cauliflower deliver comfort with rich texture; finish them in your Dutch oven under lid or transfer to the oven for browning. The Dutch oven’s even heat distribution makes it particularly effective for ensuring gratins cook uniformly without hot spots. Grain salads with farro or wild rice pilaf, dressed in vinaigrette and studded with roasted vegetables, offer make-ahead flexibility at room temperature. Consider preparing a nutty wild rice pilaf with cranberries and herbs to add depth and seasonal appeal to your spread. For a modern twist on traditional sides, you can also prepare cast iron skillet pizza as an unconventional vegetable-forward option that brings interactive dining to your Thanksgiving table. When heating Dutch oven dishes, maintaining precise temperature control ensures vegetables cook evenly without burning or becoming mushy. To preserve your prepared sides effectively, store cooled vegetables in vacuum seal storage bags for extended freshness and easy reheating. Well-prepared vegetable sides can elevate the Thanksgiving meal by adding variety through casseroles, gratins, roasts, and sautés. These components guarantee your Thanksgiving spread balances richness, texture, and visual appeal. For best results when seasoning cast iron cookware used in your Thanksgiving preparations, consider oils with a high smoke point to ensure durability and optimal performance at elevated cooking temperatures.
Breads, Rolls, and Cornbread
As you shift from vegetable sides to the bread course, you’ll find that Dutch ovens excel at baking cornbreads, dinner rolls, and yeasted loaves through superior heat retention and steam management.
For cornbread variations, balance 1 cup cornmeal with 3/4 cup flour and 3/4–1 cup buttermilk, adding optional eggs and 2–4 tablespoons fat. Increase cornmeal ratios to 2:1 for denser corn pone. Incorporate 1/2–1 cup grated cheddar or honey for enriched flavors. When substituting vegetable oil, bacon grease enhances the cornbread’s depth of flavor significantly. Sugar can be adjusted or omitted depending on your preferred sweetness level.
Roll techniques benefit from the Dutch oven’s steam retention, promoting oven-spring and tender crumb. Preheat your seasoned pot to 400–425°F, coat with fat, and bake 20–35 minutes until toothpick-tested. Distribute coals with more on the lid than the base for even browning. Vent briefly near completion to prevent sogginess. The crispy, golden crust develops as steam escapes during the final baking stages. Since the Dutch oven’s lid and base become extremely hot during baking, always use a heat-resistant handle cover when handling the pot. To ensure your bread is fully cooked through, check that the internal temperature reaches 165°F or use a toothpick test for doneness. Using a trivet helps distribute heat evenly and prevents the bottom of your bread from burning. You’ll achieve 8–12 servings per standard Dutch oven.
Desserts and Sweet Finishes
Your Dutch oven shifts seamlessly from savory mains to indulgent desserts, leveraging its superior heat distribution and moisture retention to bake everything from fruit cobblers to chocolate cakes with minimal fuss. Thanksgiving cobblers benefit from layered fruit bases topped with cake mix or biscuit-style batters, while dump cakes combine pumpkin filling, cake mix, and butter for effortless assembly. Chocolate lava cakes translate beautifully with careful heat management and foil liners to prevent scorching. Bread pudding—cubed day-old bread suspended in spiced custard—bakes evenly and holds exceptionally well for buffet service. Sweet toppings like caramel, whipped cream, and ice cream enhance warm desserts directly from the Dutch oven. Employ lower temperatures for custard-based items and monitor sugar toppings to prevent burning under coals, as uneven heat distribution can cause certain areas to scorch faster than others. For precise temperature monitoring of your desserts, consider using an infrared thermometer to verify internal temperatures and ensure even baking throughout your Dutch oven. Peach cobblers made with Bisquick biscuit dough create a golden crust while the fruit filling remains moist and flavorful beneath. Apple cakes featuring warm spices and apples pair wonderfully with Dutch oven cooking, delivering the moisture retention necessary for tender, flavorful results. Just as savory pot pies benefit from properly prepared ingredients, desserts also require coating and layering techniques to achieve ideal consistency and texture. The same principle of deglazing with liquid that enhances savory stews can be applied when creating sauce reductions to accompany warm desserts. Long-handled wooden utensils are ideal for stirring and serving these desserts without damaging your cast iron or risking burns from hot surfaces.
Planning, Timing, and Execution for Holiday Service
Once you’ve mastered the Dutch oven’s capacity for both savory mains and sweet finishes, you’ll face the real challenge: orchestrating multiple dishes across a compressed holiday timeline without sacrificing quality or your sanity.
Menu sequencing prioritizes low-and-slow braises early, reserving high-heat finishing for the final 30–45 minutes. Work backward from your target serving time, marking critical milestones to the minute. Assign make-ahead components—stocks, aromatics, bread for stuffing—to earlier days. The slow-roasted turkey with herb butter should be removed from the fridge 7 hours before service to reach optimal room temperature.
Allocate explicit cooking times for turkey resting and Dutch-oven holding periods; mashed potatoes, for instance, remain stable covered at low heat up to 60 minutes. Build 15–30 minute buffers between carving, plating, and final oven work. Consider preparing turkey meatballs ahead of time to eliminate raw meat handling and reduce last-minute protein stress at camp. Bone-in, skin-on chicken thighs benefit from the same make-ahead preparation strategy, allowing you to sear proteins in advance and finish them during service. The Dutch oven’s exceptional heat retention properties keep side dishes warm throughout service without overcooking them. The tight-fitting lid ensures that moisture remains sealed in during holding periods, maintaining the quality of your prepared dishes.
Match pot sizes to recipes, avoiding overfilling. Stage one oven low for finished pans, another active for roasting. Parallel tasks—simmering stocks while braising sides—maximize Dutch-oven capacity without overloading heat sources. Complete your holiday spread by preparing creative sides and desserts, such as skillet apple crisp or homemade cranberry sauce, which can be finished in the final oven stages. Like achieving a proper sear on proteins, mastering temperature control across multiple Dutch ovens requires attention to heat management and sequential timing.