You can cook sous vide without a machine by using freezer-grade zip-top bags, a calibrated digital thermometer, and a heavy-walled pot on your stovetop. Employ the water-displacement method to remove air, maintain precise temperatures between 130–185°F depending on your protein, and monitor the water bath consistently. Sear your food afterward for restaurant-quality results. While stovetop methods require more attention than dedicated machines, they’ll deliver tender, evenly cooked meals if you understand the specific techniques involved.
Methods for Sous-Vide Without a Machine
You don’t need specialized equipment to sous-vide at home—freezer-grade zip-top bags and a stable water bath’ll get you there. The water-displacement method reliably removes most air from bags, creating effective sous vide alternatives to commercial vacuum sealers. For manual methods, clip your bag’s rim to your pot edge and weight it with kitchen utensils to prevent floating during long cooks. Use food-grade or freezer-grade plastics only—BPA-free options minimize leaching at typical home sous-vide temperatures (70–85°C). Double-bagging provides extra security against leakage and cross-contamination. An insulated cooler paired with periodic manual heat adjustments maintains temperature stability better than open pots. Keep bag openings above the waterline during sealing to prevent contamination, and monitor your bath temperature consistently with a reliable thermometer. Many home cooks successfully use digital thermometers to track water temperature throughout the cooking process. Controlling water temperature manually requires frequent monitoring and ice or cold water adjustments to prevent overheating your cooking vessel. A cast iron skillet with a lid can help retain heat during manual sous-vide cooking by creating a more controlled thermal environment when placed over your water bath. Proper labeling of your bags with contents and cooking dates helps track storage duration and ensures you use older preparations first. For longer cooking durations, permeable membrane bags that allow moisture release while sealing against the meat’s surface can extend the aging process similar to traditional dry aging methods. Commercially available compression bags designed to seal without vacuums offer convenient alternatives for home cooks seeking reliable space-saving solutions. For longer storage periods before cooking, consider using durable seals on your bags to maintain freshness and prevent premature air leakage.
Temperature Control Strategies
Since precise temperature maintenance defines successful sous vide cooking, reliable measurement and active management become essential when you’re working without a commercial circulator.
You’ll need a calibrated digital thermometer with ±0.5–1.0°C accuracy, positioned at mid-depth to avoid false readings. Maintain temperature stability by using low, consistent stove heat and making small adjustments rather than aggressive on-off cycling. A heavy-walled pot slows heat loss and reduces fluctuations, similar to how cast iron’s heat retention properties make it valuable for achieving consistent cooking results.
For heat conservation, cover your pot with a fitted lid and float insulation on the bath surface. Stir gently every 10–20 minutes to equalize temperature gradients. When adding cold food bags, use brief heat bursts to recover temperature without overshooting. A quality digital thermometer clipped to the pot’s side helps you monitor changes in real time, allowing you to respond quickly to any temperature drift. Manual stirring prevents the temperature stagnation that would occur in an unmixed water bath. Unlike commercial circulators that provide water circulation power to maintain uniform heat distribution, these strategies compensate for absent precision, keeping your bath consistently within target range. An airtight closure on your food bag prevents water from entering during the cooking process, ensuring proper heat transfer and food safety. Well-seasoned cast iron and other properly seasoned cookware naturally develop non-stick properties that can enhance your overall cooking versatility across different techniques. Proper heat retention through equipment choices and technique minimizes energy loss and reduces the frequency of temperature adjustments needed during cooking.
Bagging and Sealing Options
Freezer-safe Ziploc bags offer a practical alternative to vacuum sealers for sous vide cooking without specialized equipment. You’ll want to use the water displacement method for effective sealing techniques. Submerge your open bag in cold water, slowly lowering it until water pressure forces air out. Keep the zipper opening above the waterline to prevent water entry, then seal once air’s fully displaced.
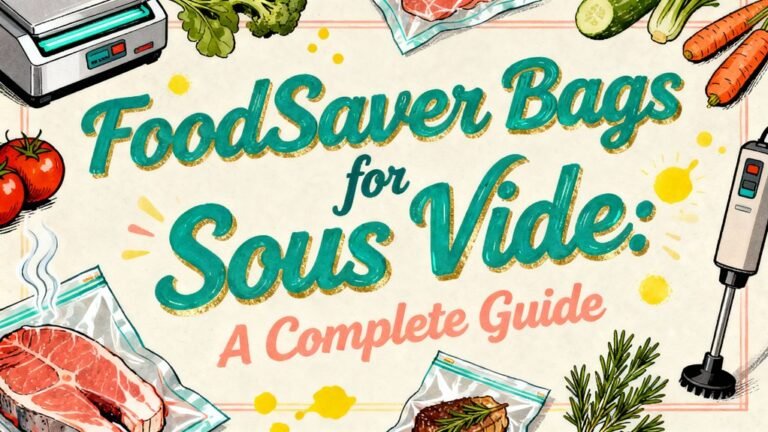
Choose freezer-grade bags over sandwich bags—their thickness provides durability during prolonged heat exposure. You can seal multiple bags simultaneously using your cooking pot for displacement, eliminating extra steps. BPA-free polyethylene withstands sous vide temperatures without melting, making Ziploc bags a reliable, cost-effective solution that delivers vacuum-like results without specialized machinery. A digital probe thermometer can help you verify that your water bath maintains the precise temperature required for sous vide cooking. For superior long-term food preservation, vacuum seal bags with airtight seals prevent freezer burn and maintain food quality more effectively than standard freezer bags. Proper air removal from bags ensures optimal heat transfer and food quality during the cooking process. While Ziploc bags work well, vacuum sealers are preferred for safety and better results in professional applications. Glass canning jars and silicone bags provide plastic-free alternatives for environmentally conscious home cooks. Ztove allows sous vide cooking directly on your cooktop, making this bagging method even more practical for everyday home cooks seeking accessible temperature control.
Food Safety and Time-Temperature Guidelines
While proper bagging techniques protect your food from water infiltration, what happens inside that sealed pouch matters just as much—temperature control and timing directly determine whether your sous vide cook eliminates dangerous pathogens or leaves them to multiply.
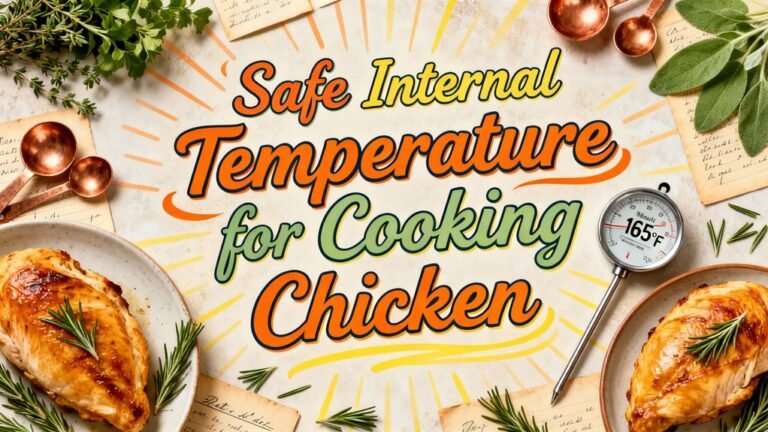
You’ll need validated time–temperature guidelines to safely pasteurize food. For example, 65°C for 10 minutes or 70°C for 2 minutes achieve equivalent log reductions for vegetative bacteria like Salmonella and pathogenic E. coli. Thinner portions reach these endpoints faster due to improved heat penetration. FoodSaver bags are constructed with multi-layer plastic that creates a durable, airtight seal preventing air and moisture from compromising the food inside. Vacuum sealing removes oxygen from the pouch, which reduces oxidation and inhibits bacterial growth during storage. Proper sealing and pasteurization kill spoilage and pathogenic bacteria effectively during the cooking process. Using a programmable alarm that alerts you when your food reaches the target temperature ensures you don’t exceed or fall short of critical time-temperature endpoints. Use quality sous vide equipment to ensure accurate and consistent temperature maintenance throughout your cook. Just as heat circulation underneath cookware is essential for even cooking in outdoor settings, consistent temperature distribution throughout your sealed pouch is critical for achieving safe and uniform results. Like Dutch oven braising, maintaining internal temperature control ensures even heat penetration throughout your food.
After cooking, rapidly cool your food to 4°C within six hours to prevent outgrowth of foodborne pathogens, particularly Listeria in vacuum-sealed pouches. Refrigerated shelf life typically maxes at 5–7 days. Before serving, reheat to 70°C core temperature to guarantee safety.
Common Pitfalls and Limitations
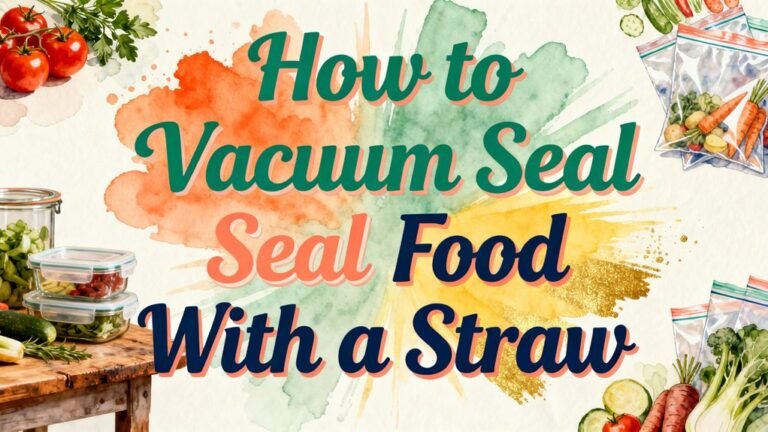
When you abandon a commercial immersion circulator for stovetop, oven, or slow-cooker methods, you’re accepting significant trade-offs in temperature stability and cooking precision. Common mistakes emerge quickly: zipper-lock bags trap air pockets that reduce heat transfer and cause uneven doneness, while hand-sealing techniques depend entirely on your skill. To minimize air pockets, consider using straw insertion methods similar to those employed in vacuum sealing applications. Temperature inaccuracies pile up without active circulation—thermal stratification creates hot and cold zones that lengthen cook times unpredictably. You’ll lack fail-safe alarms to catch temperature drift during multi-hour cooks, and cooling protocols become inconsistent, raising bacterial regrowth risks. Glass containers like borosilicate glass vessels provide superior heat distribution compared to plastic bags, making them a more reliable option for maintaining consistent temperatures when using alternative cooking methods. Thick cuts remain vulnerable to prolonged danger-zone exposure. Reproducing exact doneness becomes nearly impossible without precise, repeatable temperature control. However, manual water circulation through consistent monitoring and periodic hot water additions can help maintain more stable temperatures than completely passive methods. Proper vacuum sealing techniques can extend food freshness by locking out air and moisture that compromise both temperature control and food quality during extended cooking processes. These limitations compound when you’re cooking for consistency or food safety.
Practical Tips for Best Results Without a Machine
Despite the pitfalls of DIY sous vide cooking, you can achieve reliable, consistent results by mastering temperature control and proper technique. Start with sous vide essentials: a digital thermometer, thick-sided Dutch oven, and freezer-safe Ziploc bags. Season your food lightly, then use water displacement to remove air before sealing individual portions flat. Heat your water bath to exact target temperature before adding the bag, clipping it to the pot edge for stability. Monitor your thermometer closely throughout cooking, adjusting stove heat to maintain precise temperature within 1–2 degrees. The tight-fitting lid of your Dutch oven creates an ideal environment for maintaining consistent water temperature during the cooking process. Dutch ovens excel at retaining heat and cooking meals evenly, making them particularly effective for precise temperature control in improvised sous vide setups. Beyond sous vide applications, Dutch ovens demonstrate remarkable versatility for slow-cooking and braising a wide variety of dishes. For cast iron Dutch ovens, proper seasoning with high smoke point oils ensures longevity and optimal performance for repeated sous vide cooking. Proper maintenance of your Dutch oven, including regular cleaning and seasoning, will extend its lifespan and ensure it performs reliably for long-term sous vide cooking. For additional convenience and reliability, consider using vacuum sealing bags that can withstand the cooking temperatures and help preserve food quality throughout the process. After your timed cook, pat the food dry and sear it quickly in a hot skillet for restaurant-quality crust. These cooking techniques deliver superior results compared to traditional methods.
Choosing the Right Equipment for DIY Sous-Vide
The foundation of successful DIY sous vide cooking rests on assembling basic equipment you likely already own. You’ll need a large pot as your water bath and a digital thermometer to monitor precise temperatures. For sealing, freezer-safe Ziploc bags work perfectly with the water displacement method—submerge them in your sink to remove air without a vacuum sealer. Individual bags per portion prevent mixing and guarantee even cooking. Consider equipment alternatives like a Presto Kitchen Kettle for controlled heating or a rack system to elevate bags evenly. A heat-resistant glove protects your hands, while a big spoon enables occasional manual circulation. Regularly test with a thermometer to ensure accurate temperature management and reveal potential inaccuracies that could affect your cooking results. These basic sous vide equipment choices deliver professional results without expensive machinery.
Troubleshooting Temperature Stability Issues
Even with basic equipment, you’ll encounter temperature fluctuations that prevent precise cooking. Start by calibrating your thermocouple using boiling distilled water (should read 100°C) and ice water tests to verify accuracy. Next, optimize your PID tuning through autotune procedures—set ATU to 0001 after filling your reservoir and placing the probe at 60°C. The controller learns your specific warmup and cooldown patterns.
Monitor heater cycling behavior; your controller should activate full power below target, reduce power approaching setpoint, then shut off on overshoot. Verify keep-warm mode settles consistently around your target temperature using a thermometer. Accurate thermometers are essential for identifying any remaining discrepancies between your controller’s reading and actual water temperature. Understanding that precision in temperature is critical will help you achieve consistent results across different food types. Proper seal strength during food preparation ensures your ingredients remain secure throughout the cooking process.
Configure feedback loops properly by adjusting your inner loop’s proportional controller settings. Finally, disable unnecessary alarms via COD0 menu settings (SL4, SL5, SL7 to 0000) and set heating function enabled (SL6 to 0001). These adjustments stabilize temperature control considerably.
When to Invest in an Immersion Circulator
After mastering temperature control with DIY equipment, you’ll recognize when an immersion circulator becomes worthwhile. If you’re cooking proteins frequently—beef, chicken, pork, fish—the investment benefits justify the cost. High-wattage models (1000W–2000W) deliver superior cooking efficiency, reaching precise temperatures within ±0.1°C consistently. You’ll eliminate guesswork that manual methods require, especially during meal prep or high-volume service.
Consider investing when you’re scaling operations with multiple batches or meal prepping across various portion sizes. Compact designs save storage space while costing less than dedicated water ovens. Stainless steel construction guarantees durability for long-term value. Unlike bulky water ovens, immersion circulators offer space-saving design that minimizes counter clutter in busy kitchens. For accurate temperature monitoring throughout your cook, many immersion circulators work alongside non-contact temperature measurement devices to verify water bath stability. The controlled environment prevents overcooked or undercooked results, locks in juices and marinades, and preserves nutrients better than conventional cooking methods like cast iron Dutch oven baking. Similar to how elevated cooking stations provide better heat control in outdoor settings, precise water bath temperatures ensure consistent results across all your preparations. Sealing food in vacuum bags enhances flavor retention while maintaining the tenderness you’ve worked to achieve. For those without a vacuum sealer, water displacement techniques using ziplock bags can work effectively for occasional cooking. Proper vacuum sealing also prevents freezer burn and extends the shelf life of your prepared proteins during storage. You’ll stress less with hands-off operation while maintaining workflow flexibility.