You’ll transform weeknight cooking with a small Dutch oven—one vessel that sears, simmers, braises, and roasts effortlessly. Pre-measure ingredients, sauté proteins first to build flavor, then add stock and vegetables. Fill only three-quarters full for even cooking. Master heat management and lid control for consistent results. Try ground beef stroganoff, Thai pumpkin curry soup, or braised roasts using tougher cuts. You can prepare restaurant-quality meals in thirty minutes or less, and there’s much more to uncover about maximizing this single pan.
Why Choose a Small Dutch Oven for Weeknight Cooking
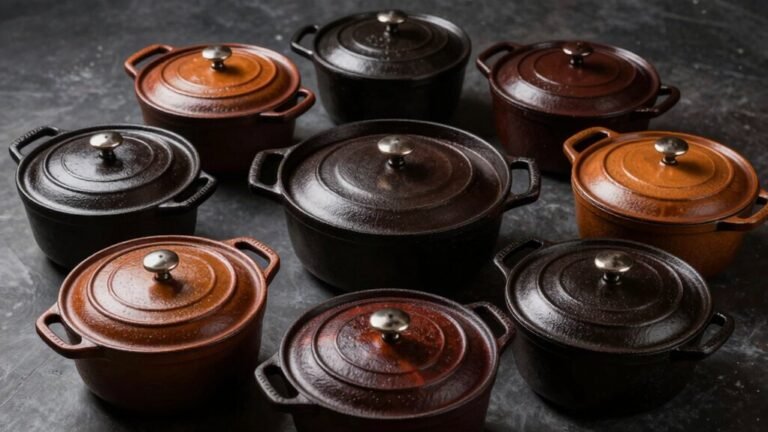
Five core advantages make a small dutch oven your best ally on busy weeknights: versatility across cooking methods, superior heat retention, practical one-pot workflow, right-sized portions, and durable construction.
You’ll sear, simmer, braise, and roast in a single vessel, eliminating multiple pans and cleanup. The tight-fitting lid traps steam, self-basting proteins and legumes while you focus on other tasks. Heavy, enameled walls distribute heat evenly, preventing scorching and reducing active cooking time. This even heat distribution makes dutch ovens particularly effective for achieving consistent results across various cooking techniques. Braising in a 350°F oven for 2 to 2.5 hours, then reducing heat to 325°F until meat becomes tender, demonstrates how Dutch ovens excel at slow-braising techniques that transform tough cuts into fall-apart texture. A dutch oven’s ability to transition seamlessly from stovetop to oven allows you to start searing on the range and finish cooking without transferring your food.
Size benefits matter on weeknights. Your 1–3 quart pot heats faster than larger Dutch ovens, delivering energy efficiency for single-pot meals. Compact dimensions fit smaller kitchens while preventing overcooking and food waste from oversized batches. Proper seasoning with high smoke point oils ensures your cast iron Dutch oven maintains optimal non-stick performance through frequent weeknight use. Recipes like Leek and Potato Soup and Basil, Broccoli, and Spinach Pesto Pasta are beginner-friendly options that demonstrate how small Dutch ovens simplify weeknight meal preparation.
Durable cast-iron construction tolerates high-frequency use, offering lasting value. With proper maintenance, your Dutch oven can last for generations with proper care, providing reliable performance for years to come. Clean your Dutch oven effortlessly by filling it with warm water, adding baking soda, and simmering for 8-10 minutes to remove stubborn food residue without damaging the surface. You’ll assemble nutritious meals from pantry staples with minimal hands-on effort—essential for time-pressed cooks managing demanding schedules.
Essential Techniques for One-Pot Success
Owning a small Dutch oven is one thing; wielding it skillfully is another. Master heat management by matching your burner size to the pot’s base and adjusting temperatures based on your cooking goal—low-to-moderate heat for braises, higher heat for initial searing followed by reduction.
Before you cook, apply solid seasoning tips: guarantee your pot’s surface is properly seasoned or enameled to prevent sticking and rust. Pre-measure and chop all ingredients (mise en place) to streamline your workflow in limited space. Sear proteins in batches to develop flavor, then deglaze with wine or stock, scraping up fond for concentrated sauce. Add dense vegetables early, tender ones late. Never fill beyond three-quarters capacity—you need headspace for bubbling. Cast iron’s even heat distribution ensures that your ingredients cook uniformly throughout the pot, reducing hot spots that can burn delicate components. For breads and other specialized recipes, you can achieve similar results using alternative methods like steam created by placing water on a lower oven rack to develop a crispy crust.
After cooking, prioritize proper maintenance by using preventative measures like parchment or aluminum foil to line the bottom of your pot, which simplifies cleanup and preserves the seasoning that keeps your Dutch oven performing at its best. Heat water in the pot and scrub food residue with a soft scrubber or sponge, avoiding soap to maintain your protective seasoning layer. Ensure to dry the oven completely and apply a thin layer of oil for long-term protection.
Stews, Braises, and Slow-Cooked Classics
When you’re ready to transform tough cuts into tender, flavorful meals, your small Dutch oven becomes indispensable. Beef stew and short ribs showcase braising techniques that develop deep, complex flavors through low-temperature cooking.
For beef stew, you’ll sear cubed meat, then build flavor by sautéing onions with tomatoes and tomato paste. Add red wine and beef stock with bay leaves, then braise at 300°F for four hours. Vegetables like carrots and potatoes can be added partway through cooking to soften and absorb the savory broth. Short ribs follow similar braising techniques: sear seasoned ribs, sauté aromatics, deglaze with wine, add mustard and stock, then braise at 275°F until meat falls from bone.
Both methods rely on patient, covered cooking at low temperatures. Your Dutch oven’s heat retention guarantees even cooking while flavors meld together seamlessly. Heavy enameled cast iron construction ensures your Dutch oven distributes heat evenly throughout the cooking process. The extensive cook time contributes significantly to the depth of flavor that transforms simple ingredients into impressive, restaurant-quality dishes. A well-seasoned roast submerged in liquid creates the savory cooking environment necessary for developing the complex flavors characteristic of braised meals. For optimal results, allow the meat to rest after cooking to retain moisture before serving. This traditional cookware remains essential because it can transition from stovetop to oven without requiring equipment changes mid-recipe.
Quick Soups, Pastas, and 30-Minute Meals
While your small Dutch oven excels at patient braises, it’s equally adept at getting dinner on the table in under 30 minutes. Quick soups rely on the sauté-then-simmer technique: aromatics cook 5–10 minutes, then liquid and solids join for a 15–20 minute finish. One-pot pastas skip separate boiling entirely—pasta cooks directly in stock and sauce in 8–12 minutes. Try dishes like Thai Pumpkin Curry Soup for a velvety, flavorful quick meal that combines aromatics with coconut milk in minimal time.
For flavor boosting in quick cooking, brown your proteins or vegetables first to develop fond, then deglaze with wine or stock. The Dutch oven’s tight-fitting lid ensures even heat distribution and moisture retention, which is especially valuable when preparing quick meals that demand consistent results. Finish with acid (lemon or vinegar) or dairy (cream or cheese) to deepen depth. Use canned beans, rotisserie chicken, or pre-cooked grains to slash simmer time from 60+ minutes to 20–30. Try hearty dishes like one-pot ground beef stroganoff that combine protein, vegetables, and noodles in a single vessel for maximum convenience. For longer-term meal prep, consider storing prepped ingredients and finished dishes using airtight seals to preserve freshness and prevent freezer burn. The Dutch oven’s versatility extends to vegetable-packed risottos and other grain-based dishes that benefit from its superior heat retention. One-pot meals significantly reduce dishwashing while delivering satisfying results. Your 3–4 quart Dutch oven serves 2–4 perfectly, scaling ingredients proportionally for consistent results.
Roasts, Casseroles, and Oven-Finished Dishes
Your small Dutch oven’s true calling emerges with low-and-slow roasts and casseroles, where tough cuts transform into fork-tender masterpieces through patient braising. Choose beef chuck, brisket, or pork shoulder—cuts rich in connective tissue that breaks down beautifully at 300–325°F over 2–3.5 hours.
For roast variations, layer aromatics beneath your meat, then arrange uniform vegetable chunks around it. Add 2–3 cups broth to reach halfway up the roast’s sides. Deglaze with wine for depth, incorporating tomato paste, Worcestershire, and fresh herbs to build complex flavor. A 6-qt Dutch oven or larger ensures even heat distribution and accommodates generous portions for family meals. Searing the roast for up to 5 minutes per side creates fond buildup that enriches your braising liquid and deepens the overall flavor profile.
Casserole tips: stagger vegetable additions—sturdy roots at start, delicate ones midway—to prevent mushiness. Rest your finished dish 10–20 minutes before serving, allowing juices to redistribute. Thicken pan juices with a cornstarch slurry for luxurious gravy. The Dutch oven’s heat retention and distribution makes it particularly effective for achieving consistent results across all your roasted and braised dishes.
Nutrition, Meal Prep, and Leftover Strategy
Because one-pot Dutch oven meals naturally combine proteins, vegetables, and liquids, you’ll find they’re perfectly suited to balanced nutrition—but intentional layering of ingredients makes the difference between a satisfying meal and one that leaves you hungry. Aim for 20–30 g protein per serving using legumes, whole grains, and modest meat portions. Target a nutrient balance near 30% protein, 30% fat, and 40% carbohydrate by calories. Include 3–6 g fiber through vegetables and legumes to support satiety and glycemic response. The enameled surface of your Dutch oven prevents metal leaching into food during these long cooking times, ensuring your nutrient-rich meals remain as safe and wholesome as possible. These healthy cooking methods support your overall wellness by retaining flavors and nutrients throughout the cooking process.
For meal prep, batch-cook base components in your Dutch oven, then portion into airtight containers for three to five days of refrigeration. Pre-chop vegetable mixes and freeze them to streamline future recipes. Cool hot food quickly before storing—within two hours—to maintain safety and quality.