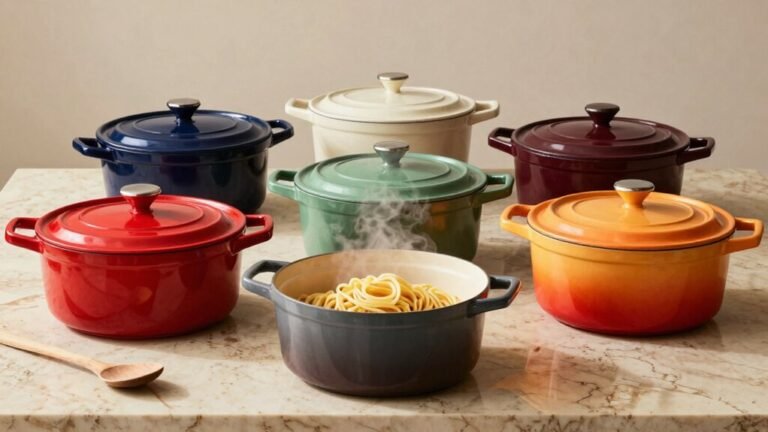
You’ll use a Dutch oven for virtually any cooking task requiring even, sustained heat. Braise tough cuts of meat, simmer stews that concentrate flavors, and sear proteins for rich pan sauces. Bake artisan bread with perfect crusts by creating a steam chamber. These versatile cast-iron vessels also handle deep frying, sautéing, and complete one-pot meals. Their heavy construction guarantees precise heat management and retention. With proper maintenance, you’ll enjoy this tool for generations, revealing countless culinary possibilities.
The Origins and Evolution of Dutch Ovens
Though cast iron cookware is now synonymous with American frontier cooking, the Dutch oven‘s story actually begins in the Netherlands during the early 17th century, where advanced metal casting techniques produced heavy cast-iron vessels with tight-fitting lids that’d become the foundation of modern cooking.
Dutch craftsmanship set the gold standard through superior dry sand mold processes, creating smoother surfaces than British competitors. Abraham Darby recognized this advantage and traveled to the Netherlands in 1704 to study these methods firsthand. He returned to England, refined the technique, and patented his improved sand casting process in 1707. Darby’s innovation made cast iron pots affordable alternatives to expensive brass and copper, enabling mass production for colonial markets. This historical significance transformed cookware accessibility worldwide and established the Dutch oven’s enduring legacy. Darby’s pots were shipped globally, reaching markets across Europe and the American colonies.
The thick-walled design of these vessels proved essential to their success, as it allowed for superior heat retention and distribution that made them indispensable in both household and commercial kitchens across generations.
Primary Cooking Applications and Techniques
Dutch ovens excel across virtually every cooking method because their design fundamentally addresses what makes food taste better: even heat distribution, moisture retention, and thermal stability. You’ll find them indispensable for long-simmered stews where thick walls concentrate flavors and tenderize ingredients through gentle, consistent heat. The enclosed environment also creates a self-contained space where flavors meld beautifully, transforming ordinary ingredients into extraordinary meals.
For sautéing methods, you can sear proteins at high temperatures, then deglaze to build rich pan sauces without switching cookware. The enameled interior lets you monitor vegetables easily while maintaining even browning. Dutch ovens are particularly effective for braising meats, a technique that combines browning and slow cooking to develop rich, complex flavors. Using a meat thermometer ensures your braised proteins reach the ideal internal temperature for both food safety and optimal tenderness.
Deep frying techniques benefit from the Dutch oven’s heat capacity, which keeps oil temperature stable—crucial for crispy, evenly-cooked results. You can also use it for bread baking, creating a humid microenvironment that produces artisan-quality crusts through steam trapping during the initial bake. When selecting a Dutch oven for bread making, consider size, material, and whether to choose enameled or bare cast iron options based on your baking needs. The lipped lids on traditional Dutch ovens can hold coals, an adaptation made by European settlers for open fire cooking. With proper seasoning and maintenance, your Dutch oven will deliver consistent, delicious results for decades across countless recipes and cooking scenarios. This versatility makes Dutch ovens your go-to vessel for nearly any cooking challenge.
Slow-Cooking and Braising Capabilities
Because they’re engineered for sustained, even heat distribution, Dutch ovens become your most reliable tool for transforming tough cuts of meat into fork-tender masterpieces. You’ll sear protein on high heat first to develop a Maillard crust, then deglaze the pot to capture fond flavor before adding your braising liquid. Maintaining a low oven temperature between 200–300°F for 2–6 hours allows collagen to convert into gelatin, creating silky texture and naturally thickened sauce.
Your braising techniques improve when you keep the lid sealed to trap steam and enable self-basting. Dense vegetables and aromatics meld during prolonged simmering, while acidic liquids like wine break down connective tissue. Adding vegetables like carrots and potatoes partway through cooking allows them to soften and absorb the savory broth without becoming overcooked. Flavor development intensifies as you layer ingredients thoughtfully and minimize lid lifting, preserving heat and moisture throughout your cook. Proper preparation and preventing freezer burn ensures your braising components maintain quality when stored ahead of time. The durable enamelled cast iron construction ensures your Dutch oven will withstand decades of high-heat braising without degradation. This exceptional heat retention capability means your Dutch oven maintains consistent temperatures essential for the slow-cooking process, allowing you to achieve restaurant-quality results at home. Quality cast iron Dutch ovens can last for generations with proper care, making them an excellent long-term investment for home cooks. Dutch ovens excel at both stovetop and oven use, making them adaptable for any stage of your braising recipe. Enameled Dutch ovens are particularly suited for braising acidic foods like wine-based sauces, as the enamel coating prevents rust and eliminates any metallic flavors that could compromise your dish.
Bread Baking and Artisan Loaves
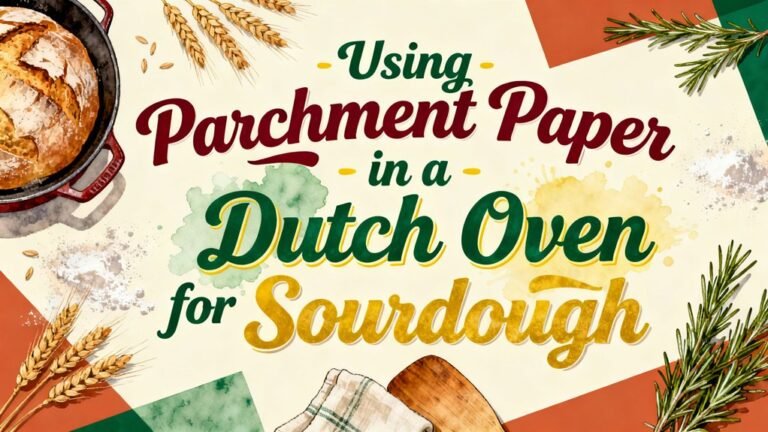
While your Dutch oven excels at low-and-slow cooking, it’s equally invaluable for baking artisan bread—transforming it into a steam chamber that produces the crackling, blistered crusts you’d find in professional bakeries. Preheat your Dutch oven to 450-500°F for 30-90 minutes before transferring your proofed dough. The trapped steam from the covered pot creates superior crust texture by enabling peak oven spring and developing that shatteringly crisp exterior with glossy bubbles you’re after. Slash your dough at a 45-degree angle, transfer it via parchment into the hot Dutch oven, then bake covered for 20-35 minutes. Reveal and bake an additional 5-15 minutes until golden. Higher dough hydration levels work beautifully here, as the enclosed environment maximizes steam retention for professional-quality results. The thick cast iron walls of your Dutch oven provide ample thermal mass for consistent temperature stability throughout the baking process. For no-knead bread recipes, the lid must remain on during the initial baking phase to trap steam and create the humid environment essential for moist, well-risen bread. This steam also promotes starch gelatinization, which contributes to a glossy, crisp crust. The long fermentation period of 12-18 hours develops complex flavors and creates the signature open crumb structure that defines artisan-quality loaves. Like cooking eggs in cast iron, proper seasoning and preparation ensure optimal baking results and prevent sticking. To troubleshoot common issues, monitor your bread for uneven browning and adjust rack positioning or oven temperature as needed. While 5-5.5 quart Dutch ovens are most commonly recommended, smaller 3-quart Dutch ovens can work successfully for bread baking with proportionally reduced dough quantities.
One-Pot Meals and Versatile Cooking
Beyond baking, your Dutch oven shines as a one-pot workhorse for complete meals that minimize cleanup while maximizing flavor. You’ll realize that one pot recipes transform simple ingredients into restaurant-quality dishes through slow cooking and even heat distribution.
Consider your meal prep options: Dutch oven chicken orzo simmers with fresh broth and herbs, while cowboy stew combines ground beef, bacon, kielbasa, potatoes, corn, and beans in smoky broth. Port braised short ribs develop deep flavors in wine sauce with mushrooms and pearl onions. Chicken fajita pasta delivers sizzling flavors in one vessel, and creamy seafood chowder combines scallops, shrimp, and clams in butter sauce. The tight-fitting lid traps steam to enhance the depth of flavor in every dish. These recipes are ideal for serving 6-8 people with satisfying leftovers for the next day.
These versatile recipes accommodate various dietary preferences, from hearty beef pot roasts to meatless sweet potato chili, and the even heat distribution ensures consistent cooking results throughout your Dutch oven, making it essential for efficient, flavorful cooking.
Health Benefits of Dutch Oven Cooking
Your Dutch oven doesn’t just create delicious meals—it actively supports your health through superior cooking methods. The pure clay construction preserves complex carbohydrates and flavonoids using gentle far infrared heat, while the heavy lid condenses steam and returns water-soluble nutrients to your food. You’ll retain more vitamins and minerals compared to metal or ceramic cookware, which use harsh heating methods that destroy delicate nutrients.
Additionally, cooking in cast iron Dutch ovens leaches beneficial iron into your meals, supporting oxygen transport and immune function—especially valuable if you’re pregnant or managing iron deficiency anemia. The nutrient preservation combined with flavor enhancement creates an ideal cooking environment where your food becomes both healthier and tastier, allowing you to maintain consistent nutritional intake without sacrificing the rich, complex flavors you enjoy. Dutch ovens provide unmatched heat retention and distribution, ensuring even cooking without hot spots that can damage heat-sensitive nutrients. When maintaining optimal oil temperatures during cooking, you prevent nutrient degradation that occurs at inconsistent heat levels. For precise temperature monitoring while cooking, oven-safe meat thermometers can help you maintain the exact heat levels needed to preserve nutrients effectively. The seamless transition from stovetop to oven cooking allows you to start dishes with direct heat and finish them with gentle, even cooking that maximizes nutrient retention. Unlike conventional cookware, pure clay Dutch ovens are 100% non-toxic and free from metal contamination, ensuring your meals remain safe and pure throughout the cooking process.
Heat Distribution and Temperature Control
The heavy construction that preserves your food’s nutrients also makes Dutch ovens exceptional tools for managing heat with precision and consistency. You’ll benefit from superior heat retention, which lets you lower burner settings and avoid temperature spikes when searing or braising. The thick, multilayered bases distribute heat evenly across the cooking surface, minimizing hot spots that compromise your results. Domed lids and tight seals promote steam circulation, equalizing temperature and moisture throughout the pot.
For stovetop cooking, start on low-to-medium heat and adjust burner power gradually rather than using high heat. In the oven, set your target temperature and rely on the Dutch oven’s stable heat for consistent internal cooking conditions. When cooking outdoors with coals, the ring method simplifies temperature management by allowing you to replace coals as they burn down to maintain your desired cooking temperature. Modern electric Dutch ovens feature digital precision controls that eliminate guesswork and ensure perfect temperature consistency across all cooking modes. To avoid damaging enamel coatings, preheat gradually before reaching your target temperature. Additionally, avoid thermal shock by placing the Dutch oven in the oven as it preheats rather than inserting a cold pot into a preheated oven. Properly managed heat distribution is essential for achieving results like the golden-brown sear that comes from consistent temperature control throughout the cooking process. Like cast iron cookware, Dutch ovens benefit from seasoning and protective coatings that enhance their heat retention and longevity. The Dutch oven’s ability to sear meat effectively before adding other ingredients helps layer flavors and develop deeper, more complex tastes in your finished dishes. This even distribution and temperature management deliver reliable cooking precision across braising, roasting, and baking applications.
Care and Maintenance Guidelines
Because Dutch ovens demand proper upkeep to maintain their heat-distribution capabilities and longevity, you’ll want to establish consistent cleaning and maintenance routines. For effective cleaning methods, rinse hot surfaces with water and gently scrub with a soft sponge. Use dishwashing liquid and microfiber cloth on enameled surfaces, avoiding steel wool that damages the finish. For stubborn baked-on food, boil water with baking soda, then scrape carefully. Always hand dry immediately with a microfiber cloth to prevent rust and water spots. To further protect your cast iron surfaces, heat the skillet on the stove after drying to evaporate remaining moisture and prevent rust formation. If rust does appear on your Dutch oven, you can remove it with steel wool or sandpaper, followed by washing, drying, and reseasoning the pot. Regarding storage practices, place a paper towel inside to absorb residual moisture, then apply a thin oil layer to cast iron surfaces. Seasoning the cast iron periodically enhances its non-stick properties and prevents rust development over time. For persistent stains that don’t respond to routine cleaning, consider using bleach solution soaking or boiling with baking soda to restore your Dutch oven’s appearance. For optimal seasoning results, consider using high smoke-point oils such as vegetable or avocado oil to build up the protective coating. Store your Dutch oven in dry areas, maintaining these habits to guarantee years of reliable performance.