You’ll combine two cups flour, 2.25 teaspoons instant yeast, 1.5 teaspoons salt, and 3/4 cup cool water into a shaggy dough. Bulk ferment for one to two hours, then cold retard for enhanced flavor development. Shape your boule or batard, then transfer it into your preheated 2-quart Dutch oven at 500°F. Bake covered for twenty minutes to trap steam, then uncovered until your internal temperature reaches 195–200°F. The techniques you’ll reveal transform this foundational method into masterful crust development.
Ingredients You’ll Need
Before you’ll want to gather your dry and wet components for this Dutch oven bread. You’ll need 2 cups unbleached all-purpose flour as your primary structural ingredient. For yeast options, instant dry yeast works best—use 2.25 teaspoons per batch. Select your salt varieties carefully; 1.5 teaspoons of fine grain salt or 2 teaspoons of sea salt will suffice. Water temperature matters greatly; incorporate 3/4 cup plus 2 tablespoons of cool water for ideal fermentation.
Consider adding optional ingredients to enhance your loaf. A half-teaspoon of apple cider vinegar introduces subtle tang, while 2 teaspoons of maple syrup or agave provides gentle sweetness. One teaspoon of olive oil contributes moisture and richness. For pan preparation, cornmeal serves dual purposes: preventing sticking and adding textural crunch to your crust, similar to how ridge design creates texture in other cookware. If you prefer a denser loaf with added nutrition, whole wheat flour can replace half of your all-purpose flour without compromising the recipe’s success. Creating a hot and humid environment during baking will help you achieve excellent oven spring and crust quality even without a Dutch oven. To maintain your Dutch oven’s longevity, consider seasoning the cast iron multiple times after each use to prevent rust and preserve its nonstick properties. A heavy-bottomed pot with a lid will distribute temperature evenly throughout the baking process, ensuring consistent results. This no-knead bread offers artisan bread quality with minimal effort required.
Essential Equipment
To bake Dutch oven bread successfully, you’ll need several specialized tools that assure precision and consistent results.
A digital scale assures accurate ingredient weighing—essential for consistency. You’ll pair it with a clear bowl for precise readings. A bench scraper, preferably the sharp metal version, cuts and lifts dough cleanly while removing surface residue.
For proofing, use a clear, straight-sided 4-quart Cambro container to track your dough’s 50% volume rise accurately. Your mixing bowl should hold at least 5 liters capacity in non-reactive materials like stainless steel or enamel. Investing in a powerful stand mixer with a dough hook enhances your dough preparation process significantly.
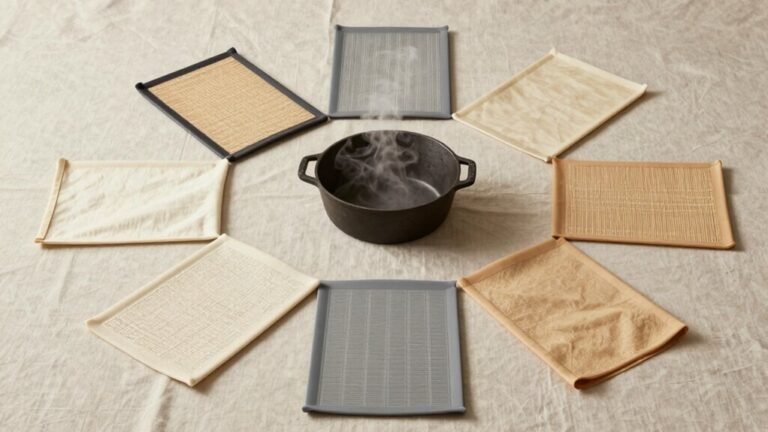
Before baking, employ a bread lame or sharp knife for scoring. This maximizes oven spring and creates professional results. Non-stick flour-sack towels prevent sticking for high-hydration dough and facilitate easy release during transfer. Your 2-quart Dutch oven—at least 23cm wide—retains heat effectively, mitigating temperature drops when opening the door. The Dutch oven’s heavy lid traps steam during baking, creating the perfect environment for developing a golden, crackling crust while keeping the interior soft and airy. A Dutch oven’s exceptional heat retention and distribution properties ensure even baking throughout your loaf. The tight-fitting lid and heavy construction allow your Dutch oven to withstand high temperatures necessary for optimal bread baking results. Proper Dutch oven preheating for 30 minutes to 1 hour at 450°F to 500°F ensures the vessel reaches thermal equilibrium for optimal steam generation and crust development.
Preparing Your Dough
Since precision determines your bread’s success, you’ll start by warming your water to 100–110°F (38–43°C), which activates the yeast without compromising its viability. Combine 2.25 teaspoons of instant yeast with your filtered water and let it rest for 5 minutes until foamy, indicating proper yeast activation.
Meanwhile, whisk together 3.25 cups all-purpose flour, 1.5–2 teaspoons non-iodized salt, and your bloomed yeast mixture in a large bowl. Create a well in the center for your wet ingredients. Pour the warm water into this well and stir for approximately 1 minute until a shaggy dough forms. Your hydration levels should produce a sticky, loose consistency that pulls slightly from the bowl’s sides. Mix until a sticky ball forms without kneading. The resulting dough can be conveniently stored in the refrigerator for up to 2 weeks if you prefer to bake on a different day, offering flexibility in your baking schedule. For longer storage beyond two weeks, consider using temperature resistance bags designed for freezer preservation to maintain dough quality. Proper dough preparation creates the foundation for developing a crispy crust when baked in your dutch oven. A 2-quart Dutch oven’s smaller capacity requires careful dough management to ensure proper steam retention during the initial covered baking phase. Bread flour can offer better rise compared to all-purpose flour if you want to enhance your loaf’s volume and texture.
Understanding the Rise Time
Your dough’s success now depends on managing fermentation through proper rise timing and temperature control. You’ll navigate two primary fermentation stages: bulk fermentation and final proofing. Room-temperature bulk fermentation typically requires 1–2 hours until your dough doubles, though dough temperature and baking environment notably influence timing. Monitor visual cues—surface bubbles and expansion—rather than relying solely on clocks. Your finger dent test confirms readiness: the indent should spring back partially. Cold retarding extends flavor development over 12–72 hours, reducing yeast activity while building complexity. A preheated Dutch oven enhances steam production and even heat distribution, which supports optimal fermentation outcomes during the final baking stage. The sealed pot environment traps moisture that prevents early crust formation and allows your dough to achieve maximum oven spring. Unlike traditional pasta pots, Dutch ovens maintain consistent heat throughout the baking process due to their heavy construction. The heavy lid and excellent heat retention create a mini steam oven environment that produces the crispy, golden crust characteristic of artisan bread. Selecting a Dutch oven with adequate container depth for water circulation ensures consistent heat distribution throughout the baking process. Before baking, score the dough on the surface to control where the bread expands and develops its final shape. Always handle your extremely hot Dutch oven with appropriate safety precautions to prevent burns during the baking process. Watch for overproofing signs: excessive slackness or collapse indicate weakened gluten structure. Proper proofing techniques balance crumb texture and acidity. Shape your loaf when it shows adequate gas distribution, then proceed to your preheated Dutch oven.
Shaping Your Loaf
Shaping transforms your proofed dough into a structured loaf ready for the Dutch oven’s intense heat. Begin with a gentle pre-shape, then allow a 20–30 minute bench rest to relax gluten and ease final shaping.
For boule shaping, tuck edges into center, then cup and drag the dough toward yourself to create a taut round surface. For batard shaping, flatten a rectangle, fold long edges toward center, and roll tightly toward one end.
Regardless of technique, use repeated gentle pulls and rotations to tighten the skin. Monitor your dough hydration closely—adjust flour sparingly to prevent dried crusts. The Dutch oven creates a steamy environment that produces the characteristic crusty exterior while keeping the interior tender and moist. Stretch dough into a taut ball while minimizing handling to maintain proper texture. Position your final seam either down or up depending on your transfer method. Proper shaping creates even holes in the crumb and improves visual results significantly. Size your loaf to occupy most of the Dutch oven base while allowing clearance for rise and scoring expansion. Like the cast iron skillet used for one-pan meals, your Dutch oven requires proper maintenance to ensure consistent baking results. After use, maintain your Dutch oven by proper cleaning and seasoning to ensure its longevity and reliable performance for years of baking. The tight-fitting lid on quality Dutch ovens traps steam effectively during the baking process. This method works equally well for sweet treats like donuts] or savory breads, showcasing the Dutch oven’s versatility beyond traditional loaves.
Prepping the Dutch Oven
Once you’ve shaped your loaf, you’ll need to prepare your Dutch oven to capture steam and develop a crisp, caramelized crust. Your Dutch oven selection should prioritize a 2-quart capacity with a tight-fitting, heavy lid for maximum steam retention. Position your pot on the middle oven rack and begin preheat timing approximately 30–45 minutes before baking at 450°F (230°C). This duration guarantees full thermal saturation, particularly for cast-iron construction. Coordinate your dough’s final proof to coincide with the pot reaching target temperature. Once preheated, immediately coat the interior with high smoke-point oil or nonstick spray, then line the base with parchment paper trimmed to pot size. For cast iron Dutch ovens, applying oil while the surface is warm helps maintain the seasoned finish and rust-resistant layer essential for long-term cookware performance. To further protect your cast iron investment, remember to immediately dry the pot after use by heating it on the stovetop to evaporate any moisture. This dual approach prevents sticking and facilitates loaf removal post-bake. The trapped steam in the Dutch oven during the initial baking phase helps the dough rise and develop a crispy, golden crust that characterizes authentic artisan bread. For additional organization and protection of your kitchen equipment, consider storing your Dutch oven with durable seals to maintain its condition between uses. Choosing an oven-safe temperature rating that exceeds your baking requirements ensures safe and reliable performance throughout the baking process. While preheating the Dutch oven is not mandatory, it aids in achieving a taller rise and better oven spring for your finished loaf.
Baking Your Bread
Preheat your oven to 500°F (240°C) with the Dutch oven positioned on the middle rack for a minimum of 45 minutes—this extended timing guarantees complete thermal saturation necessary for perfect steam generation and crust development. Once your dough’s scored surface reaches optimal proofing, transfer it via parchment paper into the preheated vessel. Immediately reduce temperature to 475°F and cover the Dutch oven for precisely 20 minutes, trapping steam that facilitates controlled oven spring and crust formation. Remove the lid and continue baking techniques until your loaf’s internal core temperature reaches 91–93°C (195–200°F). Monitor crust coloration and crumb structure set throughout this phase. Temperature control during these stages activates Maillard reactions, developing complex flavors and golden-brown pigmentation. Keep salt separate from yeast during the initial mixing phase to prevent yeast inactivation and ensure consistent fermentation results. Allow the loaf to cool on a rack for 1-2 hours, ensuring proper texture and flavor development as residual steam escapes and crumb structure fully solidifies.
Achieving the Perfect Crust
Because a crispy, well-developed crust depends on precise steam management and temperature control, you’ll need to master several interconnected techniques throughout the bake.
Preheat your Dutch oven to 450–475°F for 30–45 minutes to establish thermal stability. Score your dough with shallow to moderate depth slashes using a sharp lame, directing expansion and creating signature ears. Dust the pot interior with semolina or cornmeal to reduce sticking and enhance crust texture. For those seeking simpler alternatives, no-knead bread can be baked in standard loaf pans or baking dishes without specialized equipment. Since a 2-quart Dutch oven is notably smaller than the standard 5-7 quart sizes, scale your dough accordingly to ensure proper fit and optimal results.
During the initial 20–30 minutes, keep the lid sealed to trap steam against your dough’s surface, gelatinizing starches and promoting blister formation. The thick walls of your Dutch oven will distribute heat evenly, supporting the stable baking temperature needed for robust flavor development. The cast iron construction provides excellent heat retention, crucial for maintaining consistent temperatures throughout the bake. Remove the lid afterward to allow crust drying and browning. For ovens running hot, lower the temperature slightly post-lid removal to prevent bottom darkening while maintaining surface caramelization. The Dutch oven’s trapped condensation creates the moisture necessary for achieving a chewier, firmer bread crust. Gradually cooling your finished loaf prevents thermal shock that could cause cracking, similar to how annealing relieves internal stresses in materials subjected to intense heat. The dough can be refrigerated for up to 1 week, with flavor improving over time before baking. This staged approach yields ideal crust development.