You’ll achieve edge-to-edge doneness in steaks by setting your bath to 129–134°F for medium-rare, then searing for a Maillard crust. You can transform poultry to juicy perfection at 145–149°F, tenderize tough cuts through extended low-temperature protocols, and cook delicate proteins like fish within precise thermal windows of 105–130°F. Vacuum sealing maximizes heat transfer and flavor concentration across all proteins. Understanding the specific temperature ranges and timing for each category reveals restaurant-quality results consistently.
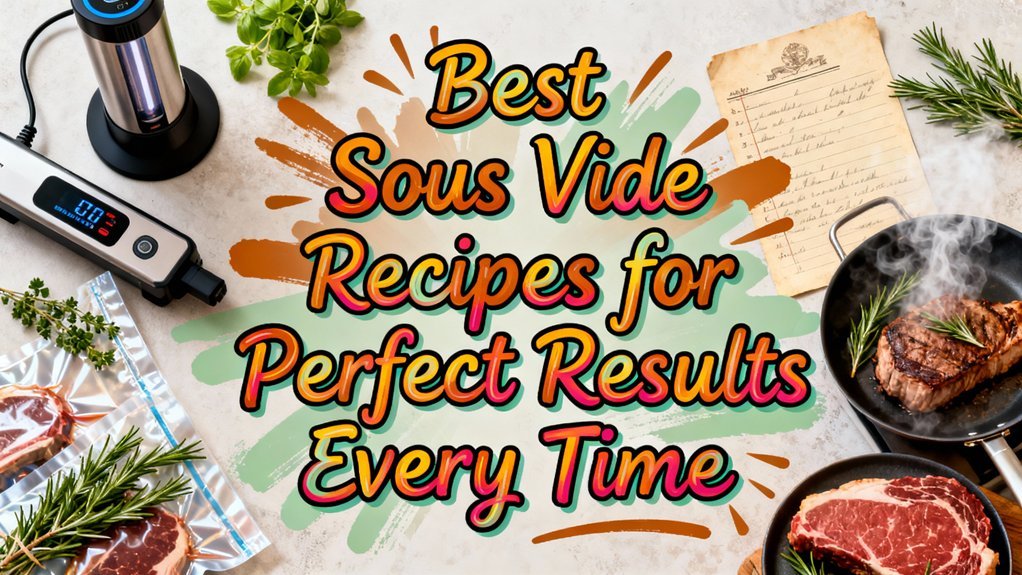
Classic Steaks With Edge-To-Edge Doneness
Because sous vide brings food to and holds it at an exact temperature rather than creating a thermal gradient from center to edge, you’ll achieve uniform doneness throughout by setting your bath to your target internal temperature. For medium-rare, aim for 129–134°F (54–57°C); for medium, target 135–144°F (57–62°C). Your steak temperature determines doneness preferences and final texture—even slight variations between 55°C and 60°C noticeably alter redness and myoglobin breakdown.
For 1–2 inch steaks, hold them for 45 minutes to 4 hours. Thinner cuts require less time; thicker cuts need longer thermal equilibration. Consult trusted manufacturer charts like Anova’s rather than ad-hoc numbers. This longer window between perfect doneness and overcooking significantly reduces the risk of ruining your steak compared to traditional cooking methods. The Anova Precision Oven can replicate these precise temperatures using a food probe for optimized cooking to ensure consistent results. After sous-vide cooking, quickly sear your steak on cast-iron or with a torch for 30–90 seconds per side to develop Maillard crust while minimizing interior temperature rise.
Tender Poultry: From Juicy Breasts to Crispy Skin
While sous vide‘s precision transforms steaks into uniformly doneness, poultry presents a distinct challenge: you’ll need to balance food safety through pasteurization with texture preservation, then finish the skin to crispness. For white meat, target 145–149°F (62–65°C) for 45–120 minutes to achieve tender, juicy breasts—a proven compromise between safety and mouthfeel. Dark meat tolerates higher temperatures or extended hold times for collagen conversion. Your sous vide techniques must reference pasteurization tables to guarantee pathogen reduction at your chosen temperature-time combination. After cooking, pat the poultry completely dry, then sear skin-side down in a preheated cast-iron skillet with neutral oil, or finish under a hot broiler. For optimal results, use fresh rosemary and lemon to enhance flavor during the water bath cooking process. Allow chicken to rest post-cooking for juice redistribution before serving to maximize tenderness. When preparing poultry in advance, vacuum sealing your cooked chicken can extend its refrigerator shelf life to 3 to 4 days. Verify doneness by checking the internal temperature at the thickest part of the meat to ensure food safety. A cast iron skillet’s superior heat retention and even heat distribution make it ideal for achieving a golden brown, crispy exterior on your finished poultry. When searing, manage oil splatter by maintaining a lid nearby and working carefully with hot oil in an open pan. This two-stage approach yields crispy skin without compromising the tender interior you’ve carefully engineered.
Pork Perfection: Low-and-Slow to Quick and Tender
Unlike poultry’s inherent food-safety constraints, pork offers you remarkable flexibility: you can engineer everything from a juicy, medium-rare chop at 135°F to pull-apart, collagen-dissolved shreds at 165°F simply by adjusting temperature and hold time. Sous vide techniques enable precise pasteurization through time–temperature interplay; lower temperatures (135–140°F) require extended holds of 1–4 hours for even heat penetration, while higher temperatures accelerate doneness but alter texture. For tenderloin and chops, target 135–140°F for medium-rare results; roasts benefit from 130–140°F over 3–5 hours. Flavor infusion intensifies within sealed bags—minimize seasoning to salt and pepper, then layer delicate aromatics like thyme and rosemary. Like the slow braising method used in red wine braising, sous vide cooking in sealed bags concentrates flavors through extended moist heat exposure, creating deeply developed taste profiles. When you vacuum seal your pork, you maximize heat transfer and flavor concentration throughout your protein, ensuring that every bite delivers consistent tenderness and taste. Pork tenderloin, being a long, narrow cut, cooks more evenly than larger roasts and reaches optimal tenderness within the lower end of recommended hold times. Selecting the appropriate container depth ensures proper water circulation around your vacuum-sealed pork for uniform temperature distribution throughout the cooking process. Like a dutch oven’s tight-fitting lid, the sealed bag environment creates optimal heat distribution and moisture retention for perfectly cooked results. Just as seasoning cast iron with fat through repeated heat cycles builds protective layers, maintaining your sous vide equipment and cookware in optimal condition requires periodic cleaning to remove mineral buildup and seasonings residue that may accumulate during repeated cooking cycles.
Tough Cuts Transformed: Fork-Tender Braises and Roasts
Tough cuts like brisket, short ribs, and chuck roast contain abundant collagen and connective tissue that, when properly denatured, dissolve into gelatin and render fat, yielding the tender, succulent results you’d expect from classical braising—yet sous vide grants you unprecedented control over this transformation. A sous vide brisket at 70–80°C (158–176°F) for 12–36 hours produces fall-apart texture, while melt in mouth ribs achieve similar results in comparable timeframes. Chuck roast at 68–75°C for shorter durations yields shreddable braise consistency. Lower-temperature protocols (55–62°C for 24–72 hours) activate endogenous proteases before collagen conversion, minimizing moisture loss while maximizing tenderness. The thermocirculator’s precise temperature control ensures consistent results throughout the extended cooking process. For optimal results, vacuum seal your prepared cuts to remove air before submerging, as seal strength and moisture handling directly impact how effectively your sous vide bags maintain integrity during extended cooking times. While alternative methods like water displacement techniques can work for occasional cooking, vacuum sealing provides more reliable results for extended sous vide preparations. This extended cooking time at optimal temperatures is essential for complete collagen breakdown. Post-cook, sear surfaces for Maillard complexity, then reduce sous-vide juices into concentrated sauce to finish your braise.
Delicate Proteins: Fish, Shellfish, and Eggs
Collagen-rich cuts demand extended moist heat and low temperatures to transform connective tissue into gelatin, but fish, shellfish, and eggs operate under fundamentally different principles—their proteins denature rapidly at modest temperatures, and their delicate structures collapse if you don’t respect narrow thermal windows. Sous vide fish thrives between 105–130°F, with thin fillets requiring just 20–30 minutes to achieve sashimi-like or flaky textures. Shellfish techniques demand slightly higher temperatures—120–135°F for shrimp and scallops—with comparable short holds. Including butter in your bags enhances the overall richness and moisture of these delicate proteins during cooking. Egg precision proves most demanding: 63–65°C produces distinct custard or saucy yolks within 45–60 minutes. You’ll achieve tender textures by vacuum-sealing proteins with minimal aromatics and fat, then finishing with brief high-heat sears to develop Maillard complexity without degrading interiors. For seafood, minimal seasoning like olive oil, salt, and pepper allows the natural flavors to shine through the precise thermal control of sous-vide preparation. Proper probe calibration ensures your thermometer remains accurate throughout the cooking process, maintaining the precise temperatures these delicate proteins require. Investing in reliable sous vide racks keeps your delicate proteins fully submerged and prevents floating bags that can cause uneven cooking. Cast iron cookware like a Dutch oven can also be used for finishing delicate proteins with high-heat searing after sous-vide cooking. To verify that delicate proteins have reached proper doneness, use a meat thermometer inserted into the thickest part of the protein to ensure accurate internal temperature readings. After cooking, pat delicate proteins dry and finish with a high-heat sear in a cast iron skillet for brief intervals to develop a flavorful crust while maintaining the tender interior you’ve carefully cultivated through precise temperature control.