You can transform your rice cooker into an affordable sous vide machine by adding a PID controller, thermometer, and circulation pump. Start by vacuum-sealing your food using the water-displacement method if you don’t have a sealer. Set your target temperature based on what you’re cooking—chicken breasts need 60–64°C for 45–90 minutes, while vegetables require 80–85°C. Maintain precise heat control and guarantee even water circulation to prevent hot spots. The specifics of perfecting your technique await.
Why Choose a Rice Cooker for Sous Vide?
While dedicated sous-vide circulators can cost $80–$400, you’ll find quality rice cookers for $30–$150, making them an accessible entry point for the cooking technique. This cost savings represents a significant advantage if you’re hesitant about investing in specialized equipment.
Beyond affordability, you’re choosing a multifunctional appliance that doesn’t sacrifice its primary purpose. Your rice cooker remains functional for cooking rice and steaming after sous-vide use, eliminating single-purpose clutter from your kitchen. Like cast iron cookware, rice cookers develop improved performance through regular use and proper maintenance, including occasional seasoning to maintain optimal non-stick properties. Just as cast iron skillets benefit from proper care to achieve golden brown crusts, rice cookers require consistent upkeep to maintain their cooking reliability.
You’ll also benefit from widespread availability—rice cookers stock supermarket shelves and online marketplaces everywhere. Setup requires minimal additional purchases: vacuum bags, jars, and a thermometer. For optimal results with vacuum bags, consider using embossed vacuum bags which are specifically designed to work effectively with sous-vide cooking methods. Proper preparation techniques, such as removing loosened buildup from your equipment before use, ensure optimal performance during cooking. This low barrier to entry makes rice cooker sous vide ideal for occasional cooks or budget-conscious home chefs testing the method before committing to premium equipment.
Like cast iron cookware, rice cookers offer superior heat retention that allows for consistent temperature control throughout the cooking process, making them reliable vessels for precise sous-vide preparation.
Essential Equipment and Modifications
Now that you’ve decided to use a rice cooker for sous vide, you’ll need to evaluate your specific model and make strategic modifications to achieve reliable temperature control and even cooking.
Start with essential accessories: a PID controller or smart plug with a temperature probe to regulate heat precisely. You’ll want a waterproof thermometer positioned mid-bath, away from heating elements and walls, to monitor accurate water temperature. Accurate thermometers are vital since slight temperature variances can significantly change food texture and cooking outcomes.
For rice cooker modifications, install a steamer insert or mesh rack to prevent food pouches from touching the heating element directly. Add a submersible circulation pump (200–400 L/h) to eliminate temperature gradients and guarantee uniform cooking. The Arduino Nano microcontroller can be integrated with your temperature sensor to automate precise temperature adjustments throughout the cooking process. Just as proper maintenance is essential for cast iron skillets to preserve their seasoning and ensure long-lasting performance, consistent care of your rice cooker setup will maintain reliable sous vide results over time. A tight-fitting lid is similarly important for maintaining stable bath conditions and preventing heat loss during the cooking process. This approach mirrors the straightforward methodology used in simple cast iron desserts, where proper equipment setup ensures consistently excellent results.
Finally, insulate your lid with a towel or foam cover to reduce evaporation, minimizing frequent water top-ups and maintaining stable bath conditions throughout your cook. For long-term storage of ingredients, consider that vacuum sealing provides superior protection compared to traditional methods, ensuring your sous vide components and ingredients maintain optimal quality. Consider using reusable silicone bags instead of disposable plastic pouches to reduce waste while maintaining food safety and cooking performance.
Understanding Temperature Control and Setpoints
Temperature control makes or breaks sous vide success in a rice cooker. You’ll need to choose between simple on/off cycling and PID control. On/off thermostats create wider temperature swings and longer equilibration times, while PID controllers minimize oscillation to ±0.1°C for better repeatability.
Your setpoint depends on your target: rare proteins need 52–55°C, medium require 57–60°C, and vegetables demand 80–85°C for collagen breakdown. Before committing to cook times, measure your actual bath temperature at the pouch level—don’t assume the labeled setting matches reality. Many rice cookers feature a Keep Warm setting around 65°C that can serve as an alternative for sous vide cooking without specialized temperature control equipment. The SVM temperature controller simplifies this process by maintaining temperature manually throughout your cooking cycle. For food preservation beyond cooking, consider using a vacuum sealer to prepare your ingredients before the sous vide process begins.
Prioritize temperature calibration using a calibrated thermometer, which should have a matte surface for accurate readings rather than a reflective one. Proper heat retention and distribution during sous vide cooking allows your rice cooker to maintain stable temperatures similar to authentic grill marks achieved through precise thermal management. If using a PID controller, invest time in PID tuning to match your cooker’s thermal characteristics. Account for thermal inertia and overshoot when selecting your effective setpoint.
Vacuum Sealing and Air-Removal Techniques
Because your rice cooker’s sealed environment depends entirely on how you trap food and remove air, mastering vacuum sealing and air-removal techniques directly determines whether your sous vide cook succeeds or fails.
You’ll find several sealer types suited to home cooking. Chamber vacuum sealers handle liquid-rich foods without pulling marinades into the pump—ideal for rice dishes. External sealers cost less but risk sucking liquids into the mechanism; pre-freeze contents or use liquid traps to prevent damage.
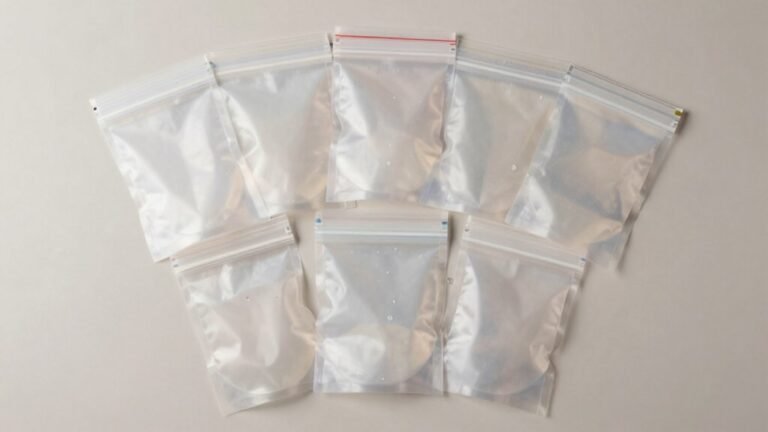
If you lack a sealer, water-displacement methods work effectively. Submerge your zip-top bag slowly in water so hydrostatic pressure expels air, then seal above the surface. The straw-suck method offers a cordless alternative, though it carries contamination risk. For those seeking an inexpensive and accessible option, the water displacement method uses only a zipper-lock bag and water to remove air without specialized equipment. For optimal results with sous vide cooking, ensure the ziplock bag is fully submerged during the entire cooking process. Using a 1:1 rice-to-liquid ratio ensures consistent texture regardless of your sealing method. Proper vacuum sealing prevents freezer burn and oxidation that can compromise meat quality during extended storage. When selecting reusable bags for extended use, consider food-grade silicone materials that withstand repeated sous vide temperatures without degradation.
Always verify seals visually before cooking to confirm reliability.
Achieving Thermal Uniformity in Your Bath
Consistency—not just in sealing, but in heat distribution—separates successful sous vide from disappointing results. Your rice cooker’s bottom heating element creates upward convection currents, but without active circulation, you’ll encounter temperature gradients reaching 10°C between top and bottom during heat-up.
Maximize thermal inertia by using a larger water volume—it dampens temperature swings and reaches uniformity more reliably. Choose wide, shallow bath geometry over tall, narrow containers; wider designs promote lateral mixing and faster convection. Minimize free air gaps around bags to reduce eddies. Insulate your lid and sides to stabilize temperature and reduce evaporation during long cooks, much like how cast iron cookware retains and distributes heat evenly for reliable cooking results. Just as parchment paper liners protect cooking surfaces while maintaining consistent heat distribution, proper insulation of your sous vide bath prevents hot spots and temperature fluctuations. A PID controller can provide precise temperature regulation beyond what a standard rice cooker offers alone. Unlike traditional crock pots and rice cookers, a thermal circulator maintains water temperature within precise tolerances while actively circulating water to ensure maximum consistency throughout your cooking vessel. Dedicated sous vide equipment offers temperature precision that surpasses makeshift solutions, delivering the restaurant-quality results that home cooks seek. Proper freezer storage methods can also extend the shelf life of your sous vide preparations when meal prepping in advance. Heat diffusers work on similar principles by distributing heat more evenly across cookware surfaces to prevent hot spots and ensure uniform cooking.
For best results, periodically stir during short cooks or add a small aquarium pump to narrow temperature differentials to 0.1–0.5°C.
Time Guidelines for Common Dishes
Once you’ve dialed in your thermal uniformity, timing becomes your next critical variable—and it’s where precision pays off. For sous vide chicken, boneless breasts need 60–64°C for 45–90 minutes, while thighs require 65–70°C for 60–120 minutes. Thickness matters: add 30–60 minutes per additional inch for even heating.
Rice cooker grains demand different approaches. White rice cooks at 93°C for 25–33 minutes using a 1:2 rice-to-water ratio. Brown rice needs 1–2 hours at 90–96°C due to its tougher bran layer. Quinoa finishes faster at 20–40 minutes around 88–95°C. The sealed environment of sous vide cooking prevents water evaporation, allowing you to use consistent water-to-rice ratios without adjusting for loss. For optimal results, consider using flavorful stocks instead of plain water to enhance the taste of your grains during the cooking process. While a vacuum sealer] isn’t required for sous vide grains, the water displacement technique with ziplock bags can help maintain consistent moisture levels for better results.
Scale your timing carefully when cooking larger batches—thermal lag increases actual cooking time. Always verify internal temperatures meet food safety standards, especially for extended low-temperature cooks.
Step-by-Step Cooking Procedures
Your rice cooker’s transformation into a sous vide bath starts with smart equipment setup—you’ll need to create an environment where heat distributes evenly and temperature stays rock-solid. Place a silicone steamer insert between the heating element and your bags to prevent hot spots. Install an external thermostat or PID controller to maintain precise temperature control, since rice cookers naturally cycle. Unlike traditional cookware materials such as cast iron, rice cookers require external temperature regulation to achieve the accuracy necessary for sous vide cooking. To further enhance water circulation and temperature stability, consider attaching an aquarium pump with a bubble stone to your rice cooker to mimic commercial sous vide circulators. External temperature regulation is particularly important because inadequate measurement methods can result in readings that are significantly lower than actual temperatures, similar to how surface temperature measurements may not reflect internal conditions.
For food preparation, vacuum seal your items using heavy-duty sous-vide bags when possible. If you lack a vacuum sealer, use the water-displacement method: partially seal your bag, lower it into water to expel air, then complete the seal. Allow your sealed proteins to rest at room temperature before cooking to ensure even heat distribution throughout the meat. Proper vacuum sealing maintains texture and flavor while preventing off-flavors from developing during extended cooking.
Load bags in single layers to maximize water circulation. Once your bath reaches target temperature and stabilizes, submerge sealed bags and begin timing. For optimal results with koji fermentation applications, maintain your incubation temperature between 28-32°C to ensure proper enzyme activity and fungal development. Monitor temperature periodically throughout cooking to guarantee consistency and adjust settings if necessary. After cooking completes, finish your food by searing to develop flavor and texture as a final step.
Safety Considerations and Limitations
While setting up your rice cooker as a sous vide bath requires careful attention to equipment and procedure, you’ll also need to understand the safety hazards and operational limitations that come with repurposing this appliance for precision cooking. Your hazard awareness should include electrical risks from steam and water exposure, temperature control inconsistencies that may leave food in the bacterial danger zone (5°C–52°C), and uneven heat distribution across your cooker’s base. Ensure your rice cooker is protected by an RCD in the fuse box to minimize electrical hazards during prolonged water exposure. Conduct a thorough risk assessment before cooking: verify your appliance maintains accurate temperatures, use calibrated thermometers to validate water and food core temperatures, and guarantee rapid cooling post-cooking. Unlike precision cooking vessels designed with active circulation to distribute heat evenly throughout the water bath, rice cookers create uneven temperature zones that compound food safety risks. Allow the rice cooker to stabilize for several minutes after filling to ensure even temperature distribution before introducing food. Food that remains in the danger zone for extended periods risks pathogenic bacterial growth that cannot be reversed through reheating. Consider lining your rice cooker with cornmeal or semolina on the bottom to improve heat contact and distribution, similar to techniques used in other cooking vessels. Use calibrated thermometers to verify temperatures rather than relying solely on the rice cooker’s internal controls, as measurement accuracy is critical to food safety. Dutch ovens rely on thick cast iron and tight-fitting lids to achieve superior heat distribution and moisture retention. Rice cookers lack precision thermostats and active circulation required for safe sous vide pasteurization, making this method unsuitable for high-risk foods.
Tips for Success and Troubleshooting
Mastering sous vide with a rice cooker comes down to careful equipment setup, precise temperature management, and knowing how to troubleshoot when things don’t go as planned. Start by verifying your cooker’s equilibrium temperature on the keep warm setting to establish your usable range. Use proper bagging methods: vacuum-seal or water-displace bags with no air gaps, then arrange pouches flat and single-layer for uniform circulation. If bags float, add weights to keep them submerged. Monitor water levels during long cooks and top up with hot water as needed. If temperature drifts, recalibrate or install a PID controller for enhanced precision control. When uneven cooking occurs, reposition pouches and verify complete bag-to-food contact to ensure even heat distribution throughout your meal. Label everything clearly to prevent confusion across batches.