You’ll want to cook chicken to 165°F to safely eliminate dangerous pathogens like Salmonella and Campylobacter. Use an instant-read thermometer inserted into the thickest part, avoiding bone and fat. While certain cuts and cooking methods allow slightly lower temperatures with precise time-temperature relationships, the 165°F standard remains the safest benchmark for most home cooks. Understanding the nuances of temperature monitoring and carryover cooking will help you master poultry preparation.
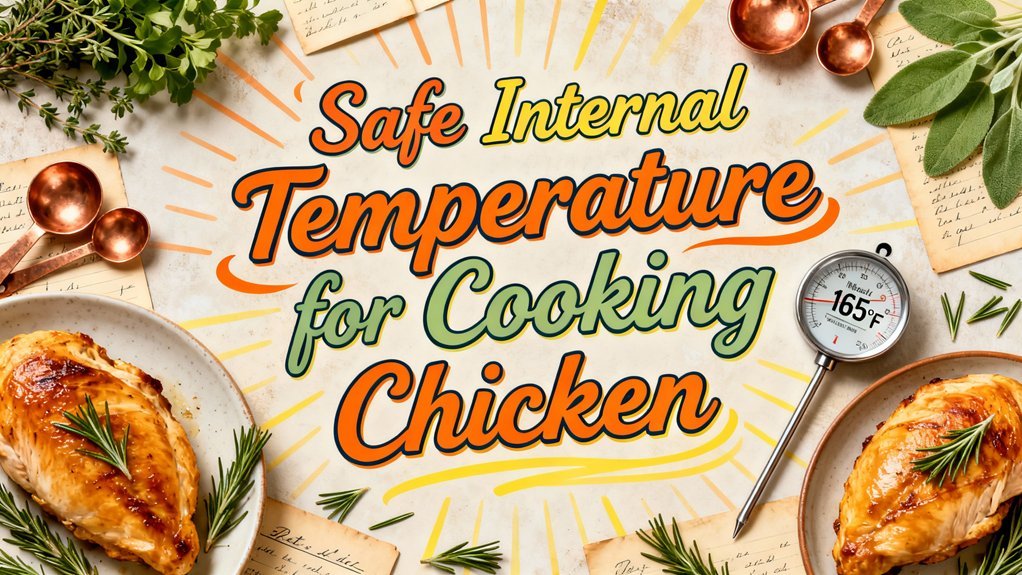
The 165°F Standard: Why This Temperature Matters
Three federal agencies—the USDA, FDA, and CDC—converge on a single recommendation: you’ll want to cook all poultry (whole birds, parts, and ground meat) to an internal temperature of 165°F (74°C) to eliminate foodborne pathogens. The science behind this standard reflects rapid pathogen inactivation at that temperature. Salmonella and Campylobacter—the primary poultry pathogens—undergo protein denaturation and cell death within seconds at 165°F, achieving the necessary microbial reductions for safety. This single-temperature rule simplifies a complex time-temperature relationship, eliminating guesswork in home kitchens. Regulatory agencies adopted 165°F as a conservative benchmark that accounts for thermometer misuse, uneven heating, and real-world variability, ensuring protection across diverse cooking methods and equipment. However, cooking at lower temperatures combined with adequate holding time can also effectively achieve the necessary bacterial reduction for safe consumption. To verify that chicken has reached the target temperature throughout, it’s essential to use a meat thermometer rather than relying on visual cues, as appearance can be deceptive. Proper insertion techniques, such as avoiding bone contact, help ensure accurate temperature readings at the thickest part of the meat. The thermometer probe should be inserted at least to the notch on the metal part to ensure proper support and protection of internal components. Cast iron skillets can reliably maintain the consistent heat distribution needed to cook chicken evenly throughout, supporting your food safety efforts. Different types of thermometers, including instant-read digital thermometers, probe thermometers, and infrared options, offer various advantages depending on your cooking setup and preferences. Salmonella contributes to over 1 million illnesses annually in the U.S., primarily linked to poultry consumption, underscoring the critical importance of reaching this safety threshold.
Understanding Time–Temperature Pasteurization
While the 165°F standard provides a foolproof endpoint for most home cooks, you might wonder what happens at lower temperatures if you’re willing to monitor time more carefully. Pasteurization effects depend on time-temperature interactions—a precise mathematical relationship governing bacterial lethality. At 145°F, you’ll need 8.5 to 10.7 minutes for equivalent Salmonella reduction. Lower temperatures demand exponentially longer holds: 140°F requires 25 to 33 minutes, while 136°F needs 63 to 79 minutes. Fat content complicates matters further, extending holding times at identical temperatures. Sous vide cooking excels here, maintaining exact temperatures throughout, as precision temperature control enables safe cooking at lower temperatures than standard ovens can reliably achieve. Just as preheating your Dutch oven prevents thermal shock when baking bread, preheating your cooking vessel ensures consistent temperature maintenance throughout the cooking process. For roasting, you can rely on carryover heating, holding at 145°F for 15 minutes post-oven. Using vacuum sealing techniques can also help preserve the texture and moisture of your chicken during storage, similar to how proper food preservation methods maintain quality in frozen foods. Proper storage in embossed vacuum seal bags can extend chicken freshness in the freezer for significantly longer periods than traditional storage methods. Always measure your chicken’s lowest point with an instant-read thermometer.
Temperature Targets by Chicken Cut and Type
Different chicken cuts and preparations require tailored temperature targets because bone density, fat content, and muscle structure all affect heat penetration and pathogen reduction rates. Whole birds and bone-in pieces demand 165°F (74°C) as your instantaneous benchmark, though dark meat can achieve equivalent pasteurization at 150–155°F (66–68°C) with appropriate hold times. Boneless skinless breasts offer flexibility: you’ll reach the conservative 165°F standard, yet chefs commonly pull at 140–150°F (60–66°C) and rely on resting periods to complete pasteurization safely. Temperature variations across chicken cuts mean you must verify readings at multiple locations—thigh without touching bone, inner breast, and meat adjacent to bone for bone-in pieces. Using a thermometer for accurate verification ensures you achieve the correct internal temperature without relying on unreliable doneness indicators like color or firmness. For searing and finishing techniques, consider employing adjustable flame control tools to achieve precise browning without overcooking the interior, similar to culinary applications that require careful heat management in a well-ventilated area. Allowing the chicken to rest for 5 minutes after cooking helps redistribute juices and complete the cooking process through carryover heat. Proper storage of cooked chicken requires protection from contamination, which can be achieved through vacuum seal bags that remove air and prevent moisture and dust exposure during refrigeration or freezing. Resting the chicken uncovered for 15 minutes post-cooking allows carryover cooking to raise internal temperatures further and achieve complete pasteurization. Always prioritize 165°F for high-risk populations regardless of cut type. A covered pot or Dutch oven with tight-fitting lid designs can retain residual heat effectively during resting, further supporting carryover cooking and ensuring food safety without drying out the meat.
How to Measure Internal Temperature Correctly
You’ll get accurate, safe doneness readings only when you’ve got the right thermometer and use it correctly. Choose instant-read digital thermometers for speed and precision over slower dial models. For probe placement, insert the tip fully into the thickest muscle, avoiding bone and fat pockets that skew readings. In whole birds, measure the thigh rather than the breast. Push the probe to the center without touching the far side, then withdraw slowly to capture the lowest temperature. Allow your device its specified response time before reading. Calibrate your thermometer regularly using ice-point and boiling-point checks to guarantee reliability, similar to how testing your thermometer in boiling water verifies accuracy. Take multiple measurements across large cuts to detect cold spots and confirm uniform doneness throughout. Similar to achieving proper heat retention and distribution in cast iron cooking, consistent temperature monitoring ensures even results throughout the chicken. For optimal results, store your thermometer properly and consider using vacuum sealer bags to preserve chicken portions at their peak quality before cooking. Resting the chicken for at least 5 minutes after cooking allows juices to redistribute throughout the meat, enhancing both tenderness and flavor. For white chicken meat, the target temperature is 165°F, while dark meat requires reaching 175°F for food safety.
Using a Probe Thermometer: Best Practices
Because probe placement directly determines whether you’ll get accurate temperature readings, mastering insertion technique is essential for food safety.
For probe insertion, position your thermometer in the thickest part of the breast, roughly three-quarters along its length, aiming toward the center. Insert the probe deeply while avoiding bones, cavities, and fat. If you’re using skin-on cuts, lift the skin with a fork before inserting. Mark your fingers on the probe shaft to control depth and prevent over-insertion.
Temperature verification requires checking multiple locations since the coldest spot may shift during cooking. Use leave-in probes for continuous monitoring and set alarms 10°F below your target. Don’t rely solely on alarms—visually and tactilely confirm doneness by spot-checking with an instant-read thermometer in several spots. Instant-read thermometers should only be inserted near the end of cooking time for a quick reading. Like searing steak, achieving proper doneness requires minimal flipping to ensure even cooking throughout the meat. Modern digital thermometers offer faster and more accurate measurements than traditional analog devices, making them invaluable for verifying chicken doneness. Consider using compatible vacuum-sealed bags to store your precisely cooked chicken for extended freshness after preparation. Proper thermometer calibration techniques ensure your readings remain reliable throughout the cooking season. Investing in quality equipment like a meat temperature probe enhances your ability to achieve consistent, safe results. The FDA Food Code recommends cooking chicken to an internal temperature of 165°F (74°C) to ensure safety and eliminate harmful bacteria.
Carryover Cooking and Resting Periods
Removing chicken from heat doesn’t stop the cooking process—residual heat from the outer layers continues raising the internal temperature as the meat seeks thermal equilibrium. Understanding carryover effects is critical for food safety.
Thermal mass determines carryover magnitude. Whole birds experience significant temperature rises, while individual breasts show minimal increases. If you pull breast meat at 145°F, it’ll reach approximately 155°F during a 30-minute rest—delivering the 8.5 minutes at or above 145°F required for bacterial pasteurization. Covering meat during resting can cause higher temperature rises due to retained heat post-cooking.
The resting importance extends beyond safety. This period allows heat gradients to equalize throughout the meat, ensuring your lowest-temperature zones achieve adequate hold times. Just as cast iron requires proper seasoning after rust removal to prevent degradation, resting periods allow the meat’s structure to stabilize and retain its juices. Similar to how Dutch oven cooking uses enclosed vessels to maintain consistent heat distribution during long cooking periods, resting allows the chicken’s internal structure to stabilize through thermal equilibrium. Like a Dutch oven beef stew simmered for extended periods, allowing sufficient resting time enables the meat’s juices to redistribute evenly. For Dutch oven cooking and other enclosed vessels, maintaining consistent heat throughout the cooking process ensures even temperature distribution across all meat portions. Ambient temperature also influences carryover; warmer environments increase the rise more than cooler ones. Proper probe placement during monitoring helps you track temperature changes accurately throughout the resting period.
Monitor your thermometer’s lowest breast reading to confirm you’ve met safety requirements.
Special Considerations for Vulnerable Populations
While the 145°F carryover cooking method works for general populations, immunocompromised individuals, preschool-age children, and older adults require stricter adherence to poultry safety standards. You must cook chicken to 165°F internal temperature for vulnerable populations—no exceptions or consumer advisories substitute for this requirement. These groups face markedly higher risks of severe foodborne illness from undercooked poultry pathogens.
You’ll find these heightened food safety standards apply in facilities providing custodial care, healthcare, nutritional services, or socialization—including hospitals, nursing homes, and day care centers. You cannot relax minimum cooking temperatures or permit bare hand contact with ready-to-eat foods. Retail establishments serving the general public remain exempt from these highly susceptible population regulations. Use calibrated food thermometers** to verify temperatures, as color and texture prove unreliable—the same verification method essential when preparing dishes like cast iron chicken pot pie. Beyond temperature verification, always check that the meat is white or light tan** throughout with no pink areas remaining. Cross-contamination prevention through proper handwashing and surface sanitation is equally critical to food safety. Symptoms of foodborne illness can manifest typically within 1 to 3 days after consuming contaminated food, making proper cooking temperatures essential for protection. Your commitment to rigorous temperature monitoring protects vulnerable populations from potentially life-threatening complications.
Common Mistakes and How to Avoid Them
Even with clear safety guidelines, most home cooks make critical mistakes that undermine poultry safety. You’ll avoid undercooking by using a calibrated thermometer instead of relying on color or juices, which aren’t reliable indicators. Insert it into the thickest part, avoiding bone contact. When inserting the thermometer probe, ensure it’s inserted deep enough—generally at least up to the metal notch or about half an inch—without poking through the other side. Don’t remove chicken immediately after reaching 165°F—carryover cooking raises temperature 5–10°F naturally. However, continuing heat beyond this point dries meat unnecessarily. Mistake awareness matters: you must monitor time-temperature relationships, especially for lower temperatures like 155°F, which require precise 60-second holds. Finally, prevent cross-contamination by using separate cutting boards and sanitizing surfaces thoroughly. Recognizing that myoglobin causes the red coloring in chicken rather than blood can help ease concerns about undercooked meat. Different cuts of chicken, including breasts, thighs, wings, and ground chicken, all require reaching the same 165°F internal temperature to ensure harmful bacteria like Salmonella are destroyed. For optimal results with varying thicknesses of meat, measure temperature at the thickest part of the cut without touching bone, which can provide false readings. A properly calibrated thermometer should show a significant temperature difference between the initial reading and stabilized reading, similar to how infrared thermometers detect heat changes in other applications. Letting the thermometer sit for a few seconds allows the reading to stabilize before you confirm doneness. Like the importance of achieving a good sear] on steak, precise temperature control is equally critical for poultry safety. Understanding the stall phase helps explain why chicken temperature plateaus at certain points during cooking. Consulting credible cooking resources guarantees you’re following current USDA guidance, protecting yourself and your family from foodborne illness.