You’ll transform two cans of cherry pie filling, one box of cake mix, and butter into a bubbling masterpiece using your Dutch oven. Spread the filling on the bottom, dump the dry cake mix over it without stirring, then distribute butter pats across the top. Position your Dutch oven over hot coals—about 15-20 underneath and 10-15 on the lid—and bake for roughly 50 minutes until set and bubbling. Rotate every 10-15 minutes for even cooking. Serve warm with vanilla ice cream, and you’ll find there’s much more you can do with this simple method.
What You’ll Need: Essential Equipment and Ingredients
Before you start layering your Dutch oven cherry cobbler, you’ll want to gather your core components: cherry pie filling (two 21-ounce cans work best, though you can substitute peach, apple, or berries), one box of cake mix—yellow pairs beautifully with cherries, though chocolate or white varieties work too—and butter cut into manageable pieces.
For equipment basics, you’ll need a cast-iron Dutch oven or 9×13 casserole dish. A medium mixing bowl helps combine your cake mix with soda—cola complements chocolate, while lemon-lime soda brightens lighter mixes. Your ingredient options remain flexible throughout preparation. You can use salted or unsalted butter, adjusting to taste preference. A single 12-ounce can of soda activates the cake mix, creating that signature cobbler texture without stirring. Having everything prepped and accessible streamlines your cooking process considerably. The cola serves as a substitute for traditional eggs and oil, providing the necessary texture and moisture for your cobbler batter to bake evenly. Like artisan bread baking, using a Dutch oven for this cobbler ensures even heat distribution throughout the cooking process. This recipe takes approximately 5 minutes to prepare, making it an ideal quick dessert for campfire meals or home entertaining.
Preparing Your Dutch Oven for Success
Since you’re cooking outdoors, you’ll want to prep your coals properly to guarantee your cobbler bakes evenly. Start your campfire 30-45 minutes before cooking, allowing time for quality coals to develop. This coal preparation establishes the temperature management foundation your Dutch oven needs. A lid hook will make it easier to safely handle and rotate your lid during the cooking process.
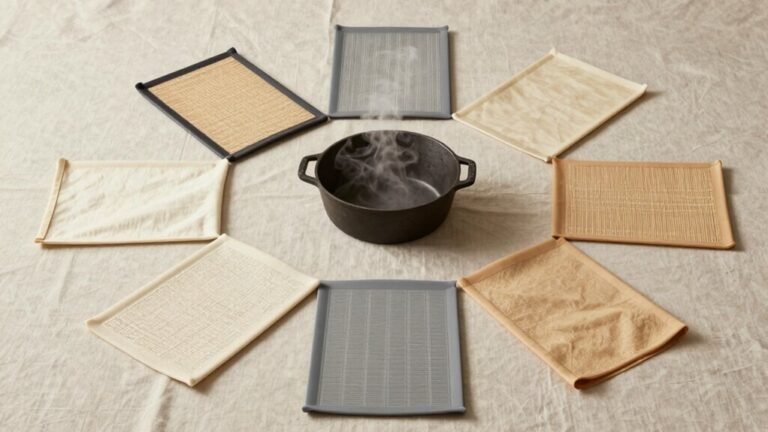
Position your Dutch oven on a single layer of hot coals, creating an even heat base. Place 15-20 briquettes underneath and 10-15 on the lid top for balanced cooking. These cooking tips assure consistent browning throughout your cobbler. The key to success with Dutch oven cooking is maintaining a rich crust through proper heat distribution. The heavy construction and tight-fitting lid of your Dutch oven create optimal heat distribution and moisture retention for superior results. Dutch ovens are equally versatile for both savory dishes like soups and stews and sweet creations like this cherry cobbler. Rotate the oven cover every 15 minutes to ensure even heat distribution across your Dutch oven. Maintaining appropriate distance] from your heat source prevents over-browning and bitter flavors in your dessert.
For precise temperature management, arrange 16-18 coals across your Dutch oven’s lid during standard baking. This coal preparation method maintains steady, controlled heat. Rotate your Dutch oven 90 degrees every 10-15 minutes, alternating directions, preventing hot spots and assuring your cherry cobbler with cake mix bakes perfectly golden.
Layering Your Cobbler: The Dump Method Explained
The beauty of Dutch oven cobbler lies in its straightforward assembly—you’re fundamentally dumping your ingredients in strategic layers that’ll transform into a golden, fruit-filled dessert.
Your layering technique starts with cherry pie filling spread evenly across your Dutch oven’s bottom, creating a solid foundation. You’ll dump the entire box of yellow cake mix directly over the fruit without stirring, preserving those distinct layers. This dump method‘s elegance lies in its simplicity—no mixing required yet. The versatility of this approach means you can easily substitute canned or fresh fruit based on your preferences, just as you would with traditional peach cobbler recipes.
Next, you’ll distribute butter pats across the dry cake mix, allowing them to melt into every crevice. The butter soaks into the dry ingredients, creating moisture that transforms cake mix into cobbler topping during baking. This uncomplicated approach delivers impressive results without complicated techniques. Pre-seasoned Dutch ovens like Lodge make this baking process even easier since they’re ready to use right out of the box for your camping adventure. For optimal results, bake your cobbler over hot coals for about 50 minutes until the top is set and edges are bubbling.
Butter Application Techniques for Even Coverage
Melting your butter to the right temperature—about 95–115°F—transforms it from a solid barrier into a flowing liquid that’ll coat every inch of your cake mix without pooling or seizing up on contact. Pour in concentric rings from the center outward, using a steady stream rather than scattered drops to encourage even runoff across the surface. A heatproof measuring cup with a narrow spout gives you precise control. After your initial pour, tilt the Dutch oven gently to guide butter into low spots and edges. Use short back-and-forth passes with your pour stream to re-wet any dry streaks. Aim for 6–12 tablespoons for a 12-inch Dutch oven, distributing in measured increments and inspecting between pours to prevent over-application. For best results with cast iron dutch ovens designed for campfire cooking, rotate the pot during the baking process to ensure even heat distribution. Dutch ovens excel at trapping steam during the initial baking phase, a principle that applies to even heat distribution when the pot is rotated strategically. Just as creating a hot and humid environment helps achieve proper oven spring in artisan breads, managing moisture and heat in your cobbler ensures optimal texture development. Just as vacuum sealing prevents oxidation and flavor loss in stored foods, proper butter application prevents dry spots that would compromise your cobbler’s texture and taste. Even butter distribution ensures consistent gooeyness] throughout the cobbler, similar to how ingredient quality impacts the overall taste of your final dessert. To maintain peak performance, season your Dutch oven after use by applying a protective oil coating] that preserves its non-stick seasoning layer for years of reliable cobbler baking.
Campfire Cooking: Using Hot Coals and Charcoal
How do you transform scattered flames into the steady, controllable heat that Dutch oven cobblers demand? You’ll build your fire down to a thick bed of hot coals, which provide the consistent radiative heat your cherry cobbler requires. For cake-mix cobblers, follow the top-heavy coal distribution: place roughly three-quarters of your briquettes on the lid and one-quarter underneath. Use the double-diameter guideline—multiply your oven’s diameter by two to estimate briquette count. Allow coals to ash over to white-hot for reduced flare risk. Create heat zones by arranging coals strategically, then adjust cooking temperatures by adding or removing coals. Start your charcoal in a chimney for 10-15 minutes to ensure fully lit coals before placing them around your Dutch oven. Like bringing steaks to room temperature before cooking, you should allow your Dutch oven to preheat with the coals arranged before adding your cobbler mixture. Rotate your Dutch oven every 5 to 10 minutes to prevent burning one side and ensure even heat distribution throughout the cobbler. The tight-fitting lid] of your Dutch oven traps moisture during the baking process, preventing evaporation and helping to cook your cobbler evenly. When properly sealed and stored, vacuum-sealed leftovers can extend the shelf life of any remaining cobbler for future enjoyment. Proper heat management is essential for achieving the even baking required for a perfectly cooked cobbler with a golden cake topping and tender cherries. This coal management guarantees your cobbler bakes evenly without burning the cherries or cake topping.
Oven and Grill Baking Instructions
Once you’ve mastered coal management over open flames, you’re ready to bake your cherry cobbler in more controlled environments—whether that’s your home oven, a grill, or a campfire setup using briquettes. For oven baking, preheat to 350 degrees Fahrenheit and layer your cherry pie filling in a prepared 9×13 casserole dish, then spread dry cake mix evenly and top with butter slices. Bake 35-45 minutes until golden brown. When using a grill, maintain 375 degrees with indirect heat inside a cast-iron Dutch oven, ensuring adequate space for heat circulation around the cobbler. For grill safety tips, keep the lid closed and avoid direct flame contact. Regular oven maintenance guarantees consistent results. Monitor both methods with a toothpick test for doneness. No additional ingredients from the cake mix box are required, ensuring a straightforward and tasty dessert experience.
Testing for Doneness and Perfect Timing
When’s your cherry cobbler actually ready to come off the heat? You’ll recognize several doneness indicators that signal completion. The golden-brown topping and filling that’s bubbling around the edges tell you you’re close. Insert a toothpick into the center—if it comes out clean, you’re done. A wet toothpick means you need five to ten additional minutes.
Timing adjustments depend on your cooking method. Over campfire coals, expect twenty to thirty minutes; in a 375°F oven, similar timing applies. Rotate your Dutch oven ninety degrees every ten minutes and the lid every ten to fifteen minutes to prevent hot spots. This rotation guarantees even cooking throughout. Using boxed cake mix can reduce your overall cooking time by approximately ten minutes compared to homemade batter. For optimal results, ensure you’re using 24 coals total with proper distribution between top and bottom of your Dutch oven. The fragrance of baked cherries, combined with minimal center jiggle and a set top, confirms your cobbler’s ready to enjoy.
Creative Flavor Variations to Try
Beyond the classic cherry-and-yellow-cake combination, your Dutch oven cobbler welcomes countless flavor upgrades that transform it from simple to sophisticated. Consider layering mixed berries—blueberry and blackberry—with cherries to deepen complexity. Swap your cake mix entirely: chocolate mixes create richer profiles, while spice cake amplifies warming notes like cinnamon and nutmeg folded into filling.
Your creative topping variations can elevate texture dramatically. Replace standard cake mix with a streusel crumble topping for crisp contrast, or sprinkle chopped walnuts and pecans into the dry mix for toasty crunch. Add chocolate chips for indulgent depth.
For fruity mix-ins, brighten cherries with lemon zest or pour lemon-lime soda over your topping instead of oil. Drizzle browned butter across the top to introduce caramelized nuttiness that lingers on every bite. Like a well-marbled pot roast, selecting quality Dutch oven cookware ensures even heat distribution and superior results in your cobbler.
Troubleshooting Common Cobbler Issues
Even with your perfectly chosen flavors and creative toppings, a Dutch oven cobbler can still hit a few snags during baking. If your cobbler crust turns soggy, you’re likely dealing with excess moisture. Drain your canned cherries thoroughly before adding them to the filling, and keep your filling thickness under two inches. Drop your topping in dollops with space between each piece, allowing steam to escape properly. For a watery filling, include cornstarch as a thickening agent and remove the lid during the final cooking stages to evaporate excess liquid. The excellent heat retention of a Dutch oven means you’ll want to monitor your cobbler closely to prevent overcooking. If your exterior burns while the interior remains raw, lower your heat and extend cooking time. Rotating your Dutch oven every 10-15 minutes helps achieve even heat distribution across the cobbler, preventing localized scorching and ensuring uniform doneness. Monitor your cobbler closely, rotating it every 10-15 minutes for even cooking throughout.
Serving Suggestions and Storage Tips
After you’ve pulled your Dutch oven from the oven, you’ve got the perfect opportunity to showcase your cherry cobbler at its best. Serve it warm with a vanilla ice cream scoop melting into the cherry filling, or add whipped cream for creamy contrast.
For storage tips, cool your cobbler completely before covering it. You’ll keep leftovers in an airtight container for three to five days in the refrigerator. Freeze baked cobbler up to three months, then thaw overnight before reheating at 350°F for ten to fifteen minutes. For extended freezer storage beyond three months, consider using vacuum sealing techniques to prevent freezer burn and maintain the cobbler’s moisture content and flavor.
These serving suggestions and storage tips guarantee your Dutch oven cherry cobbler stays delicious whether you’re enjoying it immediately or savoring it later. Avoid refreezing after thawing to maintain ideal texture and flavor.