You can vacuum seal food with heavy-gauge polyethylene trash bags (3-6 mil) using water displacement and a heat source. Submerge your sealed bag into water, keeping the opening above the waterline to expel air. Pinch the neck closed and use a heated hair straightener to create an airtight seal. However, you’ll need food-grade materials, proper temperature control, and careful attention to safety protocols—particularly concerning pathogens like *Clostridium botulinum*. Understanding these critical requirements determines whether your improvised method succeeds or fails.
Safety Considerations and Food-Grade Materials
Because vacuum sealing reduces oxygen in a package, it can paradoxically create conditions where dangerous anaerobic pathogens like *Clostridium botulinum* thrive if you don’t maintain proper temperature and acidity controls. You must use food-grade packaging materials exclusively—trash bags aren’t manufactured to food-contact standards and can leach plasticizers and dyes into your food, particularly with fatty or heated items. Non-food-grade plastics may fail under vacuum pressure or produce unreliable heat seals. Your packaging materials must withstand heat-seal temperatures and create continuous, debris-free seals; food particles compromise seal integrity. Always label food with type and date packaged to track storage duration and ensure timely consumption. High-barrier, food-grade films prevent oxygen and moisture transfer effectively, inhibiting oxidation and freezer burn. Like cast iron cookware that requires re-seasoning to rebuild protective coatings, vacuum-sealed foods need proper storage conditions to maintain their preservation integrity. Remember that vacuum sealing is not a standalone method of food preservation and requires proper storage in a shelf, refrigerator, or freezer after sealing. Following these packaging material requirements guarantees both food safety and regulatory compliance.
Essential Equipment and Tools You’ll Need
You’ll need three primary categories of equipment to vacuum seal food effectively: a vacuum source, compatible sealing bags or containers, and a heat source to create permanent seals.
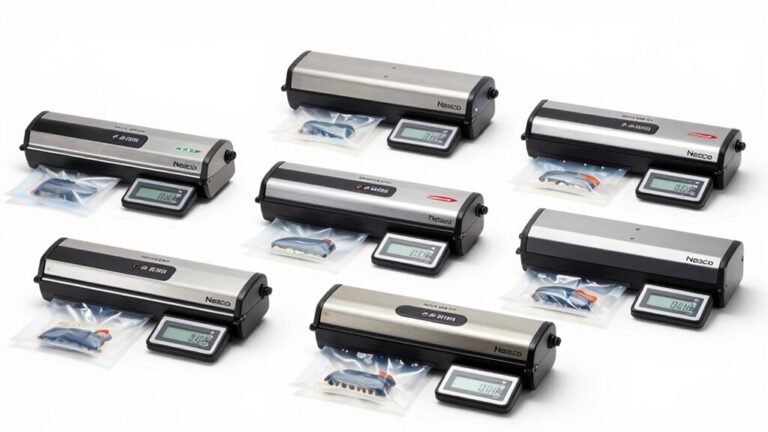
Your vacuum type options range from handheld pumps and shop-vacs with adapters to dedicated external or chamber sealers. Each delivers different vacuum strength and workflow efficiency. Pair your chosen vacuum with heavy-gauge polyethylene trash bags—contractor-grade, 3–6 mil minimum—to withstand evacuation pressure without puncturing. Chamber vacuum sealers are particularly effective for high-volume packaging operations and can handle both solid foods and liquids. Popular options like the NESCO® Vacuum Sealer VS-12 offer double heat seals and dual pumps for reliable performance.
For sealing equipment essentials, you’ll require an impulse sealer or clothes-iron-style heat sealer for reliable seams. Alternatively, a soldering iron with a flat tip works for improvised applications. Additionally, secure clamps, binder clips, or heavy-duty tape to maintain airtight contact between your bag and vacuum source during evacuation. A rigid board distributes compression evenly, preventing localized stress failures.
Preparing Your Food Before Vacuuming
Proper food preparation directly determines whether your vacuum-sealed packages maintain quality and safety throughout storage. You’ll start by prioritizing food cleanliness—sanitize all work surfaces, cutting boards, and utensils with food-safe sanitizer before handling. Wash your hands thoroughly for at least twenty seconds with soap and water.
For produce rinsing, use running potable water and a brush on firm-skinned items like potatoes and carrots to remove soil and surface organisms. Trim any spoiled or bruised portions to prevent sealing decay inside your packages. Blanching vegetables like green beans, broccoli, and asparagus before vacuum sealing stops enzyme actions that affect flavor and texture. When vacuum sealing corn on the cob, you can skip the blanching step to preserve a fresh-picked flavor, though the texture may be slightly softer after freezing.
Cool cooked foods below 40°F within two hours to minimize bacterial growth. Pre-freeze delicate items like berries on baking sheets to preserve structure. Keep raw meats refrigerated separately from ready-to-eat foods. Vacuum sealing removes oxygen from storage bags, which prevents oxidation and bacterial growth that causes meat to deteriorate. For optimal results with various food types, consider how even heat distribution affects the quality of different items during storage and preparation. Vacuum-sealed foods can maintain quality for extended periods, with specific storage duration guidelines varying by food type and freezer conditions. Finally, portion foods into meal-sized amounts and leave 2–3 inches headspace for reliable sealing. Labeling and dating each package ensures easy identification and helps you track storage duration for optimal freshness. Proper headspace management prevents sealing failures that can compromise your food’s integrity during extended storage.
Step-by-Step Improvised Vacuuming Method
Lower your sealed bag into a water basin with the opening above the waterline. Water pressure forces air out through the narrow neck opening. Insert a straw if you need extended reach into the bag interior. Apply hand pressure to expel remaining air pockets while adjusting submersion depth to prevent water entry. Proper food preparation ensures optimal preservation and prevents spoilage during the water displacement process. This method effectively slows bacterial and mold growth by removing oxygen, similar to commercial vacuum sealing.
Once you’ve maximized air removal, pinch the neck closed and clamp a heated hair straightener across it for 5-10 seconds. This advanced sealing technique addresses common vacuuming challenges by creating an airtight bond. For best results, ensure your heat source maintains temperature consistency throughout the sealing process. Maintain pressure until the seal cools completely. Make multiple passes if weaknesses appear. Inspect the sealed edge for uniformity before storage. Airtight packaging is more compact than traditional storage methods and contributes to longer shelf life for both fresh and dry foods. Allowing sealed foods to rest briefly after sealing, similar to how cooked pizza benefits from cooling before serving, helps the seal set properly and ensures maximum durability. Note that this water displacement method works best with solid foods, as pre-freezing liquids prevents the vacuum sealer from drawing them into the machine.
Sealing Techniques for Airtight Results
Achieving an airtight seal requires meticulous attention to bag preparation and sealing mechanics. You’ll want to position the bag’s top edge correctly, eliminating creases that compromise seal integrity. Insert the vacuum hose while holding the bag closed tightly at the top, maneuvering carefully to avoid sucking in bag sides during air removal.
After sealing, allow the heated plastic to solidify for a few moments before testing. You should visually inspect the sealed edges and apply light pressure to detect any air bubbles or leaks. If you find air escaping, repeat the sealing procedure immediately. Smooth bags are more resistant and provide better watertight seals for optimal results. Proper vacuum sealing prevents freezer burn, extending your food preservation time significantly. Always ensure you’re using appropriate vacuum sealing bags rather than regular trash bags to achieve professional-quality results. Bags with material thickness of at least 3 millimeters offer enhanced durability and better protection against punctures during storage and handling.
For liquids, activate your sealer’s liquid stop function and fill bags no more than two-thirds full. Once all the air is removed, quickly tie the bag shut to maintain the vacuum seal. Vacuum sealing removes oxygen that slows bacterial growth and oxidation, preserving the texture and flavor of your food. Vacuum sealing can preserve meat in the freezer for up to three years compared to traditional storage methods. These techniques guarantee consistent, reliable airtight results when vacuum sealing with standard bags.
Food-Specific Guidelines and Best Practices
Different foods demand tailored approaches to vacuum sealing because their moisture content, texture, and microbial risks vary greatly. For meat handling, you’ll pat surfaces dry and protect sharp bones with wrapping to prevent punctures. Seafood storage requires flash-freezing delicate items and using chamber sealers for high-moisture varieties. Produce preservation involves blanching gas-emitting vegetables and flash-freezing soft fruits before sealing. Dairy safety demands cooling products before sealing and using delicate modes for soft cheeses. Meal packaging necessitates cooling cooked foods to refrigerator temperatures first, then dividing into portion-sized packages. You’ll label everything with dates and follow recommended storage windows. When storing baked goods and pastries, ensure they are completely cooled and consider using external vacuum sealers to prevent crushing delicate textures. Similar to how proper temperature management is essential for baking success, maintaining consistent storage conditions is critical for vacuum-sealed foods. After vacuum sealing your foods, thoroughly dry all surfaces to prevent moisture buildup that can compromise the seal’s integrity. Whole chickens can maintain quality for up to two years in the freezer when properly vacuum sealed with adequate chamber dimensions and seal width. For optimal freshness, store all vacuum-packed perishable foods at constant refrigerator or freezer temperatures to maintain quality throughout the storage period. This methodical clarity guarantees your vacuum sealing maximizes freshness while minimizing contamination risks across all food categories.
Testing Your Seal for Reliability
Once you’ve sealed your food packages following proper guidelines for each category, you’ll need to verify that your seals actually work—because even meticulous technique can fail if the seal isn’t airtight. You’ll conduct leakage testing using the water submersion method: submerge your sealed package under vacuum and observe for escaping bubbles indicating holes or seal weaknesses. Alternatively, perform vacuum decay testing by placing the package in a chamber, evacuating air, and monitoring pressure changes over time. You can also apply dye penetration testing along seal edges to reveal hidden leak paths. Heat seal strength testing ensures that your sealed edges maintain their integrity under the storage conditions your food will experience. Proper sealing verification is essential because it locks out air and moisture that would otherwise slow spoilage and compromise food quality. These methodical approaches establish seal integrity before storing your food, preventing spoilage and contamination while ensuring reliable preservation throughout shelf life. For enhanced detection capabilities, modern testing equipment can identify leak holes down to 20µm, providing comprehensive verification of your package’s airtight seal quality.
Understanding Limitations and Storage Expectations
While your sealed packages may appear airtight, you’ll want to understand that standard household materials and storage conditions carry real limitations that affect how long your food actually stays fresh. Trash bags possess inferior barrier properties compared to commercial vacuum film—they transmit oxygen and moisture at higher rates, accelerating spoilage and freezer burn. Material limitations include thin spots, inconsistent thickness, and weak heat seals that compromise containment. Refrigerated items gain only modest shelf-life extension of days rather than weeks. Frozen goods still experience freezer burn due to continued vapor transmission through the film. Fatty meats remain vulnerable to oxidation and rancidity as oxygen diffuses through the plastic. Dry goods see negligible benefit, eventually succumbing to staling, infestation, or mold. Temperature control remains essential for food safety regardless of your sealing method. For best results with vacuum-sealed items, consider freezing contents before sealing to achieve flatter packing and enhance storage efficiency, similar to how a well-oiled cast iron skillet helps achieve crispy edges in baking applications. In comparison, properly vacuum sealed meat in commercial film can maintain quality for 2 to 3 years in the freezer when stored at 0°F. Vacuum packaging does not eliminate the risk of pathogenic bacteria like Clostridium botulinum, which can survive and thrive in oxygen-free environments, making proper refrigeration and freezing still necessary for food safety.