You’ll uncover a Dutch oven transforms your kitchen into a culinary powerhouse. Bake crusty breads with trapped steam, braise tough cuts into tender perfection, and simmer complex soups and stews. Use it for frying, roasting, and one-pot meals that simplify cleanup. Outdoor cooking with coals opens entirely new possibilities. Whether you’re working with enameled cast iron or seasoned bare cast iron, this versatile vessel handles it all. The techniques and recipes you can master will expand your cooking repertoire greatly.
Selecting the Right Dutch Oven for Your Needs
Before you invest in a Dutch oven, you’ll want to contemplate your household size, cooking needs, and available storage space. Size considerations matter greatly. A 5.5 QT medium option works well as your starting all-around choice, serving 4–6 people comfortably. Small sizes suit solo cooks or two to four servings, while large models exceed 7 QT for families or entertaining.
Consider shape too. Circular Dutch ovens offer versatility for most recipes and fit standard stovetop burners. Oval designs accommodate larger proteins like beef tenderloin, providing extra cooking surface. Enameled Dutch ovens require no seasoning and clean easily with soap and water, making them ideal for busy home cooks. For cast iron Dutch ovens without enamel coating, seasoning with oils that undergo polymerization when heated creates a durable nonstick surface. Dutch ovens can also be used in the oven for baking applications like preparing oven-baked German pancakes with caramelized toppings. These versatile pots excel at both stovetop and oven cooking methods, allowing you to seamlessly transition from browning ingredients to finishing dishes in the oven.
Regarding material preferences, enameled cast iron dominates popular models. Prioritize large loop handles for easy gripping with oven mitts, solid metal lid pulls for high temperatures, and adequate wall thickness for ideal heat distribution. A quality enamel coating significantly impacts how well your Dutch oven performs across various cooking methods including braising, baking bread, and making stews. Since enamel quality consistency varied] significantly among tested products, research specific brand durability before making your purchase. When using cast iron Dutch ovens on glass top stoves, exercise caution to prevent scratching the surface as cast iron can damage cooktops if not handled carefully. These features guarantee durability and reliable performance across countless dishes.
Baking Breads, Pastries, and Desserts
A Dutch oven‘s enclosed environment creates the ideal conditions for baking artisan breads, trapping steam that develops a crispy, golden crust while keeping the interior tender and moist. You’ll preheat your Dutch oven to 450°F for 30-45 minutes before baking, ensuring maximum heat absorption. Preheating the Dutch oven enhances oven spring and final loaf volume, preventing inadequate rise and density that results from using a cold pot.
For no-knead bread variations, you’ll mix flour, yeast, salt, and water, then let the dough rise for extended periods. With sourdough methods, you’ll perform stretch and folds during bulk fermentation, then cold proof overnight before baking. The heavy pot ensures even heat distribution throughout the baking process. Refrigerated dough can be stored for up to 7 days, allowing flavors to develop while making the cold dough easier to handle during shaping. When handling your Dutch oven during the baking process, always use heat-resistant mitts or gloves to prevent burns from the extremely hot cookware. Using an oven-safe meat thermometer can help you monitor internal dough temperature to ensure proper fermentation and baking results.
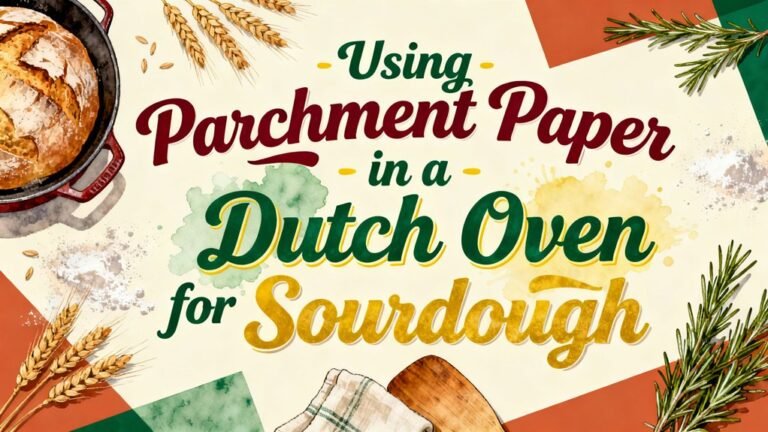
Your baking techniques should include scoring the dough surface before transferring it onto parchment in the hot Dutch oven. Unlike specialized tools such as deep fry thermometers designed for specific cooking methods, your Dutch oven’s versatility allows it to perform multiple baking functions effectively. Proper lid removal timing allows you to achieve the desired crust color while maintaining the bread’s moisture. Bake covered for 20 minutes, then uncovered for 25-35 minutes until golden brown. Cool completely on a rack before slicing to set the crumb structure properly.
Simmering Soups, Stews, and Braises
While your Dutch oven excels at baking, it’s equally invaluable for slow-cooked braises and hearty stews that develop deep, complex flavors through low, moist heat. You’ll sear seasoned beef chunks until deeply browned, creating the Maillard reaction that builds foundational flavor. Next, sauté aromatics like onions and garlic, then deglaze with wine to release caramelized bits from the pot’s bottom.
Add stock to barely cover ingredients, then transfer your covered Dutch oven to a 275-350°F oven. Braise for 2-4 hours until meat shreds easily. Add vegetables partway through for ideal texture. For optimal results, ensure the braising liquid covers the meat three-quarters of the way rather than submerging it completely, as total submersion creates a stew instead of a true braise. To deepen flavor complexity, consider deglazing with balsamic vinegar or tomato paste for additional richness beyond standard wine reductions. The aromas filling your house while the stew develops will signal that simple ingredients combined with time are enhancing the flavor. The Dutch oven’s heavy construction maintains consistent heat distribution, ensuring uniform soup consistency and balanced stew flavors throughout your braise. When selecting your Dutch oven, check for evenness and surface condition to ensure optimal heat retention and cooking performance. The tight-fitting lid plays a crucial role in moisture retention, which is essential for developing the tender, fall-apart textures that define exceptional braises. This same slow-roasting technique works beautifully for turkey breast cooked atop a bed of sautéed vegetables until reaching the desired internal temperature.
Mastering Heat Control With Coals
Once you’ve mastered Dutch-oven cooking indoors, you’ll reveal that managing heat with coals outdoors requires a fundamentally different approach—one that’s more art than science, though simple ratios can guide you. Start with the rule of threes: oven diameter in coals for the bottom, add three for the top. Coal placement matters greatly—ring patterns deliver even heat distribution, while checkerboard spacing on lids prevents hot spots. Rotate your Dutch oven and lid in opposite directions every 10–15 minutes for uniform cooking. Monitor coal lifecycle closely; ash buildup reduces output, so add fresh coals periodically during long cooks. Environmental factors like elevation, wind, and moisture control demand adjustments. Like preheating a cast iron skillet indoors, avoid placing a cold Dutch oven directly into intense heat, as thermal shock can damage the pot. For longer cooking times exceeding 45 minutes, add additional coals to maintain consistent heat throughout your meal preparation. Consider using briquettes for longer burns when you need sustained, reliable heat over extended periods. Just as proper freezing conditions are essential for preserving food quality, maintaining consistent heat control ensures even cooking results. Remove coals quickly to lower temperature; add them gradually to raise it. Proper fire management skills will help you achieve the precise temperatures needed for different cooking methods. Temperature adjustment becomes intuitive with practice. Much like how extended freezer storage preserves the quality of vacuum-sealed poultry, consistent heat management preserves the integrity of your ingredients during outdoor cooking.
Adapting Your Favorite Recipes
Your favorite recipes don’t have to stay confined to conventional ovens—you can successfully translate them into Dutch-oven cooking by understanding the key conversions for vessel size, liquid content, and heat distribution. Start by matching your pan size to the appropriate Dutch-oven equivalent: a 9×13 baking pan correlates to a 12″ Dutch oven, for example. Adjust ingredients proportionally when scaling batches, keeping fill levels below two-thirds capacity. Reduce liquid by roughly one-third when converting slow-cooker recipes to prevent soupy results. For cooking times, expect 6–8 hours on low in a slow cooker to translate to 2–3 hours at 325°F in a Dutch oven. Monitor doneness earlier than original times, checking periodically until you master your specific pot and heat source. Cast iron Dutch ovens retain heat longer, allowing for more consistent cooking temperatures throughout your meal preparation. The Dutch oven’s exceptional performance in braising meats and baking bread demonstrates why proper recipe conversion unlocks its full potential across diverse culinary applications. The trapped steam created by a properly sealed Dutch oven lid enhances bread quality and texture, similar to how the vessel’s heat retention benefits other cooking methods. Unlike slow cookers that rely on gentle electric heat, Dutch ovens are versatile for various cooking techniques including sautéing, frying, braising, baking, and roasting on both stovetop and in the oven. Enameled cast iron Dutch ovens offer the added benefit of reduced maintenance requirements compared to bare cast iron, making them particularly appealing for home cooks seeking durability without extensive upkeep. For optimal longevity, hand wash your Dutch oven rather than placing it in the dishwasher to preserve both the enamel coating and any wooden components. If you prefer greater visibility while cooking, glass-lid Dutch ovens allow you to monitor your food without releasing heat or moisture during the cooking process.
Seasoning and Maintaining Cast Iron
Because cast iron Dutch ovens develop their nonstick properties through proper seasoning and care, you’ll want to master both the initial setup and daily maintenance routines. For seasoning techniques, apply thin layers of high smoke-point oil like flaxseed or canola, then bake upside down at 300-500°F for one hour. Repeat this process three to twelve times, building gradual layers rather than applying one heavy coat. Before seasoning, ensure you clean off loose bits of old seasoning and burned-on food scraps, then rinse and dry the Dutch oven completely to prepare it for the restoration process. The polymerization process that occurs during baking converts liquid oil into a hardened surface that bonds permanently to the cast iron. This chemical bonding creates a durable protective layer that resists rust and enhances the nonstick surface. Beef tallow is a natural option with a high smoke point that prevents burning during the seasoning process. After baking, allow the Dutch oven to cool inside the oven to ensure the seasoning fully cures before use. For maintenance tips, clean your Dutch oven immediately after cooking with hot water and a detergent-free sponge, then dry it on the stovetop. You can also season your Dutch oven using stovetop heating methods as an alternative to oven-based seasoning. Wipe it with a thin oil layer while warm to draw seasoning into the pores. For more extensive rust buildup, consider soaking the Dutch oven in a 50/50 vinegar solution for about an hour before scrubbing with steel wool to remove corrosion. Cook fatty foods like bacon initially to strengthen the seasoning and develop that durable nonstick surface.
Cooking Proteins and One-Pot Meals
A Dutch oven’s heat retention and tight-fitting lid make it ideal for transforming tough cuts of meat and simple ingredients into deeply flavored, tender meals. You’ll find success with collagen-rich proteins like chuck roast, short ribs, and pork shoulder through low-and-slow braising that converts connective tissue to gelatin. Dark poultry meat stays moist under the lid, while sausages and cured pork add concentrated flavor to long-simmered dishes. Don’t overlook plant proteins—beans and lentils create satisfying one-pot meals with minimal effort.
Your meal formats range from stews and braises to soups, casseroles, and paella-style dishes. Brown proteins first to develop Maillard flavors, then deglaze with stock or wine. Layer ingredients by cooking time, maintaining a tight lid throughout. You’ll achieve tender, flavorful results consistently. For optimal browning before braising, sear your proteins over medium-high heat to develop a golden crust that adds depth to your final dish. The Dutch oven’s high heat retention makes it particularly effective for preparing nutrient-dense meals like beans and vegetables that benefit from extended cooking times. These trapped steam environment ensures that flavors meld together beautifully while proteins become fall-apart tender. Submerging your roast in a savory cooking liquid composed of broth, wine, and aromatics allows the meat to braise evenly and absorb complex flavors throughout the cooking process. Corned beef and other cured meats are excellent candidates for Dutch oven cooking, with 40-50 minutes per pound ensuring the meat becomes very tender. Cast iron lids offer self-basting properties that promote even moisture distribution throughout your dish. Always hand wash cast iron with warm soapy water rather than using a dishwasher, which will damage the seasoning and cause rust.
Outdoor Cooking Techniques
Dutch oven cooking over coals and campfires demands specialized equipment and careful heat management to succeed. You’ll need a camping-style cast-iron Dutch oven with three legs, plus essential tools like a lid lifter, long-handled tongs, and heat-resistant gloves.
For outdoor grilling techniques, position your oven on a stable, flat surface with coals spread evenly underneath and across the concave lid. Rotate the oven and lid every 10–15 minutes to eliminate hot spots and guarantee even cooking. A charcoal chimney aids in quickly heating your coals before they’re ready for cooking. Cast-iron Dutch ovens are particularly valued by experienced cooks for their ability to distribute heat evenly and retain heat effectively during extended outdoor cooking sessions. The Dutch oven’s exceptional heat retention properties make it as reliable outdoors as it is in your kitchen.
Cast iron care requires preheating coals until grey and white for consistent heat. To verify your coals have reached the proper temperature, use an oven thermometer to monitor heat levels throughout the cooking process. Refresh coals every 45 minutes during longer cooks. Balance top versus bottom heat based on your dish: baking needs more top heat, while stews require roughly equal distribution for ideal results.
Quick Recipe Ideas to Get Started
Now that you’ve mastered heat management and rotation techniques, you’re ready to put your Dutch oven to work with simple, satisfying recipes.
Start with easy dinner options like 30-minute chicken and rice using Lipton onion soup mix, or creamy pasta dishes that cook entirely in your pot. You’ll appreciate how the Dutch oven’s even heating integrates sauces perfectly. One-pot lasagna delivers layered pasta flavor without multiple dishes, while Ham and Bean Soup takes just 35 minutes for smoky depth. For perfectly tender chicken breast, try searing seasoned chicken in butter before adding vegetables and broth, then simmering covered until the internal temperature reaches 165°F.
For heartier meals, Dutch Oven Beef Stew and Arroz Con Pollo showcase the pot’s versatility. Don’t overlook quick desserts—your Dutch oven’s consistent temperature makes baking Dutch Oven Sourdough Bread accessible to beginners. The Dutch oven’s steamy environment produces a characteristic crusty exterior while keeping the interior tender and moist. Gradually preheat your Dutch oven to avoid damaging the enamel coating before baking. For an even more satisfying slow-cooked option, try a chuck roast with root vegetables that braises low and slow for fork-tender perfection, finished with a rich gravy made from the cooking liquid. The one-pot meal approach means you’ll spend less time cleaning up and more time enjoying comfort food with family. These veggie and protein-packed meals transform simple ingredients into nutritious dinners that support healthy eating habits.
Each recipe builds your confidence and demonstrates why this single vessel deserves permanent kitchen real estate.