You’ll transform ground beef into deeply flavorful, satisfying meals by harnessing your Dutch oven’s superior heat retention and moisture-locking lid. Start by browning seasoned beef over medium-high heat, then deglaze with red wine or broth to capture those caramelized bits. Layer in vegetables, aromatics, and your choice of sauce—whether it’s a rich goulash, stroganoff, or chili base. The oven’s consistent temperatures guarantee even cooking and enhanced flavors with minimal seasoning. Uncover how specific techniques elevate each dish from ordinary to exceptional.
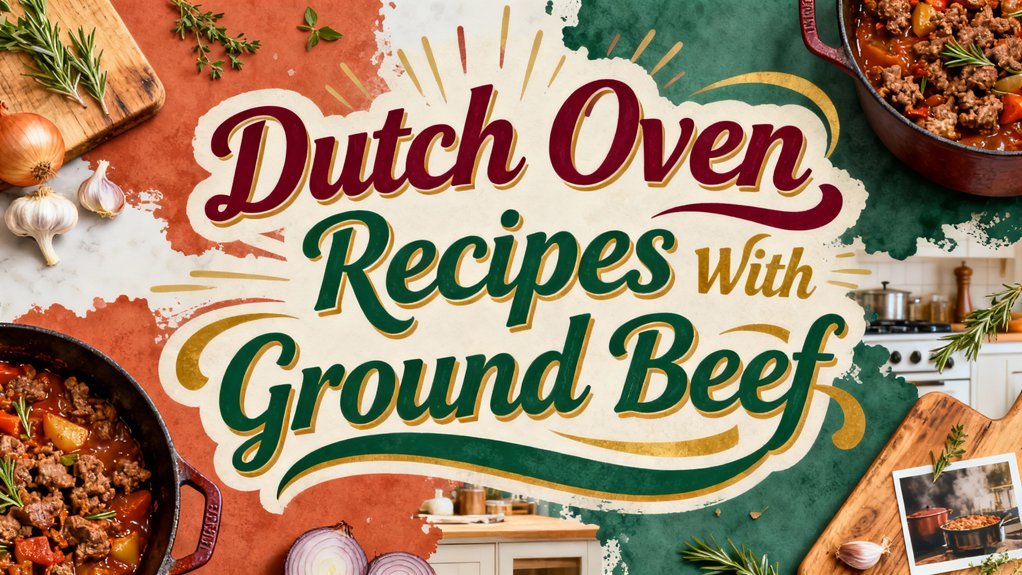
Popular Ground Beef Dutch Oven Recipes
Through the Dutch oven’s superior heat retention and even cooking, you’ll unveil deeply flavored ground beef dishes that simmer into tender, cohesive meals. Ground beef benefits from the Dutch oven’s ability to maintain consistent temperatures, ensuring even browning and flavor development.
You’ll uncover five standout recipes that showcase these cooking tips. Ground Beef Stew combines lean beef with vegetables and herbs for a comforting classic. Dutch Oven Goulash layers ground beef with tomato sauce and elbow macaroni. One Pot Ground Beef Stroganoff features mushrooms and egg noodles in a single vessel. Dutch Oven Shepherd’s Pie tops seasoned beef with creamy mashed potatoes before baking. Dutch Oven Chili builds depth through bacon, spices, and long simmering.
Each recipe leverages the Dutch oven’s heat distribution to transform simple ingredients into sophisticated, satisfying meals. Ground Beef Stew is also known as hamburger stew, poor man’s stew, or grandma’s ground beef stew, making it a versatile comfort food that works well for both everyday dinners and casual gatherings. These ground beef dishes benefit from the same technique of browning meat to develop a rich crust and building complex flavors through long, gentle cooking. Like cast iron Dutch ovens, these vessels are built for durability and longevity in your kitchen for years of reliable cooking. When using a Dutch oven with a glass lid, remember that glass lids have lower temperature tolerances than the pot itself, typically rated safe only up to 420°F. For those seeking alternative cooking methods, non-cast iron pans can also be used with proper greasing and adjusted cooking techniques. These Dutch oven recipes are perfect for weeknight dinners that require minimal preparation and deliver maximum comfort.
Comfort Food Dishes for Every Occasion
While those standout recipes demonstrate the Dutch oven’s versatility, you’ll find even greater satisfaction in dishes that adapt to any occasion and appetite. You can prep Cowboy Baked Beans ahead for family gatherings, combining ground beef, bacon, and beans in a molasses-rich sauce that deepens with time. For meal prep, Creamy Shells and Beef delivers a complete one-pot dinner in thirty minutes—you’ll brown the beef, incorporate pasta and tomato sauce, then finish with cream and Parmesan for richness.
Shepherd’s Pie lets you customize vegetables to what you’ve got on hand, layering seasoned beef beneath creamy mashed potatoes. These dishes aren’t just convenient; they’re designed to satisfy after demanding days while requiring minimal cleanup. The tight-fitting lid of your Dutch oven ensures superior moisture retention, keeping your one-pot meals tender and flavorful. One-pot stroganoff with egg noodles offers a healthier alternative to processed versions by using fresh ingredients instead of canned soup. For maximum flavor and to prevent freezer burn if you’re storing leftovers, consider vacuum sealing portions of your finished Dutch oven meals for extended freezer storage. Browning your ground beef at high temperatures creates a flavorful crust that enhances the depth of your finished dish. The even heat distribution from your Dutch oven’s thick cast iron ensures consistent cooking throughout your meal, much like the proper sear achieved when cooking chicken in cast iron. The one-pot meal approach simplifies both cooking and cleanup, making weeknight dinners more manageable for busy families. Your Dutch oven transforms simple ingredients into genuine comfort.
Hearty Stews and Casseroles
When you’re craving deep, satisfying flavors that develop over low heat, Dutch oven stews and casseroles deliver. You’ll find stew variations ranging from classic ground beef preparations to hobo stew enhanced with Cajun seasoning and hot sauce. Brown your ground beef thoroughly, drain excess grease, then layer in aromatics, potatoes, carrots, and broth for stovetop or oven simmering.
For casserole techniques, you’ll assemble tortillas, seasoned ground beef, and cheddar cheese with enchilada sauce for straightforward oven-baking. Cowboy casserole combines ground beef with smoked sausage and bacon, creating complex flavor layers. Cover your Dutch oven to braise, letting moisture tenderize ingredients while intensifying flavors. Season incrementally throughout cooking, adjusting consistency with additional broth as needed. Fresh herbs like parsley, rosemary, and thyme can be layered in during cooking to develop robust, layered flavors. The heat retention of Dutch ovens is ideal for large batch dishes, ensuring even cooking and consistent results across all ingredients. Like traditional pot roasts, you can deglaze with red wine after browning the meat to create a rich, flavorful sauce base that elevates your ground beef dishes. For added depth, consider reaching a safe internal temperature before serving to ensure your ground beef is fully cooked throughout. The Dutch oven’s ability to transition from stovetop to oven allows you to start your ground beef dishes on high heat for proper browning, then move directly into the oven for unattended, low-and-slow cooking. For outdoor cooking, utilize heat management with charcoal briquettes to maintain consistent temperatures throughout your ground beef recipes, whether you’re cooking over a campfire or in your backyard.
Essential Cooking Methods
Mastering a few key techniques will transform your Dutch oven ground beef dishes from good to exceptional. Your browning techniques set the foundation—cook ground beef over medium-high heat for five minutes, stirring often to guarantee even browning on all sides. Season with salt and pepper during this process.
Deglazing methods reveal deeper flavors. After browning, add a splash of wine or broth, scraping the pot’s bottom with a spatula for two to three minutes. This releases fond—those caramelized bits that intensify your dish’s complexity. Add garlic next, stirring for two minutes until fragrant. For enhanced depth of flavor, consider incorporating 2 to 3 minced garlic cloves along with aromatics like onions or shallots. A high-quality seasoning oil applied during cooking helps prevent rust and buildup on your cookware’s surface.
Once you’ve built this flavorful base, reduce heat to medium-low, cover your Dutch oven, and simmer gently. These foundational steps create rich, well-developed tastes that distinguish restaurant-quality meals from ordinary cooking.
Key Ingredients You’ll Need
The foundation of exceptional Dutch oven ground beef dishes rests on selecting the right ingredients in proper proportions. You’ll want 85/15 lean ground beef as your base—it delivers robust flavor without excess liquid. Your ingredients overview should include aromatics: ½ medium onion grated and 2-6 minced garlic cloves build depth. Cremini mushrooms (12 ounces quartered) contribute umami, while bell peppers and potatoes add texture and substance.
Binders matter too. You’ll use eggs, bread crumbs, and sour cream to create proper consistency and richness. Seasonings shape your flavor profiles: Worcestershire sauce, paprika, garlic powder, and fresh herbs like thyme and rosemary create complexity. These components work synergistically—each ingredient supports the others, producing layered, satisfying Dutch oven meals that justify their preparation time, and the ability to prepare and cook these dishes in under an hour makes them ideal for camping adventures. Like traditional Dutch oven cooking, layering ingredients strategically enhances both flavor distribution and cooking efficiency. For optimal results, ensure your ingredients are at consistent ambient temperature before combining them. Dutch ovens distribute temperature evenly, which helps ground beef cook uniformly throughout the pot. Searing the ground beef first creates a flavorful crust that develops rich sauces through the braising process. Lean ground beef provides essential protein and iron, making these one-pan dinners both nourishing and practical for busy weeknights.
Preparation Tips for Success
Once you’ve assembled your ingredients, proper technique transforms them into restaurant-quality Dutch oven dishes. Start your meal prep by treating ground beef with baking soda, salt, and water twenty minutes before browning—this guarantees maximum tenderness and moisture retention. When sourcing your meat, choose quality ground beef that’ll brown evenly at medium heat within five minutes.
Melt butter before adding beef and onions, seasoning with salt and pepper. Cook four to five minutes until mostly browned, then drain excess grease. This step prevents greasy, heavy dishes. After vegetables soften, thoroughly cook the meat through. Deglaze with wine or broth, scraping up flavorful browned bits from the pan bottom. Let liquid mostly evaporate in two to three minutes, concentrating flavors before adding remaining ingredients. Like Dutch oven chicken pot pie, maintaining consistent heat throughout the cooking process is essential for achieving ideal consistency in your beef dishes. A tight-fitting lid traps steam inside the Dutch oven, which helps develop more tender results and deeper flavors in your ground beef preparations. For optimal results when preparing Dutch oven beef casseroles, layer your tortillas, meat mixture, enchilada sauce, and cheese to create a cohesive dish that bakes evenly throughout. Consider using vacuum sealing techniques to prepare your ground beef in advance, which helps maintain moisture and flavor before cooking. By removing oxygen] through vacuum sealing, you can significantly reduce oxidation and extend the shelf life of your prepared ground beef portions. A vacuum sealer with multiple sealing modes allows you to adjust settings based on whether you’re preserving ground beef, marinated portions, or prepared sauces for your Dutch oven recipes.
Campfire and Outdoor Cooking
Your Dutch oven’s performance shifts dramatically once you move from kitchen to campsite, where heat management replaces precise stovetop control. For outdoor cooking, you’ll arrange charcoal briquettes underneath and atop your lid—typically 20 for a 10-inch oven, scaling up to 24–30+ for larger sizes. Sear your ground beef first, then add aromatics and liquids before covering for extended simmers. Adjust briquette placement to maintain steady heat; add more underneath if temperature drops, redistribute top coals to regulate doneness.
When preparing camping meals, brown ground beef thoroughly before building layers. For dishes like chili or beef stroganoff, allow 30–60 minutes covered cooking with occasional stirring. To prevent damage to your Dutch oven during outdoor cooking, use gentle tools rather than metal utensils that could scratch the enamel coating. If finishing with cornbread or potato toppings, pile additional coals on the lid and check progress with a toothpick. Like slow-roasting methods that achieve fork-tender results, your covered Dutch oven creates a moist environment that develops deep flavors in ground beef preparations. The tangy and buttery sauce characteristic of slow-cooked Dutch oven dishes can elevate your campfire meals with rich, complex flavors. Consider using a digital oven thermometer to verify your ground beef has reached safe internal temperatures without repeatedly opening your Dutch oven lid. After your outdoor cooking adventure, remember to thoroughly dry your Dutch oven and store it with paper towels inside to prevent rust and moisture damage. Ground beef provides 31.5 g Protein per serving, making it an excellent choice for sustained energy during outdoor adventures. A one-pot meal minimizes cleanup and equipment needed at your campsite, allowing you to focus on enjoying your outdoor experience.
Variations and Substitutions
While ground beef remains the foundation of these Dutch oven classics, you’ll find flexibility across proteins, vegetables, grains, and seasonings that’ll let you adapt recipes to your pantry and preferences. Consider protein alternatives like ground turkey, chicken, or pork to lighten traditional dishes without sacrificing heartiness. For vegetable enhancements, incorporate cremini mushrooms, bell peppers, jalapeños, or fresh carrots alongside your base ingredients. You can swap pasta shapes—egg noodles, shells, or elbow macaroni—depending on texture preferences. Adjust seasonings boldly: add tamari and bay leaves to goulash, layer taco seasoning into enchiladas, or enrich stroganoff with spicy brown mustard and dry red wine. The Dutch oven’s superior heat retention means minimal seasonings can develop complex flavors through slow-braising, allowing you to achieve restaurant-quality results with just a few key ingredients. For additional depth, try using grass-fed beef for a richer flavor profile that enhances the overall dish. The Dutch oven’s ability to retain and distribute heat makes it particularly effective for recipes requiring extended simmer times, ensuring even cooking throughout your ground beef dishes. The ConvEGGtor placement on your Big Green Egg helps distribute heat evenly for consistent cooking results across all your ground beef creations. When transporting finished casseroles to potlucks or gatherings, consider using vacuum seal bags to maintain freshness during travel, as proper vacuum sealing levels ensure optimal air removal and preservation. Store your finished casserole in a tight-sealed container in the refrigerator for up to 3 days to preserve the rich flavors and ensure freshness. Top finished dishes with cheddar, sour cream, or fresh parsley to customize flavor profiles to your taste.
Serving Suggestions and Storage
Now that you’ve perfected your Dutch oven recipe and customized it to your taste, how you serve and store it matters just as much as what goes into the pot. Employ proper serving techniques by presenting dishes hot—uncover foils carefully to release steam and allow stroganoff to thicken covered for 5-10 minutes before garnishing with parsley, dill, or cracked pepper. Layer mashed potatoes on shepherd’s pie for a golden crust; finish enchilada casseroles with melted cheese for visual appeal and texture.
For food storage, drain excess grease from meat mixtures before assembly, preventing spoilage. Check potatoes and carrots with a fork for complete doneness before refrigerating leftovers. Store leftovers in airtight containers to maintain freshness and prevent odors from affecting other foods in your refrigerator. Store stroganoff after sour cream fully blends and thickens. Avoid storing acidic tomato-based dishes long-term in enameled Dutch ovens, which can cause deterioration. The exceptional heat retention properties of Dutch ovens also help maintain optimal temperatures during storage and reheating. Reheat covered skillets on the stovetop, stirring frequently to maintain juiciness and tenderness. For optimal enjoyment of communal meals like Slumgullion, consider serving directly from the 12-inch Dutch oven to preserve heat and foster shared dining experiences.