You can use oven cleaner on cast iron, but you’ll need sodium hydroxide-based formulas like Easy-Off Heavy Duty to effectively strip seasoning without compromising the metal. Non-lye cleaners won’t work and can leave residue that prevents re-seasoning. You’ll want chemical-resistant gloves, eye protection, and proper ventilation during application. After treatment, neutralize remaining lye with a vinegar-water solution, then thoroughly dry your skillet. The reseasoning process that follows determines your pan’s long-term durability and non-stick performance.
Best Oven Cleaner Products for Cast Iron
When you’re stripping seasoning from cast iron, the active ingredient matters far more than the brand name. You’ll want sodium hydroxide (lye) listed as the primary active ingredient—it chemically breaks down organic seasoning and carbonized buildup effectively. Easy-Off Heavy Duty aerosol is widely recommended because its thick foam adheres to vertical surfaces and maximizes contact time. Generic lye-based aerosol cleaners perform similarly if sodium hydroxide concentration is comparable. Avoid fume-free variants; they substitute lye with weaker chemistries that won’t fully strip seasoning. For cast iron maintenance involving multiple pieces or heavy buildup, consider commercial lye formulations in controlled bath settings. The process may take 24-48 hours for optimal results depending on the severity of buildup and environmental conditions. Always check product labels for cast iron exclusions before purchasing cleaning alternatives. Note that Weiman Stove & Oven Cleaner is not suitable for cast iron, making it an inappropriate choice despite its effectiveness on other cookware. Like other cookware used in Dutch oven ground beef recipes, cast iron requires proper seasoning maintenance to prevent rust and ensure even heat distribution. Properly seasoned cast iron, similar to Dutch ovens used for one-pot meals with root vegetables, distributes heat evenly across the cooking surface for consistent results. Many outdoor enthusiasts also use cast iron Dutch ovens to prepare camping desserts that benefit from the same careful maintenance and seasoning practices. After stripping and cleaning, apply a light coat of oil] to maintain the skillet’s seasoning and prevent rust, ensuring you thoroughly dry the skillet] before oiling to prevent moisture damage. Prioritize PPE and proper ventilation when using any lye-based product.
How to Apply Oven Cleaner to Your Skillet
Successful oven-cleaner application hinges on three preparatory steps: confirming sodium hydroxide’s presence on your product label, gathering appropriate PPE (chemical-resistant gloves, eye protection, long sleeves), and establishing a well-ventilated workspace—ideally outdoors. Before spraying, remove loose debris with a brush, then place your skillet on nonreactive plastic sheeting to contain runoff. Apply a thick, even foam coating to all seasoned surfaces, ensuring complete coverage. Enclose the treated skillet in a sealed plastic bag to maintain foam activation; check progress after 24 hours. Easy Off Heavy Duty is recommended as a sodium hydroxide cleaner for optimal results on cast iron. For heavy buildup, reapply oven cleaner types containing sodium hydroxide rather than reduced-odor formulations. Proper food storage methods like vacuum sealing can teach us similar principles about sealing containers to preserve quality and prevent contamination. For cast iron with stubborn baked-on residue, baking soda solutions offer a gentler alternative that loosens food without damaging the surface. After cleaning, applying a thin coat of high smoke-point oil helps maintain and build up the seasoning layer. Avoid prolonged exposure beyond recommended inspection intervals to prevent excessive metal corrosion. Safety precautions including gloves and protection are essential when handling cleaning solutions to protect your skin and eyes. Once the oven cleaner has done its work, thoroughly rinse the skillet with warm water and immediately dry it by heating on a stovetop or in an oven to evaporate all moisture and prevent rust. Similar to how a thermometer requires proper acclimation to the environment before delivering accurate readings, your skillet should reach ambient temperature before applying oven cleaner to ensure consistent chemical activation across all surfaces. This methodical cast iron maintenance approach maximizes seasoning removal while protecting your cookware’s integrity.
Step-by-Step Application Process
Though oven cleaner application seems straightforward, methodical execution protects your cast iron’s structural integrity while maximizing seasoning removal. You’ll spray Easy-Off Heavy Duty oven cleaner thoroughly across all surfaces, including the backside, ensuring even coverage. The lye-based formula targets organic solids effectively, dissolving built-up residue as the jet black finish turns glossy. Seal your bagged skillet tightly to contain fumes safely. After heating at 200°F, you’ll wipe away dissolved material completely. Repeat applications address heavily seasoned skillets requiring multiple cycles. For heavily gunked vintage skillets, you may need to extend soaking to three or four days for optimal results. This systematic approach demonstrates oven cleaner benefits for cast iron maintenance by stripping to bare metal without damaging the underlying structure. Your methodical attention prevents oversaturation while achieving ideal restoration results. Once the rust and seasoning are removed, seasoning the cast iron multiple times using polymerization through high heat will restore the protective coating and prevent flash rust. Unlike harsh oven cleaners, you can also use kosher salt or baking soda as gentle abrasives to scrub off stubborn burnt areas without compromising the skillet’s integrity. For additional preservation techniques, consider that avoiding harsh detergents and excessive water helps maintain your skillet’s integrity long-term. Remember to immediately dry with a towel after the cleaning process to prevent moisture buildup and rust formation.
Essential Safety Equipment and Precautions
Before you begin stripping your cast iron with oven cleaner, you’ll need to assemble thorough safety equipment that protects against the lye-based formula’s caustic properties. Wear thick rubber gloves and safety glasses to shield your hands and eyes from chemical splashes. Use a breathing mask or dust mask to prevent respiratory exposure to harsh vapors.
Your safety procedures should include working outdoors or in well-ventilated areas with oven vent fans running. Spray skillets inside a trash bag to contain fumes and prevent ground contamination. Keep children away from your treatment area entirely. The lye chemical composition in oven cleaner makes it especially important to avoid skin contact and inhalation of vapors during the stripping process. Have a 50/50 vinegar solution readily available as a precautionary measure for any spills or breathing difficulties that may occur. After the oven cleaner has worked to dissolve built-up organic solids, you’ll need thorough rinsing to remove all chemical residue from the skillet. For additional hand protection during the drying and handling phase, consider using heat-resistant handle covers to prevent burns as you work with the still-warm skillet. Unlike the versatility of Dutch ovens for everyday cooking, cast iron requires this specialized chemical treatment only when restoration is necessary. Cast iron’s natural magnetic properties make it an ideal material for restoration projects that demand careful chemical handling. Similar to how continuous temperature monitoring ensures precise cooking results, constant vigilance during the chemical stripping process protects both your safety and the skillet’s restoration quality.
Even in ventilated spaces, don’t skip respiratory protection—the caustic chemical vapors demand consistent precautions. This combination of protective equipment and deliberate safety procedures guarantees you’ll safely restore your cast iron without compromising your health or your skillet’s integrity.
Neutralizing Lye Residue After Treatment
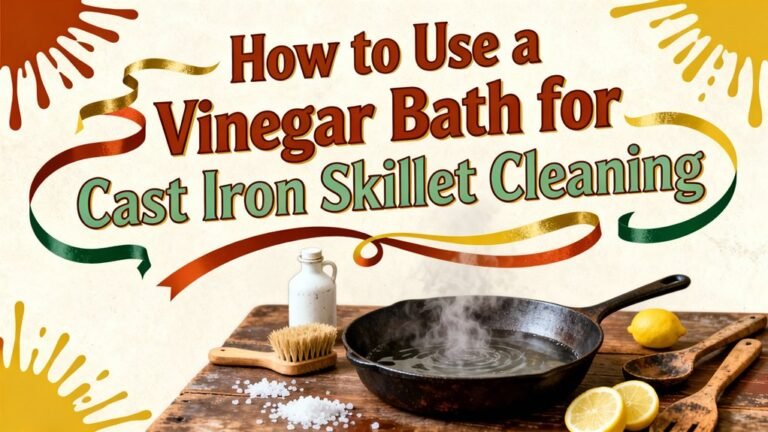
Once you’ve removed your skillet from the oven cleaner solution, your work isn’t finished—you’ll need to methodically neutralize the caustic lye residue clinging to the iron’s surface. Start with a high-pressure rinse under running water for several minutes to flush away bulk lye and saponified residues. For enhanced lye safety, apply a brief vinegar-water solution (1:1 to 1:4 ratio) to neutralize remaining alkalinity—but avoid prolonged contact that risks etching. Follow with hot soapy water and scrubbing to eliminate dissolved fats and films. Your neutralization methods should conclude with thorough drying using a towel and low oven heat, similar to the careful heat management used when baking cast iron cookware for extended periods. Unlike vinegar, the lye bath does not etch or pit the metal, making it an effective restoration method. Short vinegar applications are particularly useful because prolonged soaking can damage the iron surface, so timing is critical during the neutralization phase. Always handle residual lye with care as it can make cast iron slippery and hazardous. Verify success using pH test strips targeting neutral pH (6.5–7.5) on final rinse water before seasoning.
Why Non-Lye Cleaners Don’t Work
While non-lye oven cleaners might seem like a gentler alternative for cast iron restoration, they won’t effectively strip your skillet’s seasoning or remove stubborn carbonized buildup. These solvent-based formulations dissolve surface grease but can’t break the cross-linked bonds of polymerized seasoning fused to your iron. The effects of solvents are superficial—they soften deposits without detaching heat-polymerized residues anchored in microscopic crevices.
Worse, residual solvents inhibit proper re-seasoning by preventing oil adhesion and creating uneven surface conditions, similar to how certain materials lack the appropriate texture and structure needed for reliable performance. You’re left with trapped chemical residues and patchy seasoning that chars unpredictably. Unlike properly seasoned cast iron that demonstrates excellent heat retention, compromised seasoning fails to perform reliably. Effective seasoning requires polymerization of oil into the pan’s surface to create a durable nonstick layer, achieved through heating the oiled pan over medium heat until the oil bonds with the iron. For heavily rusted griddles, oven cleaner as a stripping agent followed by sanding can remove extensive rust before proper re-seasoning. Unlike harsh oven cleaners, warm soapy water and a soft sponge provide safe, effective cleaning that preserves your skillet’s seasoning without chemical damage. Proper cast iron maintenance requires mechanical removal or lye-based stripping to genuinely restore your skillet and maintain its nonstick surface for years to come. Manufacturer guidance explicitly warns against this approach because the results compromise your skillet’s restoration and durability. Mechanical removal or lye-based stripping remains the proven method for genuine seasoning restoration.
Alternative Stripping Methods for Cast Iron
If you’re committed to restoring your cast iron skillet without resorting to lye-based oven cleaners, you’ve got several proven alternatives—each with distinct tradeoffs between effectiveness, safety, and surface preservation.
Mechanical stripping using steel wool, chainmail scrubbers, or fine-grit sanding removes seasoning and light rust without harsh chemicals. For heavy buildup, abrasive blasting with walnut shell or soda safely strips to bare metal while preserving your pan’s profile.
Thermal stripping through self-cleaning cycles or controlled open-flame burnoff oxidizes seasoning away, though you’ll risk uneven heating and potential warping on older pieces. Combining heat with gentle scraping minimizes chemical exposure and mechanical stress. After any stripping method, hand washing is required to remove all debris and particles before the reseasoning process begins. A chain mail scrubber proves particularly effective for removing rust without damaging the underlying metal.
Both methods demand immediate post-treatment: thorough cleaning, complete drying, and high-temperature reseasoning to prevent flash rust and rebuild protective layers.
What Happens When Using Self-Cleaning Ovens
Self-cleaning cycles strip cast iron through thermal pyrolysis rather than chemical action, heating your skillet to 800–900°F over 2–4 hours to carbonize seasoning and oxidize surface buildup into ash. While this oven self cleaning method effectively eliminates food residue, it destroys your skillet’s protective seasoning layer completely. The extreme temperatures strain cast iron’s structural integrity, risking interior cracking and warping that compromise future cooking performance.
For cast iron maintenance, self-cleaning ovens present significant drawbacks. You’ll need extensive manual wipe-down afterward to remove ash residue, defeating convenience purposes. The thermal shock can weaken the metal itself. Additionally, high-heat exposure generates potentially harmful fumes and carbon monoxide risks if heavy buildup exists. Repeated high heat exposure from self-cleaning cycles can also blow electrical fuses in aging ovens, creating additional safety concerns. Using an instant-read thermometer can help you verify safe cooking temperatures on cast iron cookware without relying on potentially damaging self-cleaning methods.
Instead, preserve your cast iron’s seasoning through gentle hand-washing and oil conditioning—protecting both the cookware’s longevity and your investment. Proper seasoning maintains the non-stick surface that ensures superior cooking results and easy cleanup. Unlike ceramic cookware, cast iron’s superior heat retention properties allow it to maintain consistent temperatures essential for optimal cooking performance. Cast iron cookware can last for generations when properly maintained, making it a worthwhile investment for any kitchen.
Reseasoning Your Cast Iron After Cleaning
Once you’ve cleaned your cast iron, you’ll need to immediately begin the reseasoning process to restore the protective layer you’ve removed. Your reseasoning techniques should prioritize polymerization—the molecular bonding of oil at high heat that creates durable seasoning.
Start by applying a thin, even layer of high-smoke-point oil like vegetable or canola oil using a lint-free cloth. Wipe away excess completely, leaving only an invisible film. Coat all surfaces including the exterior and handle. For superior heat stability and durability, consider using beef tallow, a natural option with exceptional performance characteristics.
Place your pan upside down in a preheated 450-500°F oven for one hour, positioning foil on the lower rack to catch drips. The seasoning benefits accumulate through multiple coats—apply at least six layers for maximum non-stick performance. This layering method mirrors the resilient, non-stick layer that develops naturally through consistent cooking and proper maintenance. Proper seasoning involves heating the oil to its smoke point so it bonds chemically with the cast iron. Cool completely in the oven to verify proper adhesion, then repeat the process as needed. Building seasoning through regular use and proper maintenance will help preserve your skillet’s non-stick surface and ensure long-lasting performance over time.