You’ll create a restaurant-quality chicken pot pie by layering shredded chicken, sautéed vegetables, and creamy sauce in your cast iron skillet, then topping it with a golden pie crust. The skillet’s superior heat retention guarantees perfectly cooked filling and crispy edges every time. Bake at 375–425°F for 45–75 minutes until the crust turns golden and the filling reaches 165°F. Uncover how strategic techniques elevate this classic comfort dish from simple to spectacular.
Ingredients and Equipment
Before you assemble your cast iron skillet chicken pot pie, you’ll want to gather the right components—a task that’s simpler than you might think. Your ingredient proportions form the foundation: butter and flour create a roux base, while chicken stock and cream build a silky filling. You’ll need about 2 cups shredded chicken, 1.5–2 cups stock, and ¼–½ cup dairy, seasoned with salt, pepper, and fresh thyme.
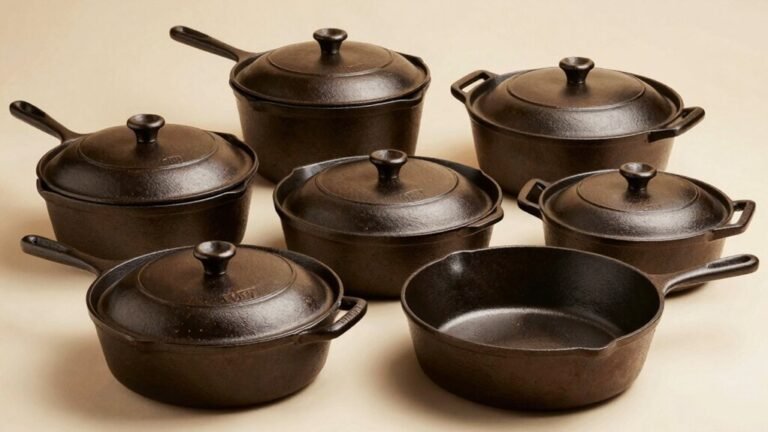
Equipment essentials include a 10–12″ oven-proof cast iron skillet for browning and baking. Grab a rimmed baking sheet to catch drips, pastry brush for egg wash, wooden spoon for stirring, and whisk for smoothing sauce. A rolling pin shapes your crust—store-bought or homemade—and oven mitts protect your hands. An oven thermometer guarantees accurate baking at 375°F, ensuring your pie crust achieves the perfect golden-brown finish. Cast iron’s heat retention properties make it especially effective for creating an evenly cooked pot pie with a beautifully browned bottom crust. Consider using boneless, skinless chicken thighs as your protein base, as they provide excellent flavor and texture when cubed and browned in the skillet. For added flavor, include minced garlic when melting your butter in the initial stages of sauce preparation.
Preparing the Chicken and Vegetables
Start by choosing your chicken—bone-in thighs deliver richer flavor and juicier texture, while boneless skinless thighs or breasts offer leaner options that shred more easily. Cook your chicken to 165°F (74°C) in simmering stock or a hot skillet, then rest it to 170°F before cubing or shredding into 1/2–1-inch pieces. Using a meat thermometer ensures you reach the safe internal temperature by checking the thickest part of the meat rather than relying on visual cues. Remember to allow the thermometer reading to stabilize before reading the temperature to ensure accuracy.
For vegetable cutting, dice carrots and celery to roughly 1/4–1/2 inch, finely chop onion, and cut potatoes into 1/2-inch cubes. Par-cook larger starches to guarantee tenderness after baking. Sauté your aromatics in butter over medium heat for 4–6 minutes, adding garlic near the end. After cooking, allow your cast iron skillet to cool before washing with warm water and a brush to remove any stuck-on food, as this gentle approach helps maintain the seasoning built up over time. Rotisserie chicken serves as a convenient time-saving option if you prefer to skip the cooking step entirely. One skillet dinners minimize clean-up while delivering comfort food that works perfectly for cold nights. Aim for equal volumes of cooked chicken and vegetables—approximately a 1:1 ratio by volume—to balance texture and filling density throughout your pot pie.
Building the Creamy Sauce
Once you’ve sautéed your aromatics to golden perfection, it’s time to build the sauce that’ll bind everything together. Start by melting butter over medium heat, then whisk in flour to create a smooth paste. Cook this roux for 1-2 minutes to eliminate any raw flour taste.
Gradually add chicken broth, whisking constantly to prevent lumps from forming. Pour in milk or heavy cream to achieve that velvety sauce consistency. For flavor variations, stir in thyme (½-3 tsp), garlic powder, onion powder, and salt and pepper to taste. Simmer on medium-low for 5-15 minutes, stirring frequently until your sauce thickens. You’ll know it’s ready when bubbles appear. This creamy filling will combine chicken, vegetables, and potatoes into a savory, cohesive mixture. Remove from heat and let cool 30 minutes before assembly—this creates the perfect binding agent for your filling, making it ideal for bringing to those in need such as new parents or sick friends who will appreciate this comforting homemade meal.
Assembling the Filling
The magic of a cast iron skillet chicken pot pie lies in balancing three essential components: protein, vegetables, and starch. You’ll want roughly 2–3 cups cooked, shredded chicken to 1.5–2 cups total vegetables for ideal filling texture. Dice carrots and celery into uniform 1/4–1/2″ pieces, ensuring even cooking throughout.
Your moisture balance hinges on the sauce consistency—aim for a thick gravy that clings to a spoon rather than pooling freely. Before assembling, let your cooled filling rest 3–7 minutes in the skillet, allowing it to settle and preventing excess bubbling when you add the crust. For optimal results, melt butter in a cast iron skillet over medium-high heat and sauté onions and garlic until fragrant and translucent before adding your other ingredients. To enhance flavor depth, consider incorporating simple seasonings like celery seed and garlic powder into your roux mixture for a more traditional pot pie taste.
Layer strategically: chicken first to protect the bottom crust, then your vegetable-gravy mixture on top. This approach maintains crispness while distributing flavors evenly across every bite. For a professional finishing touch, you can use a kitchen torch to lightly char the pie crust edges after baking for added color and depth.
Preparing and Topping With Pie Crust
With your filling settled and ready, it’s time to build the framework that’ll transform your cast iron skillet into a golden-brown masterpiece. Remove your second pie crust from crust storage and unroll it carefully over your filling. Using proven pie crust techniques, fit the dough across the top and fold the edges under, pressing them firmly against the bottom crust to create a secure seal. Crimp the edges decoratively for both aesthetics and adhesion. Cut several slits into the center for steam venting—this prevents pressure buildup during baking. Brush the entire surface with beaten egg wash for that coveted golden finish. Like Dutch oven cooking, proper heat distribution is essential for achieving even baking results. A well-seasoned cast iron surface, created through oil polymerization, helps ensure your pot pie bakes evenly without sticking. Allow the assembled pot pie to come to room temperature before placing it in the oven to ensure even baking throughout. For precise results similar to candy making, consider using a digital probe thermometer to verify your pot pie has reached the proper internal temperature. For extended storage before baking, consider using freezer burn prevention techniques to maintain quality if you need to prepare the pot pie in advance. You can also prepare the pie crust dough ahead of time using minimal equipment, similar to no-knead bread methods that don’t require specialized cookware. These final touches guarantee your pot pie bakes evenly while developing a perfectly crisp, caramelized exterior that’ll impress anyone at your table.
Baking and Browning
As your pot pie enters the oven, you’ll want to strike a balance between crisping that gorgeous top crust and gently heating the filling through without scorching the edges. Position your cast iron skillet on a rimmed baking sheet and bake at 375–425°F with the rack centered for even heat distribution. Apply egg wash beforehand for a deep golden finish. Monitor for bubbling filling and golden crust as your primary doneness cues; baking typically takes 45–75 minutes depending on crust variations and temperature. Different baking techniques suit different pastries—puff pastry requires initial high heat for oven spring, while traditional dough benefits from moderate temperatures. Always verify the filling reaches 165°F internally before removing from heat. For optimal results, ensure sauce reduction to approximately 2 1/2 cups before assembly to maintain proper moisture levels in your pot pie filling. Consider using vacuum sealing to prepare individual pot pie portions in advance, which extends freshness and streamlines reheating for quick meals. The blind baked crust should be slightly undercooked before pouring in the prepared filling to prevent over-browning during the final bake. Cast iron skillets, known for their substantial weight, can also help press out excess moisture from ingredients before assembly if needed. The even temperature distribution that cast iron provides ensures your filling heats uniformly while the crust achieves that perfect golden-brown exterior. Using a trivet between your skillet and the oven rack can further improve heat distribution and prevent the bottom crust from burning. For an advanced finishing touch, consider using a kitchen torch to selectively caramelize the crust edges and achieve a professional appearance with precise flame control.
Troubleshooting Common Issues
Even when you’ve followed every step meticulously, your cast iron pot pie can still encounter problems that compromise texture, flavor, and appearance.
Overcrowding effects devastate your skillet’s performance. When you cram ingredients together, steam replaces searing heat, leaving vegetables limp and chicken pale. Cook in batches instead to maintain the dry environment your cast iron demands. Undercooking vegetables before adding them to your skillet can result in uneven texture, so par-cook tougher vegetables through blanching or sautéing beforehand.
Your oil selection matters critically. Unclarified butter scorches edges while extra virgin olive oil breaks down, creating sticky residue. Choose high smoke point oils like avocado or grapeseed to prevent smoking kitchens and guarantee proper non-stick performance. Thin oil application prevents the sticky surface that compromises your crust’s crispness.
Finally, insufficient crust venting causes trapped steam to separate your top layer from filling. Cut decorative slits before baking, and monitor browning every 10-15 minutes, rotating your skillet for even golden results.