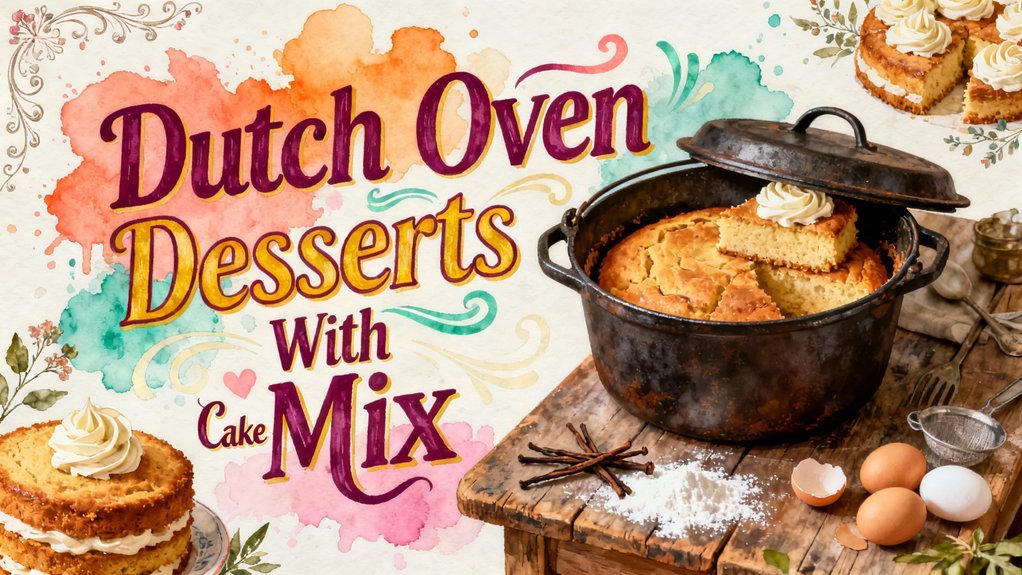
You’ll love how easy Dutch oven desserts are with cake mix! Just layer your favorite pie filling, sprinkle dry cake mix on top, drizzle melted butter, and bake at 350°F until golden. Cherry chocolate, strawberry shortcake, and fruit cobbler variations are crowd-pleasers that need minimal equipment and tolerate small mistakes. The beauty? You can customize flavors to match your preferences. Whether you’re camping or hosting backyard gatherings, these dump cakes deliver foolproof results every time. Want to master the techniques that’ll take your Dutch oven desserts to the next level?
What Makes Dump Cakes Perfect for Camping
When you’re planning a camping trip, the last thing you want to do is haul a kitchen’s worth of equipment into the wilderness. Dump cakes solve this problem perfectly. You’ll need only a Dutch oven, basic tools, and a spoon—nothing more. These easy campsite desserts require no mixing bowls or electric mixers; you simply layer ingredients directly into the pot. Their straightforward approach makes them ideal family friendly recipes that kids can help prepare. The name originates from the dumping method, which involves simply pouring each ingredient into the pot without any complex mixing. Visual cues like a golden top tell you when they’re done, eliminating guesswork. Shelf-stable cake mix and canned peaches mean minimal refrigeration needs. For large group camping events, multiple Dutch ovens can be utilized to prepare desserts for 75-100 people at once. The same slow-braising techniques used for savory Dutch oven dishes can also be adapted for creating rich, flavorful desserts with minimal effort. Proper seasoning and preparation of your Dutch oven, similar to cast iron skillet maintenance, ensures even heating and prevents sticking during the baking process. Preheating your Dutch oven to the appropriate temperature, much like preheating to 475-500°F, helps achieve an evenly baked dessert with a golden brown top. Because dump cakes tolerate small mistakes, you’ll still end up with delicious results even if your camping setup isn’t perfect.
Cherry Chocolate Dump Cake Recipe
Now that you’ve got the dump cake concept down, it’s time to put it into practice with a recipe that’ll have your camping crew asking for seconds. This cherry chocolate dump cake combines a delightful cherry blend with decadent chocolate richness that’s hard to resist.
Start by spreading two 21-ounce cans of cherry pie filling across your prepared 9×13-inch baking dish. Sprinkle one box of chocolate cake mix evenly over the cherries, then drizzle three-quarters to one cup of melted butter across the top. Skip the stirring—the magic happens when you bake at 350°F for 35 to 60 minutes until golden brown. The no mixing required approach makes this an ideal choice for outdoor cooking when you want to minimize preparation steps. For best results, allow the melted butter to create a crust during the baking process. Like the versatility of using a cast iron Dutch oven, this dump cake method works equally well in conventional ovens or over outdoor coals. Unlike more complex stovetop preparations that require careful heat management, this dump cake method eliminates the need for deglazing the pot with additional liquid. Before you begin baking, ensure your cooking area is well-ventilated to allow heat and moisture to escape safely during the cooking process. This straightforward technique relies on fruit filling and melted butter to create the moist, cake-like topping that makes dump cakes so effortless.
Cool briefly, then serve with vanilla ice cream or whipped cream. If you’re preparing this dessert ahead of time, consider that proper storage methods like vacuum sealing can help preserve any leftovers for extended periods. You’ve just created a camping dessert that tastes like you spent hours preparing it.
Strawberry Shortcake Style Dessert
If you’ve mastered the dump-cake format, you’re ready to bring classic strawberry shortcake to your campfire—and you’ll do it without separating fruit, cake, and topping into different components. Layer fresh strawberries or pie filling directly in your 10–12″ Dutch oven, then sprinkle dry cake mix over top. Add 6–12 oz of Sprite or water to hydrate the mix evenly, preventing dry pockets. Dot with butter or cream-cheese dollops for richness. Your cake toppings can include graham-cracker crumbs, freeze-dried strawberries, or mini marshmallows to enhance texture and flavor. This balanced dessert combines the fruit and cake elements that make strawberry shortcake so beloved at outdoor gatherings. Like a traditional pot roast that develops flavor through proper heat management, your Dutch oven dessert requires consistent oven temperature to bake evenly. For best results, line your dutch oven with parchment paper to make cleanup effortless after your campfire meal. To ensure even baking and prevent undercooked sections, use a high-temperature thermometer to verify your coals are maintaining consistent heat. Modern wireless thermometer technology with multi-probe temperature monitoring can help you track both your Dutch oven heat and the internal doneness of your dessert simultaneously for foolproof results. If you’re preparing ingredients ahead of time, consider using freezer-quality zipper-lock bags to store your pre-measured cake mix and other dry components for convenient campfire cooking. After serving, remember that thoroughly drying your cookware prevents rust and maintains its longevity for future outdoor meals. Bake using roughly 10 bottom and 20 top coals for approximately 30–35 minutes until a toothpick comes clean. Serve warm with vanilla ice cream to complete the strawberry variations experience.
Fruit Cobbler Variations
Once you’ve nailed the dump-cake format, you’re ready to explore the endless possibilities of fruit cobbler variations—and the beauty of this method is its flexibility. Smart fruit pairings make all the difference: pair peaches with yellow cake mix, berries with white cake mix, or cherries with chocolate cake mix for deeper contrast. You’ll control cobbler texture by adjusting butter amount—more butter creates moisture, less yields crumbly results. Mix dry cake mix with melted butter for a uniform topping, or leave it dry for drop-biscuit texture. Drain syrupy canned fruit to prevent sogginess, especially with juicy fresh peaches. The trapped steam created during the initial baking phase helps develop a golden exterior while maintaining a tender interior texture. For even heat distribution throughout your cobbler, rotate the pot and lid periodically during the baking process to ensure consistent cooking results. Cast iron’s superior thermal mass and heat retention properties make it particularly effective for maintaining the consistent temperatures that cobblers require throughout the baking process. The Dutch oven’s exceptional heat retention and distribution properties ensure that your cobbler develops those rich, complex flavors that make this dessert so memorable. Proper seasoning and maintenance of your Dutch oven will ensure it continues to perform beautifully across all your dessert endeavors. A 5 quart Lodge Dutch Oven is the ideal vessel size for achieving perfectly baked cobblers with optimal heat retention and capacity. Like traditional pot roast recipes that rely on slow-baking to achieve tender results, cobblers benefit from consistent oven temperatures and extended cooking times. Each variation transforms your Dutch oven into something uniquely delicious, so don’t hesitate experimenting with your favorite flavor combinations.
S’mores Cake Method
S’mores lovers, your Dutch oven‘s about to become the ultimate campfire upgrade. This s’mores inspiration transforms classic campfire treats into a stunning layered dessert that’ll impress everyone gathered around.
Start by placing cake pieces in your Dutch oven’s base, then crumble graham crackers and mix them in for that authentic s’mores flavor. Layer broken Hershey’s chocolate bars next—this chocolate layering is key to creating those rich, melty pockets throughout. This recipe yields 12 servings perfect for feeding a crowd at your campsite.
Top everything with jumbo marshmallows in a single layer, then set your Dutch oven over medium coals for 10-15 minutes until the marshmallows turn golden brown. For the perfect finish, use a torch or fresh coals to toast them to caramelized perfection. Check frequently to prevent burning and ensure your marshmallows reach the ideal golden-brown doneness. Dutch ovens are incredibly versatile for campfire cooking and can handle various outdoor dessert recipes beyond s’mores. Like cast iron cookware, Dutch ovens benefit from proper seasoning and maintenance to ensure long-term durability and optimal cooking performance. The even heat distribution that Dutch ovens provide is particularly valuable when baking desserts that require consistent temperatures. For best results, always preheat the Dutch oven with the lid on before adding your dessert mixture to prevent cracking.
You’ll create a show-stopping dessert that captures everything you love about s’mores, served right from your Dutch oven.
Additional Flavor Combinations
Beyond s’mores, your Dutch oven dessert possibilities are practically endless. You can explore new flavor pairings by matching fruits with complementary cake mixes—cherry filling with chocolate cake creates a Black Forest–style dessert, while apple pie filling pairs beautifully with spice cake to enhance warm cinnamon and nutmeg notes.
Don’t shy away from unexpected ingredient combinations. Try root beer with spice cake, or ginger ale with pear filling for surprising depth. Layer in texture enhancers like nuts, oats, and brown sugar for crumble toppings, or fold citrus zest into berry fillings for brightness. Consider lining the bottom of your Dutch oven with parchment paper to make cleanup easier after creating these delicious desserts. The cast iron construction of your Dutch oven heats slowly and evenly, which helps maintain consistent temperatures throughout baking and reduces temperature spikes that could affect your delicate dessert layers. For ingredients like berries and fillings you plan to freeze after baking, consider storing them in vacuum sealer bags to extend their freshness and prevent freezer burn. Vacuum sealing extends shelf life by removing air and moisture that cause deterioration in frozen baked goods. Unlike traditional baking vessels, alternative baking pans such as stoneware and casserole dishes can also be used for similar dessert creations when cast iron isn’t available. Just as with savory cooking, achieving proper temperature control is essential for consistent baking results across different cooking vessels.
Your soda choice matters too. Lemon-lime sodas lighten most combos, while cola deepens chocolate profiles. These versatile combinations let you customize every Dutch oven creation to match your preferences.
Essential Tips for Dutch Oven Baking
As you’re perfecting those flavor combinations, you’ll want to master the fundamentals of Dutch oven baking—because the best dessert won’t shine if the technique falters.
Start by preheating your Dutch oven with the lid on to create even heat and trap steam for consistent rise. When working with cake mix variations, reduce liquid by about 5–10% since the enclosed environment retains moisture differently than traditional ovens. Line your pot with parchment or grease it thoroughly to prevent sticking. The Dutch oven’s thick cast iron and tight-fitting lid enable superior heat distribution compared to standard bakeware.
Use indirect heat underneath—avoid scorching bottoms by adding coals later or using a trivet for height adjustment. Rotate your pot midway through baking to correct uneven browning. Keep the lid on initially to trap steam for moisture, then remove it near the end for browning. This seamless transition from covered to uncovered baking mimics the versatile cooking methods that make Dutch ovens essential in any kitchen. Test doneness with a toothpick and gentle jiggle, expecting longer bake times than conventional recipes require. Metal or ceramic covered pots mimic professional oven conditions by providing superior heat retention compared to standard home ovens. A 5 to 6-quart Dutch oven is ideal for most cake mix desserts as it provides adequate space for dough expansion while maintaining proper heat circulation. The Dutch oven’s reliable cast iron cookware construction makes it particularly effective for achieving consistent results with desserts compared to lighter bakeware options. Proper storage of your finished Dutch oven desserts can extend their shelf life significantly when you utilize freezer preservation techniques.
Serving and Storage Suggestions
You’ve mastered the baking—now comes the best part: getting your Dutch oven dessert onto the table where it’ll shine. Serve your creation warm (110–140°F) to maximize flavor and let cold ice cream melt beautifully into each bite. Let it rest 10–15 minutes after removing from heat so you’ll get cleaner slices.
Your portion sizes depend on the occasion: offer 2–3 ounces per person for casual family meals, 4–6 ounces for plated event desserts. Use a shallow spatula to lift slices from your oiled Dutch oven, preventing sticking and maintaining integrity.
For warming techniques, keep whole cakes hot up to two hours in an insulated cooler with a folded towel. Transport cooled desserts in flat containers, then reheat gently at 180–200°F before serving. Just as a meat thermometer ensures precision in savory dishes, checking your dessert’s internal temperature helps verify it’s heated through evenly. Refrigerate leftovers for three to four days, or freeze for two to three months.