You’ll create tender, flavorful pork by searing a 3–6 lb pork shoulder in a 6-quart Dutch oven, then braising it at 275–325°F for 2.5–4 hours until it reaches 195–205°F. Add quartered Granny Smith apples twenty minutes before completion, submerged beneath the braising liquid. Deglaze with chicken broth and vinegar to build rich layers. Serve sliced pork over mashed potatoes with softened apples and pan juices spooned overtop. Refrigerate leftovers within two hours; they’ll keep 3–4 days. The specific techniques for maximizing flavor and texture await your revelation.
Choosing Your Pork Cut and Apples
You’ll want to start with pork shoulder—also called Boston shoulder, pork butt, or Boston butt—because its hardy texture, abundant connective tissue, and relatively high fat content make it perfect for Dutch oven braising. This economical cut, typically under $2.00 per pound, transforms into tender, flavorful meat during low-and-slow cooking. The heavy Dutch oven provides even heat distribution for consistent cooking results. Avoid lean cuts like pork loin or tenderloin, which dry out during extended braising. The tight-fitting lid of your Dutch oven traps moisture effectively, basting the meat as it cooks and preventing the pork from drying out. For optimal results, ensure your cooking vessel sits on a stable surface with proper heat distribution underneath. Like many campfire cooking applications, Dutch oven braising allows you to create complex, satisfying dishes in outdoor settings. A quality enamel coating will protect your Dutch oven from rust and extend its longevity through years of use. Just as achieving a characteristic crust requires ample oil or butter, Dutch oven braising relies on adequate fat and moisture to develop rich flavors. To prevent damage to your Dutch oven, always begin with gradual heating rather than immediately applying high temperatures.
For apple varieties, select tart, firm apples such as Granny Smith that maintain shape during cooking. Honeycrisp or Fuji offer balanced sweet-tart flavor profiles. High-pectin varieties preserve texture at 300°F temperatures. Quarter apples into uniform 2-inch pieces, core them, and position around your pork. This pork cut selection paired with proper apple varieties guarantees premium flavor integration and textural consistency.
Essential Equipment and Vessel Selection
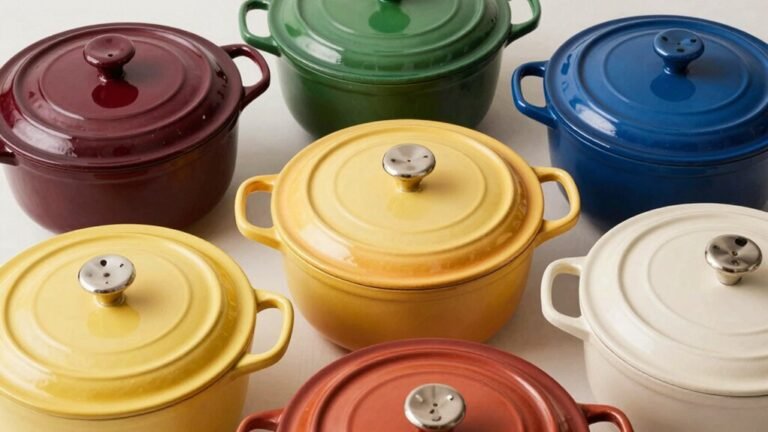
Once you’ve selected your pork shoulder and apples, the right equipment becomes your foundation for successful Dutch oven cooking. You’ll need a 6-quart Lodge Dutch oven, ideal for roasting substantial pork cuts while accommodating vegetables. This size distributes heat evenly across your roast’s surface. The Lodge brand is made in America and known for quality craftsmanship that ensures a lifelong relationship with your cookware. Proper seasoning and maintenance of your Dutch oven through regular oil coating will build a resilient non-stick layer that protects against rust and improves with use over time. The heavy, thick-walled construction of Dutch ovens provides superior heat retention and even distribution, creating ideal conditions for developing deep flavors through slow simmering. Combining your seasoned pork with root vegetables like potatoes, carrots, and onions creates a complete one-pot meal with balanced flavors and textures. The tight-fitting lid] of your Dutch oven ensures optimal moisture retention throughout the cooking process, allowing your pork and apples to braise together while preserving essential juices and flavors.
Invest in a quality lid lifter—either the Carolina Cooker model at $10.99 or the CampMaid award-winning option at $112.96—ensuring safe removal from hot coals. The Lodge Camp Dutch Oven Lid Lifter provides essential heat protection during campfire cooking. Long metal tongs enable precise coal placement on the lid and bottom simultaneously, critical for consistent heat regulation. A glass lid allows you to monitor your food without releasing heat or moisture during the cooking process.
Leather gloves like Wells Lamont Women’s ($15) protect your hands during Dutch oven maintenance and equipment manipulation. These accessories work synergistically to maintain proper heat control and extend your cookware’s lifespan through careful handling during high-temperature cooking sessions.
Preparing Your Ingredients
Selecting the right pork cut establishes the foundation for your Dutch oven success—pork shoulder (blade or Boston butt) delivers the collagen and marbling necessary for tender, shreddable meat after 2.5–3+ hours of braising, while pork loin or tenderloin produces firmer, sliceable results in 30–90 minutes if you tie or wrap lean cuts in fat or bacon to prevent drying. Trim excessive external fat while preserving a thin cap for moisture and flavor. Remove silverskin from tenderloin to enhance texture penetration.
For ingredient preparation, select firm, tart-sweet apples like Granny Smith or Honeycrisp—roughly 1–2 per 2 lb of pork. Slice them into thick wedges to prevent disintegration during cooking. Prepare onions and garlic as base aromatics; gather fresh thyme and rosemary for sustained flavor. Establish seasoning balance early with salt and pepper, then adjust post-braise for ideal depth. Golden Delicious apples are mild and juicy, making them another excellent option for creating a balanced sauce alongside your pork. When cooking in a Dutch oven, the enclosed environment ensures that the roast achieves beautiful tenderness throughout the braising process.
Searing and Building Flavor
Searing transforms the pork’s exterior through the Maillard reaction, developing the deep, caramelized crust that’ll anchor your Dutch oven braise with complex, savory depth. Heat 3-4 tablespoons of olive oil or bacon grease until smoking slightly, then place your seasoned roast fat-side down. Sear 3-4 minutes per side, checking doneness by lifting edges with tongs—you’ll achieve golden-brown results across all surfaces in approximately 10 minutes total.
After searing, build flavor layers by sautéing minced garlic and sliced onions until softened. Deglaze the pot with chicken broth, scraping up caramelized brown bits that’ll intensify your braise’s savory foundation. Real maple syrup can be added during the deglazing process to balance the savory flavors and complement the natural sweetness of the vegetables. Allow the pot to rest for a few minutes after deglazing to let fuel and components stabilize before proceeding. For optimal results, monitor the roast early during the braising process since Dutch ovens distribute heat efficiently and may require shorter cooking times than traditional methods. Once you reach the target internal temperature of 145°F, you’ll know the pork has achieved the ideal tenderness for slicing or shredding. Like glazed ham preparations, you can brush the roast with a glaze made from citrus and brown sugar during the final stages of cooking to add caramelized sweetness. These searing techniques create the essential flavor base that transforms your pork into a richly developed, restaurant-quality dish.
Braising and Cook Time Guidelines
Because your seared pork’s success hinges on steady, controlled heat, you’ll want to maintain your oven between 275–325°F for ideal collagen breakdown and moisture retention. Preheat thoroughly and use an oven-safe thermometer to prevent temperature swings that toughen meat.
For braising temperatures and cooking methods, timing depends on your cut. A 3–6 lb pork shoulder typically requires 2.5–4 hours until fork-tender, while leaner pork loin needs just 1–1.5 hours at 350°F to prevent dryness. Monitor internal temperature rather than relying solely on clock time—target 195–205°F for shredded texture or 145–160°F for sliceable meat. Using a 7-8 quart Dutch oven ensures optimal heat retention and even cooking throughout the braising process. The Dutch oven’s exceptional heat retention and distribution properties make it particularly effective for achieving the patient, even cooking required for developing rich, complex flavors. The crosshatch pattern cut into the fat helps seasonings penetrate deeply and promotes even browning during searing.
Check liquid levels only near completion. Add apples during the final 30–60 minutes at your braising temperature to soften without disintegrating.
Adding Apples and Finishing Touches
To maximize textural contrast and flavor enhancement, you’ll want to time your apple addition carefully during the final stages of braising. Introduce quartered apples 20 minutes before completion to maintain structural integrity while allowing adequate liquid absorption. For apple integration, submerge them beneath the braising liquid—a combination of cider, broth, and vinegar—guaranteeing even cooking and flavor distribution. Using a trivet helps prevent the bottom layer of apples from burning while ensuring proper heat distribution throughout the Dutch oven. Similar to traditional stew preparation, deglazing with vinegar can enhance the depth of flavor in your braising liquid. Like the braising techniques used for short ribs, covering the pot during cooking helps trap steam and moisture for optimal tenderness. For longer-term storage of leftover braised pork and apples, consider using resealable vacuum seal bags to preserve the dish while protecting it from freezer burn and oxidation. Proper seasoning of your cookware, much like the multiple rounds of seasoning used to restore cast iron, ensures optimal flavor development in every dish.
After resting the pork for 10 minutes covered, slice it against the grain. Arrange slices on a serving platter, surrounding them with softened apples and caramelized onions. The sweet and light sauce that develops from the pan drippings should be drizzled over each portion, concentrating the rich, concentrated braising liquids. This presentation method guarantees every serving receives balanced apple-to-pork ratios and ideal flavor delivery through the concentrated juices. Thicken leftover juices with flour or corn starch if you prefer a more luxurious sauce consistency.
Serving Suggestions and Storage
Your Dutch oven pork roast deserves a presentation that honors the effort you’ve invested in its preparation. Arrange sliced pork in overlapping rows on a warm platter, spooning braising juices and softened apples over each serving. Employ plating techniques like nestling meat atop mashed potatoes or polenta to catch flavorful juices. Garnish the platter with fresh thyme sprigs for visual appeal and an herbaceous touch.
Plan portion sizes at 6–8 ounces cooked pork per adult, paired with ½–¾ cup starch accompaniments. For serving styles, carve tableside for family service or arrange thin, overlapping slices for buffet presentations. The creamy mashed potatoes complement the dish particularly well when arranged as a bed for the tender braised meat. A well-marbled cut of meat ensures the pork remains succulent and flavorful throughout the slow-roasting process. The Dutch oven’s ability to trap steam and provide even heating creates the ideal environment for achieving tender, evenly cooked meat. Using a heat diffuser on your stovetop further promotes consistent temperature distribution for optimal braising results. This versatile cookware also excels at roasting and braising, making it perfect for transforming tougher cuts into tender, flavorful meals.
Refrigerate leftovers within two hours; consume within 3–4 days. For extended storage, consider using vacuum sealing to preserve leftovers in airtight containers for 2–3 months maximum. Reheat gently at 300–325°F with reserved pan juice, covered with foil, preventing dryness and preserving quality.