You’ll maintain your cast iron Dutch oven by cleaning it immediately after use with a stiff scraper and hot water—never dish soap. Dry it thoroughly with towels, then finish on a warm stovetop to eliminate moisture. Season periodically with thin oil coats at 450-500°F to create a rust-resistant surface. Store it in cool, dry locations with lids ajar for air circulation. Address light rust with vinegar solutions promptly. These foundational practices preserve your cookware’s performance and longevity across generations, though mastering advanced techniques will further enhance your results.
Cleaning Methods
Because cast iron Dutch ovens require different care approaches depending on their construction, understanding the proper cleaning method for your cookware is essential to maintaining its longevity and performance.
Start by using a stiff non-metal scraper or spatula to remove large food particles while your Dutch oven’s still warm, minimizing scrubbing needs. For enameled surfaces, employ plastic or nylon scraper types and brushes—avoid metal scouring pads that’ll scratch the finish. Rinse with hot water and agitate using stiff nylon cleaning tools until runoff runs clear, reducing your need for harsh cleaners. Always cool your Dutch oven to room temperature before washing to prevent thermal shock and potential cracking.
For baked-on residue, simmer water with baking soda for 8–10 minutes to soften deposits before scraping. If you’re using a camp or charcoal-cooked oven, remove ash from the rim and lid first to protect the seal’s integrity. For bare cast iron surfaces, the salt cleaning method effectively extracts impurities and loosens debris without harsh detergents. The coarse texture of kosher salt acts as a gentle abrasive that removes food particles and impurities when rubbed vigorously over the surface. After washing thoroughly, apply a light layer of cooking oil while the oven is still warm to maintain its seasoning. Once oiled, heat the Dutch oven until the oil begins lightly smoking to create a protective seasoned layer. For Dutch ovens with silicone handles or components, be mindful of the temperature limits of silicone when applying heat to prevent damage to non-cast iron elements. Avoid using dish soap and prolonged soaking to prevent rust and damage.
Drying and Moisture Control
Moisture is cast iron’s primary enemy, and you’ll prevent rust formation by ensuring complete dryness before storage. Use absorbent towels immediately after rinsing to minimize water dwell time on the surface. Finish drying on the stovetop or in a warm oven at 200–250°F for 5–15 minutes to eliminate trapped moisture within the metal’s pores. For optimal results, place the pot in the oven for a 10-minute drying session to ensure all moisture is evaporated before proceeding to the next stage.
Employ effective drying techniques by storing lids separately and ajar to permit air circulation. For enameled Dutch ovens, cool to room temperature first to prevent thermal shock before applying heat. Use felt cookware protectors between stacked pans to prevent moisture accumulation and maintain proper air circulation. You can verify proper drying by using non-contact temperature measurement to confirm the Dutch oven has cooled sufficiently after heat drying.
Address moisture absorption by storing your cookware in dry, well-ventilated areas away from sinks and steam sources. In humid climates, use silica gel desiccants within closed storage spaces to lower local relative humidity. Similar to how prolonged contact in raw conditions enhances flavor absorption in sous vide cooking, extended exposure to moisture promotes rust formation and should be minimized through consistent maintenance practices. Apply a light oil film while warm to create an additional moisture barrier.
Seasoning and Re-seasoning
Seasoning transforms your Dutch oven into a naturally nonstick, rust-resistant cooking surface through polymerization—a chemical process where oil bonds to iron under high heat and hardens into a protective, hydrophobic layer. Effective seasoning techniques require multiple thin cycles at 450–500°F for approximately one hour each, allowing gradual buildup rather than relying on single applications. Oil selection matters: drying oils like flaxseed polymerize readily, while high-smoke-point oils such as grapeseed or peanut offer practical reliability. Beef tallow is favored as a seasoning oil because it has a high smoke point of around 400 degrees Fahrenheit, allowing it to withstand high heat without burning or smoking. Avoid butter for seasoning due to its low smoke point, which causes it to burn quickly on heated cast iron. Apply extremely thin coats, wiping until the surface feels nearly dry to prevent sticky pooling. The oil must be heated to its smoke point to bond chemically with the cast iron and form a durable protective layer. Bake upside-down with foil underneath to catch excess. Cool completely in the oven. For heavily stripped iron, repeat 3–10 cycles, seasoning both interior and exterior surfaces uniformly. Allow items to cool inside the oven for better seasoning and enhanced finish development. Proper technique—applying thin layers and heating the pan past the oil’s smoke point—matters more than the specific oil chosen. Regular cooking with oil or fat adds another seasoning layer and maintains the protective finish over time. Some methods advocate multiple rounds of oiling and baking to build up a durable seasoning layer that strengthens with continued use and care.
Rust Removal and Restoration
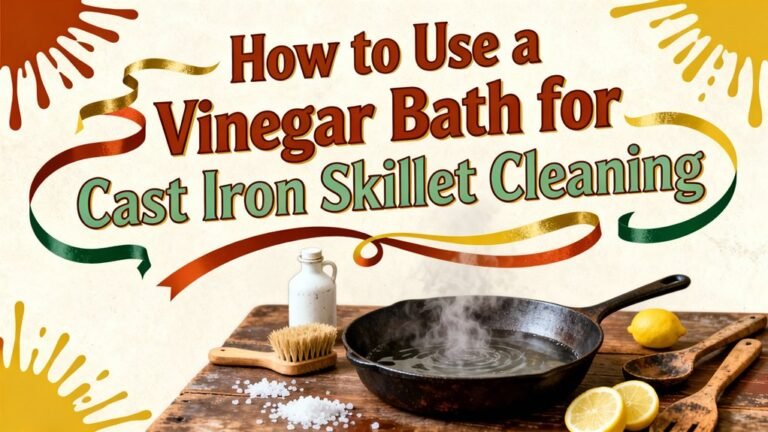
Even well-maintained cast iron can develop rust when exposed to moisture or stored improperly, but you’ll find that removing it and restoring your Dutch oven to cooking condition needn’t be difficult or time-consuming. For light surface rust, abrasive pads and vinegar-water solutions work efficiently. Soak affected areas in a 1:1 vinegar solution for 5–30 minutes, scrub thoroughly, then rinse with hot water and dry immediately. Avoid using wire wheels or sandpaper during scrubbing, as these damage the surface of your cookware. For moderate to heavy rust, consider commercial phosphoric-acid removers or electrolysis methods. Mechanical restoration using wire brushes or progressive hand-sanding removes thick scale effectively. An alternate method involves using alfalfa hay and apple cider vinegar for rust removal on cast iron cookware. For heavily rusted cast iron, you can also combine soaking in a vinegar and water solution with baking soda and steel wool scrubbing to remove all rust from both the top and bottom of the pan. After rust removal, seasoning the cast iron multiple times using high-quality seasoning oil applied while the skillet is still wet will prevent flash rust from forming. Like developing a rich crust on beef in a Dutch oven through proper heat and oil application, you should heat the oiled pan over medium heat until it begins to smoke, then reduce the heat to maintain the smoke for 15-20 minutes to allow the oil to polymerize and create a non-stick surface. After any rust removal method, always apply re-seasoning with oil to restore the protective surface and prevent future corrosion. Store in dry, ventilated conditions to prevent future corrosion.
Cooking and Use Best Practices
Your cast iron Dutch oven’s cooking performance depends entirely on mastering heat management and proper technique. You’ll achieve optimal heat distribution by positioning 6-7 briquettes underneath and 15-20 on top for general cooking. For baking, adjust your ratio to 2/3 heat on top and 1/3 below. Equal heat distribution suits simmering stews and roasts.
Your cooking techniques should include preheating the cast iron for 15-20 minutes before adding food. Line the interior with parchment paper for easy cleanup. Always lift the lid straight up to prevent ash from contaminating your dish. Rotate the lid halfway through cooking while turning the bottom in the opposite direction to eliminate hot spots. For extended cooking times exceeding 45 minutes, refresh your coals to maintain consistent temperature and guarantee perfectly cooked meals. Using a charcoal chimney aids in quickly heating replacement coals without interrupting your cooking process. When preparing dishes like pork roasts, searing the meat on all sides develops a brown crust that enhances the overall flavor profile. After each use, protect your Dutch oven by thoroughly drying it completely and applying a thin layer of oil to prevent rust. The Dutch oven’s tight-fitting lid creates optimal moisture retention, ensuring your food stays tender and flavorful throughout the cooking process. These heavy-duty cast iron pots are designed to distribute heat evenly and maintain stable temperatures for consistent results across various cooking methods and recipes. The steam trapping capability of your Dutch oven during the initial cooking phase helps develop superior browning and texture, similar to the benefits experienced in bread baking applications.
Storage and Long-term Maintenance
Proper storage separates a cast iron Dutch oven that’ll last generations from one that’ll succumb to rust and deterioration. You’ll need to implement deliberate storage solutions that prioritize moisture control and temperature regulation. First, confirm complete dryness by wiping your Dutch oven with a clean towel immediately after washing, then place it on low stovetop heat for thorough drying. Apply a thin protective oil layer using high smoke point oils like canola or flaxseed, wiping away excess to prevent stickiness. To maintain the non-stick, rust-resistant layer, rub the oil into the pan while it is warm, ensuring effective polymerization that bonds the oil into the surface. Select cool, dry storage locations away from humidity—avoid garages and consider your oven interior or cabinets instead. Always let your Dutch oven cool before storing to avoid thermal shock that can damage the enamel finish. For cast iron with rust damage, you can restore smaller amounts of rust by scouring with steel wool, followed by reapplication of oil to prevent further deterioration. Avoid prolonged soaking that can rust unfinished rims, and keep your Dutch oven stored with paper towels inside to absorb any residual moisture. For long-term rust prevention, you’ll maintain seasoning through periodic reapplication and monitor conditions in humid environments. Store below shoulder height, and use paper towel barriers if nesting smaller skillets inside to prevent seasoning scratches. Consider turning the lid upside down to efficiently store smaller items on its flat surface, maximizing your cabinet space.
Maintenance for Enameled Dutch Ovens
While enameled cast iron Dutch ovens share the durability of traditional cast iron, they demand distinctly different maintenance practices to preserve their glossy enamel coating. You’ll want to hand-wash exclusively with warm soapy water and soft sponges, avoiding abrasive steel wool that scratches enamel. Always preheat on low to medium heat only, as high temperatures cause discoloration and potential crazing. Immediately towel-dry rims and lid edges to prevent rust formation on unenameled surfaces. For stain removal, you can safely use baking soda paste or diluted vinegar solutions without damaging the finish. While minor cosmetic imperfections don’t affect performance, significant enamel repair typically requires professional refinishing. Store pieces separately with protective liners, and maintain pest control around storage areas to protect your investment. Using cooking fat or oil during preheating helps distribute heat evenly and prevents the enamel from scorching. Enameled cast iron does not require seasoning due to its enamel finish, which eliminates the maintenance steps needed for traditional cast iron. Unlike traditional cast iron that improves with use, enameled Dutch ovens maintain their appearance through careful heat retention management. The tight-fitting lid locks in moisture and flavor during the cooking process, making it essential to maintain its seal. Never put enameled Dutch ovens in the dishwasher, as the harsh cycle can damage the enamel coating. Proper storage with protective liners and drying techniques ensures your enameled Dutch oven remains in pristine condition for years to come. Enameled cast iron offers no seasoning requirements compared to traditional cast iron, making it more accessible for home cooks seeking lower-maintenance cookware options.
Regular Use and Preventive Care
Because cast iron’s seasoning—that protective, non-stick patina built through oil polymerization—requires active maintenance to remain effective, you’ll want to establish a consistent cleaning routine immediately after each use. Scrape warm cookware with wooden or nylon utensils, then rinse thoroughly and dry completely to prevent rust. Apply light oil coating while still warm.
Your preventive measures should include preheating slowly with modest oil before cooking to protect seasoning and reduce sticking. Avoid sudden temperature fluctuations, which risk cracking and seasoning degradation. These usage tips prove essential: lift rather than slide your Dutch oven across surfaces, maintain moderate heat settings, and use only wood, silicone, or nylon utensils. Regular inspection identifies dull or sticky spots requiring touch-up seasoning before deterioration advances. Using a chain mail scrubber effectively removes stuck-on food while maintaining your seasoning layer. Heating the skillet after washing helps evaporate residual moisture that could compromise your seasoning. Placing a paper towel inside when storing will absorb any residual moisture that could compromise your seasoning layer. For stubborn residue, natural salt scrubs or mild soapy water can be used without damaging the seasoning. Cast iron Dutch ovens work well across all stovetop types, from gas to induction, making them ideal for diverse cooking environments. The health benefits of cast iron extend beyond convenience, as cooking in these vessels can add dietary iron to your meals. Properly seasoned cast iron can last for generations when maintained with consistent care and attention to these preventive practices.