You’ll transform your cast iron into a virtually non-stick surface by mastering three essential practices. First, build durable seasoning using high smoke-point oils like grapeseed or avocado, applying thin layers and wiping away excess. Second, clean immediately after cooking with hot water and minimal soap, then dry completely and apply a light oil coat to prevent rust. Third, adjust your cooking habits by using moderate-to-high heat and limiting acidic foods to reinforce rather than erode that protective layer. Each step builds upon the others for decades-long performance.
Understanding Seasoning: Purpose and Methods
Seasoning isn’t just a cooking technique—it’s the foundation of cast iron care that transforms bare metal into a durable, non-stick cooking surface. When you heat oil to high temperatures, polymerization occurs, bonding a hardened, protective layer directly to the metal. This process fills microscopic pores, creates a corrosion-resistant shield against rust, and provides the smooth, slick finish that prevents food from sticking.
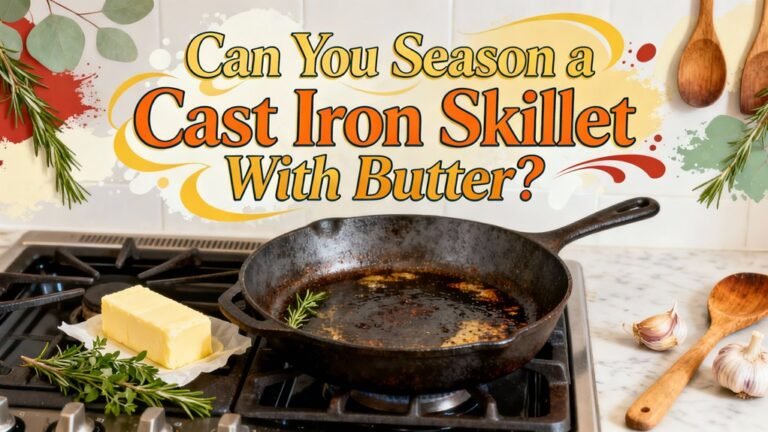
Many seasoning myths suggest you need exotic ingredients, but you don’t. You’ll want high smoke point oil types like grapeseed, avocado, or canola—they enable effective bonding at baking temperatures. Beef tallow is another excellent option, offering natural heat stability and a smoke point around 400°F that prevents burning during seasoning. Avoid using butter for initial seasoning since its low smoke point of 350°F causes it to burn and impart unwanted smoky flavors. For optimal results, wipe off excess oil to avoid sticky residue that can interfere with building a smooth patina. Apply thin layers, repeat cycles, and you’ll build a dark, shiny surface that lasts decades. While flaxseed oil requires significantly more time investment than conventional methods, it produces a harder, more durable finish that resists wear over extended use. Each cooking session reinforces your seasoning naturally, making regular use your best maintenance strategy. After baking, allow the skillet to cool inside the oven to ensure the seasoning properly cures before the next use. To properly season your skillet, preheat the oven to 350-400°F, apply a thin layer of oil, and bake the skillet upside down for 1 hour. Well-seasoned skillets can last a lifetime with proper care and frequent usage that enhances the non-stick layer.
Cleaning Your Cast Iron After Use
Proper cleaning immediately after cooking is essential to maintaining your cast iron’s seasoning and preventing rust. Start with a hot water rinse to remove excess food residue, wiping the interior with a clean paper towel. For routine cleaning, scrub with a stiff-bristled brush in warm, soapy water—modern dish soap won’t strip your seasoning. Use minimal soap and rinse thoroughly.
For effective scrubbing of stubborn residue, try a chainmail scrubber or apply coarse salt as an abrasive. Repeat if needed. Steel wool works for rust removal only. Avoid wire brushes for regular cleaning. If you encounter particularly tough food buildup, consider deglazing with red wine to loosen stuck pieces before scrubbing. For tougher stains that resist initial scrubbing, try boiling water with baking soda in the skillet to help lift burnt food.
After scrubbing, dry completely, then wipe a thin coat of cooking oil inside and out. Use grapeseed, canola, or any cooking oil. Absorb excess with a paper towel before storing. Avoiding moisture retention through thorough drying prevents rust formation and extends your cookware’s lifespan.
Drying and Preventing Rust
Once you’ve finished scrubbing and rinsing your skillet, moisture becomes your cast iron’s greatest enemy. You’ll need to employ effective drying techniques to prevent rust formation.
Start by immediately wiping your pan with absorbent towels like blue Scott shop towels, ensuring you remove all water from the interior, handle, and exterior. Next, place your skillet upside down on a stovetop burner for a couple minutes until it smokes lightly, indicating complete dryness. This heat-drying method vaporizes excess moisture without risking rust. For optimal results, use a gas burner to ensure consistent heat application.
After your pan cools, apply a thin oil coating using vegetable oil or Crisco shortening, then wipe away excess with a paper towel. This protective layer is vital for rust prevention. For stubborn rust spots that may develop despite proper care, gentle scrubbing with salt can help restore your skillet’s surface. To further protect your investment, avoid soaking the pan in water as prolonged exposure can accelerate rust formation. Store your skillet dry, and periodically reapply oil as needed to maintain its seasoning and safeguard against moisture damage.
Cooking Practices That Maintain Seasoning
The protective oil layer you’ve applied sets the foundation, but your cooking practices will ultimately determine how well your skillet’s seasoning develops and endures. You’ll strengthen your seasoning by using minimal oil during cooking, which reinforces natural non-stick properties rather than creating sticky buildup. Maintain moderate to high cooking temperatures to build a solid, slick seasoning layer while avoiding rapid temperature fluctuations that compromise the coating. Cook acidic foods sparingly, as they erode the polymerized surface. After cooking, wipe the interior lightly with a damp cloth, then apply a thin oil application while the pan’s still warm. To further maintain your skillet between cooking sessions, pour kosher salt into the cooled pan and scrub it vigorously with a paper towel to remove any remaining food particles and impurities, similar to how air-tight sealing prevents bacterial growth by maintaining consistent protective conditions. For additional protection against rust, consider applying multiple seasoning rounds during the restoration process to ensure a durable protective coating. This consistent approach—combining appropriate cooking temperatures with strategic oil application—preserves and enhances your skillet’s protective seasoning over time, similar to how Dutch ovens develop their seasoning through even heat distribution and proper maintenance.
Essential Tools and Supplies
Investing in the right tools transforms cast iron maintenance from a guessing game into a streamlined routine you’ll actually stick with. Start with essential cleaning tools: a chainmail scrubber removes stuck-on food without damaging seasoning, while plastic pan scrapers handle ridged surfaces effortlessly. A stiff-bristled brush provides leverage during rinsing and protects your pan’s protective layer better than abrasive pads. The Deluxe Pan Scraper is recommended for multiple types of cookware and should be kept easily accessible next to your sink.
For seasoning, stock high-smoke-point oils like grapeseed or canola to build polymerized layers. Apply thin coats with lint-free cloths—excess oil creates sticky buildup rather than smooth seasoning. Consider spray dispensers for even application during maintenance. A house seasoning blend containing oils and beeswax enhances and maintains cookware performance effectively. These versatile pots demonstrate how cast iron can be used across soups, stews, grains, and desserts when properly maintained. Proper seasoning creates a non-stick surface that requires less maintenance and cleanup over time. After cooking, always apply a light coat of oil] to maintain your skillet’s seasoning and prevent rust.
Finally, keep handle covers and heat-resistant trivets on hand. These prevent burns and protect your surfaces when moving hot cookware. Together, these supplies guarantee consistent, effective care.
Fixing Sticky or Brown Spots
Even with proper maintenance, sticky or brown spots can develop on your cast iron skillet—but you’ll want to address them promptly before they become permanent damage. Understanding sticky residue causes helps you choose the right cleaning techniques.
Sticky spots typically result from polymerized oil layers applied too thick or incomplete polymerization from low-temperature seasoning. Brown spots stem from accumulated food residue and carbonized oils from repeated low-heat cooking. Regular maintenance with proper heating is essential to prevent these issues from developing in the first place. Always hand wash cast iron with warm soapy water rather than using a dishwasher, which will damage the seasoning and cause rust. To further protect your skillet, avoid prolonged soaking in water since extended water exposure significantly increases rust risk. Once your skillet is clean and dry, applying a thin layer of oil to all surfaces helps maintain the seasoning and prevents rust. A well-seasoned cast iron pan develops a natural non-stick coating that prevents food from adhering to the surface.
For light gummy residue, heat your skillet at 300–500°F for one hour, then scrub with coarse kosher salt and a stiff-bristled brush. For stubborn tackiness, use a pan scraper with hot water immediately after cooking.
For heavy carbonized buildup, strip the surface to bare iron using steel wool, then reseason with a thin coat of high-smoke-point oil at 450–500°F for one hour.
Addressing Rust and Corrosion
While sticky spots and brown residue affect your skillet’s cooking surface, rust and corrosion pose a more serious threat to your cast iron’s longevity. Begin your rust assessment by examining the pan’s surface for orange-brown discoloration and corrosion indicators like pitting or flaking.
Remove rust using a chain mail scrubber or steel wool to scrape off buildup effectively. For stubborn spots, soak a cloth in vinegar and rub affected areas, or combine equal parts vinegar and water, soak for thirty minutes, then scrub with a stiff brush. Limit vinegar soaks to 8 hours maximum to avoid damage to the pan’s integrity. For tough rust spots, you can also create a baking soda paste or apply baking soda with a natural acid source like a potato or lemon for effective removal without harming the cast iron.
After cleaning, dry your skillet thoroughly with towels immediately to prevent moisture. Heat the pan briefly to evaporate remaining water completely. You can also place the pan in a 500-degree oven to ensure complete drying and begin the seasoning restoration process. The natural non-stick seasoning that develops over time will help protect your pan from future rust formation. Once dry, reseason the pan to restore its natural non-stick coating by applying a thin oil layer and baking at 350 degrees for one hour to restore protection.
Resolving Food Sticking Issues
After you’ve successfully eliminated rust and restored your skillet’s integrity, you’ll want to address one of cast iron’s most common frustrations: food sticking to the cooking surface.
Build your seasoning layers consistently by reapplying light oil after each cleaning. This creates a durable non-stick coating that improves over time. For oil selection, choose oils that shimmer—not smoke—before you add food. Use sufficient oil to coat the entire surface; eggs require more than fatty proteins like chicken. Applying a thin layer of oil to the cooking surface after cleaning helps maintain your skillet’s seasoning and prevent rust. Always ensure your skillet is thoroughly dried before storing to prevent moisture damage.
Preheat your skillet 3-5 minutes until water droplets sizzle and evaporate instantly. Add fat after preheating to prevent absorption. Maintain proper temperature throughout cooking, avoiding sudden heat spikes that cause adhesion. Cast iron retains heat exceptionally well, so turn down the heat after your initial preheating phase. If oil begins to smoke, remove the pan briefly to cool it down. The polymerization of oils creates a resilient protective layer that strengthens with each use. Like sous vide cooking, cast iron cooking benefits from precise temperature control to achieve optimal results. Regularly repeat seasoning to maintain the non-stick qualities of your cookware. Remove stuck food immediately while the pan’s warm, using wooden scrapers gently. Soak stubborn residue in hot water, then scrub with salt or chainmail.
Handling Flaking, Peeling, and Structural Damage
Despite your best seasoning efforts, cast iron can develop flaking, peeling, or structural damage that compromises both its appearance and functionality. Understanding flaking causes—including over-seasoning, low smoke-point oils, acidic foods, thermal shock, and neglect—helps you prevent recurrence. Chain mail or steel wool can effectively remove loose or flaky areas while helping develop new seasoning layers.
Your remediation strategies should start with visual inspection and tactile assessment to gauge damage severity. Remove loose seasoning and rust using coarse abrasives until you reach sound bare metal. For heavy flaking, perform complete rust and seasoning removal before rebuilding. Well-seasoned skillets can tolerate some acidic foods better than newly seasoned cookware, so building a robust seasoning layer protects against future damage.
After thorough drying, reapply thin oil layers and polymerize them at appropriate temperatures through multiple cycles. This prevents brittle, delaminating layers. Allow gradual cooling between sessions, then maintain your skillet through regular cooking and mindful ingredient choices. Rubbing oil into the pan while it is warm helps maintain the non-stick, rust-resistant layer that protects your investment. To further protect your investment, avoid soaking your cast iron and ensure immediate drying after washing to prevent rust formation. When washing your skillet, modern dish soaps are safe and effective for removing stubborn residues without compromising your seasoning. Using high smoke-point oils like vegetable or avocado oil when resealing your skillet ensures a durable, long-lasting finish. Proper storage in a dry place is essential to maintain the cast iron’s longevity and performance.