You’ll heat your skillet to smoking point, then sprinkle two tablespoons of coarse kosher salt across the surface with minimal hot water to create a slushy paste. Scrub firmly in circular motions with a paper towel, applying light pressure until the salt darkens and residue lifts away. Rinse with warm water, thoroughly dry, then apply a thin oil layer while the pan’s still warm. This gentle method restores seasoning without soap. The specifics of proper technique matter greatly for maintaining your skillet’s longevity.
Essential Supplies for Salt Cleaning
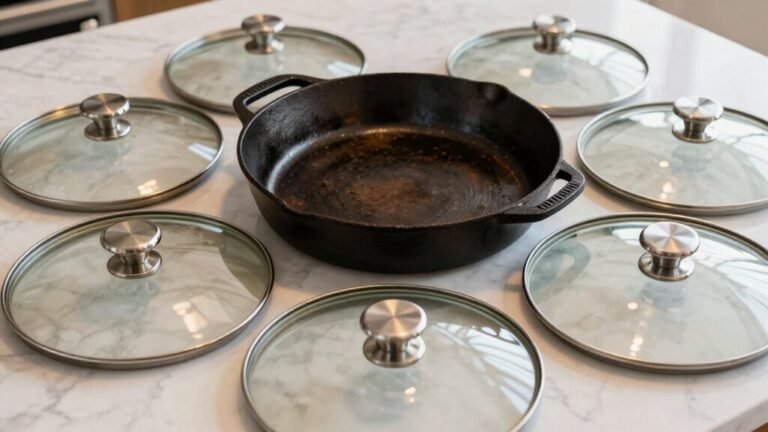
You’ll need just four basic items to clean your cast iron skillet effectively with salt. First, gather kosher salt—the coarse crystals provide superior scrubbing power compared to table salt varieties. Two tablespoons suffices for a standard pan size. Second, prepare 2-4 paper towel sheets as your primary cleaning tools. Their durability withstands vigorous scrubbing while absorbing moisture and debris without tearing. Third, select your oil: olive oil, Crisco, or avocado oil work equally well for post-clean conditioning. One tablespoon restores the protective seasoning layer. Finally, have your cast iron skillet ready at room temperature. These four components—kosher salt types, paper towels as cleaning tools, oil, and your skillet—comprise everything required for effective, damage-free cleaning without additional specialized equipment. Like a Dutch oven used for slow-roasting meat, cast iron cookware develops superior heat retention properties over time. For enhanced cleaning power, consider using a chain mail scrubber to improve your grip and effectiveness on heavily rusted surfaces. Like vacuum seal bags that require durable, secure seals to function effectively, your cast iron requires consistent maintenance to preserve its protective coating. Regular cleaning maintains seasoning and prevents rust from developing on your cookware. After cleaning with salt, you should immediately dry your skillet by heating it on a stovetop or in an oven to evaporate all moisture and prevent rust formation. After cleaning with salt, you can further strengthen your skillet by building a durable nonstick seasoning through oven seasoning at higher temperatures.
Cooling Your Pan Properly
After you’ve scrubbed away the residue with salt, resisting the urge to immediately rinse or oil your skillet is essential—proper cooling is what protects your cast iron from thermal shock and warping. Let your pan cool for approximately five minutes until it’s safe to handle without burns. Monitor the surface for the disappearance of heat haze and the last wisps of smoke. These cooling methods guarantee even temperature distribution throughout the metal, a principle that applies to precision cooking techniques like sous vide as well.
Rushing this step invites trouble: uneven cooling causes seasoning cracks, while residual heat traps moisture that promotes rust. Safe handling depends on patience. Once fully cooled, inspect your skillet for remaining sticky residues or salt deposits. The surface should appear matte and smooth, confirming you’re ready for the final oiling stage. To maintain your skillet’s durability, avoid soaking overnight as this can lead to rust formation. Dry the pan immediately with a clean paper towel to prevent water from remaining on the surface. After cooling, wipe down with a thin layer of seasoning oil to maintain the protective coating on your cast iron. For best results, use light olive oil rather than extra virgin varieties, as it has a higher smoke point and seasons more effectively. This polymerization of oils] creates a resilient, non-stick layer that improves with use over time. A light coat of oil applied after cleaning ensures your skillet remains seasoned and rust-free for years to come.
Preparing the Skillet for Cleaning
Before you begin scrubbing, setting up your workspace strategically guarantees you’ll work efficiently without interruptions or accidents. Clear your countertop and arrange your tools—stiff nylon brush, lint-free towels, and oven mitts—within arm’s reach. Position a cutting board beneath your skillet to protect surfaces from abrasion during cleaning safety.
Perform thorough skillet inspection next. Examine the interior for rust, flaking seasoning, or baked-on carbon to determine your cleaning approach. Check the handle, exterior, and underside for structural damage like cracks or loose rivets that could compromise safety. Probe stuck-on food with a wooden spatula to assess adhesion strength. Note any rancid or burnt odors indicating degraded seasoning requiring deeper restoration. For heavy rust accumulation, electrolysis cleaning can reverse rust buildup by transferring oxide from the skillet to a sacrificial metal anode. Always use non-abrasive sponges or cloths to avoid damaging the surface during your inspection and cleaning process. Just as steam during baking helps develop optimal results in sourdough preparation, proper moisture management during cast iron cleaning prevents rust formation. For severe rust issues, electrolysis tanks offer a more thorough approach to removing all rust and buildup. Using salt scrubs provides a gentle yet effective method for removing stuck-on food that may cause these odors. After cleaning, applying high smoke-point oils such as vegetable, avocado, or grapeseed oil helps maintain the skillet’s seasoning. Finally, confirm your skillet is warm but not scalding before handling. Hand washing is required to ensure your cast iron maintains its seasoning and remains protected from damage.
Applying Coarse Kosher Salt
With your skillet heated to a smoking point, you’re ready to deploy the salt method—one of the most effective techniques for removing stubborn buildup. Sprinkle two tablespoons of coarse kosher salt across the entire bottom surface. The coarse salt benefits lie in its rough texture—far superior to fine salts for abrasive cleaning. Distribute it evenly by shaking the pan, then add minimal hot water to create a slushy paste. Using a paper towel or rag, scrub in firm circular motions, working the mixture into all surfaces including the sides. You’ll notice the salt darkening as it lifts away impurities. Continue until the abrasive action visibly reduces residue buildup. Like chain mail scrubbers, the salt method uses light pressure and circular motions to preserve your pan’s seasoning while removing debris. Regular maintenance with this salt cleaning method ensures optimal performance and longevity of your cast iron cookware, which is essential for maintaining the even heat distribution that makes cast iron ideal for baking. Avoid soaps or harsh detergents during the cleaning process to maintain the seasoning that protects your cast iron. For rust removal, consider that prolonged soaking can etch the iron surface, so use gentler methods like the salt technique for routine maintenance. After cleaning, thoroughly dry your skillet and apply a light coat of oil before storage to prevent rust.
Scrubbing Techniques and Methods
Now that you’ve got your salt slush working, the scrubbing technique you employ determines how effectively you’ll remove buildup. Your manual scrubbing approach should combine force with purpose. Use a damp paper towel to apply the salt mixture vigorously across the skillet’s surface, focusing on the bottom where impurities concentrate most. Work the sides thoroughly as well. A bamboo scrubber delivers excellent results for stubborn residue—scrub hard for one minute after heating. Don’t shy away from using elbow grease; aggressive scrubbing techniques extract baked-on debris effectively. Repeat passes until the surface cleans completely. The key to successful manual scrubbing lies in consistent pressure and thorough coverage across all areas of your cast iron. To prevent damage, avoid using cold water on a hot skillet, as temperature shock causes cracking. The cast iron’s thick construction naturally resists damage during vigorous cleaning when proper techniques are employed. Regular cleaning prevents buildup of debris, so maintaining this scrubbing routine will enhance the longevity of your cookware over time.
Recognizing When Residue Is Removed
After you’ve completed your vigorous scrubbing, you’ll want to confirm that you’ve actually removed all the residue rather than simply redistributing it across the surface. Use visual cues first—the pan should appear uniformly dark and matte without shiny patches or discoloration rings. Next, perform tactile checks by dragging your fingertip across the cooled surface; you shouldn’t detect grittiness or grainy sensations. Pay attention to odor indicators by warming the pan briefly; any lingering burnt or rancid smells signal trapped debris. Finally, conduct behavioral tests during cooking. Food should release predictably without sticking to specific spots, and browning should occur evenly across the entire surface. Consistent performance confirms complete residue removal. The coarse texture of kosher salt ensures that your scrubbing efforts don’t scratch the pan while effectively removing stuck-on food particles. Stiff-bristled brushes are similarly designed to remove stuck-on food and buildup without damaging the seasoning layer. A well-seasoned cast iron skillet with a nonstick surface will make cleaning easier and prevent food from adhering during the cooking process. For stubborn spots, gentle scrubbing with salt or a chain mail scrubber can restore your pan’s cooking performance. For best results, consider preheating your skillet before cooking to ensure even heat distribution across the surface, similar to how proper oven temperatures enhance the cooking process. After cleaning, always ensure thorough drying to prevent rust from developing on your skillet. For optimal results, complete your cleaning within approximately 2 minutes while the skillet is still warm to maximize the salt’s abrasive effectiveness.
Rinsing Without Damaging Seasoning
Once you’ve removed the bulk of residue through scrubbing, rinsing becomes your next critical step—and it’s where many cast iron owners inadvertently compromise their seasoning. Your rinsing techniques directly impact seasoning integrity, so proceed strategically. Use warm water rather than scalding hot water to avoid thermal shock that weakens the seasoning layer. Tilt your pan to direct water flow and prevent pooling, which accelerates rust formation. Wipe with a paper towel during rinsing to minimize prolonged water contact with the iron surface. Keep the rinse brief—quick water exposure prevents moisture from seeping into cast iron’s porous structure. For heavily built-up residue that resists salt scrubbing, lye-based oven cleaner can dissolve stubborn organic solids, though it requires careful handling and re-seasoning afterward. Similar to how precise technique ensures perfect results in other cooking methods, proper cast iron maintenance requires controlled heat application to avoid damaging your seasoning layer. Always hand wash cast iron with warm soapy water rather than using a dishwasher, which will damage the seasoning and cause rust. Maintaining a smooth, flat bottom on your cast iron helps ensure optimal contact with your cooking surface and prevents damage during the cleaning process. Multiple rounds of oiling and baking help build up a durable seasoning layer that improves with use and care. Follow immediately with thorough drying, then apply a thin oil layer while the pan’s still warm to restore your protective seasoning barrier. Storing your pan in a warm oven after oiling helps maintain the seasoning and prevents rust from developing during storage.
Drying Your Cast Iron Thoroughly
Your rinsing work means nothing if moisture lingers on the pan’s surface. Water trapped in cast iron’s pores causes rust and undermines seasoning efforts.
Start with an immediate wipe-down using a clean rag or paper towel, targeting all surfaces to eliminate standing water. Next, employ stovetop heat drying by placing your skillet on high for a couple minutes—this effectively boils off remaining moisture. You can also use a low simmer for controlled evaporation.
For thorough moisture prevention, follow with oven-assisted drying. Preheat your oven to 450 degrees, then place the warm pan inside at 200°F to guarantee complete dryness before applying oil. Allow the skillet to cool until it’s warm to touch, inspecting for any remaining moisture spots. These drying techniques assure your pan stays protected and ready for its protective seasoning layer, which forms a natural non-stick surface and prevents rusting when properly applied after thorough drying.
Applying Oil for Protection
The right oil makes all the difference between a durable seasoning and a sticky, uneven mess. For oil selection, you’ll want a food-grade option with a high smoke point—grapeseed, canola, or vegetable oil work well for their reliability and availability.
Regarding application techniques, apply an extremely thin layer using a lint-free cloth, then wipe away excess until the pan appears almost dry. This prevents pooling and smoking. Use multiple light coats rather than one heavy application, buffing between layers to build even seasoning gradually. Polyunsaturated oils with high smoke points contribute most effectively to creating a durable, hard polymer layer that protects your cast iron long-term. Proper material thickness and layering techniques ensure your seasoning resists wear and maintains its protective qualities over time. Understanding the manufacturing process behind cast iron helps you appreciate why consistent seasoning techniques are so critical to longevity. Unlike specialized cookware such as Le Creuset Dutch Ovens, cast iron requires this careful layering approach to develop its seasoning over time. Consider pairing your cast iron with quality cooking utensils like metal spatulas and wooden spoons that won’t compromise your seasoning during cooking. Much like how vacuum sealing removes oxygen to preserve food freshness, the layering process in cast iron seasoning creates a protective barrier that resists deterioration over extended use.
Place your skillet upside down on the oven rack with foil below to catch minimal runoff. This positioning minimizes oil accumulation on the cooking surface. After baking at 450–500°F for one hour, cool completely in the oven before buffing away any tacky residue.
Storage and Maintenance Tips
After you’ve built up your seasoning through proper oiling and baking, maintaining that protective layer depends entirely on how you store and care for your skillet between uses. Your storage solutions should prioritize airflow and moisture control—keep your cast iron in well-ventilated areas and guarantee it’s completely dry before storing. Avoid airtight containers that trap condensation. Use protective measures like felt liners or paper towels between stacked skillets to prevent scratching and absorb stray moisture. Store frequently used pans conveniently near your range to encourage regular use, which naturally maintains seasoning and builds the skillet’s natural nonstick properties over time. Periodically inspect your cookware for early rust signs, especially around rims and handles. Keep a light oil layer on cooking surfaces as a moisture barrier, similar to how proper moisture control is essential in food storage applications. Keep a light oil layer on cooking surfaces as a moisture barrier, and address any discoloration immediately to prevent spread.