You’ll eliminate sticking by building a polymerized oil layer through consistent seasoning, preheating your skillet 5-15 minutes gradually, and selecting high-fat proteins with firm vegetables. Always wait until oil shimmers before adding food, and don’t flip until a clear crust forms. Choose oils with high smoke points like algae or grapeseed oil. Maintain proper heat around 375-450°F using auditory cues—steady sizzling indicates readiness. The techniques that transform your pan into a reliable non-stick surface reveal themselves through deliberate application of these foundational principles.
Seasoning Creates Non-Stick Coating
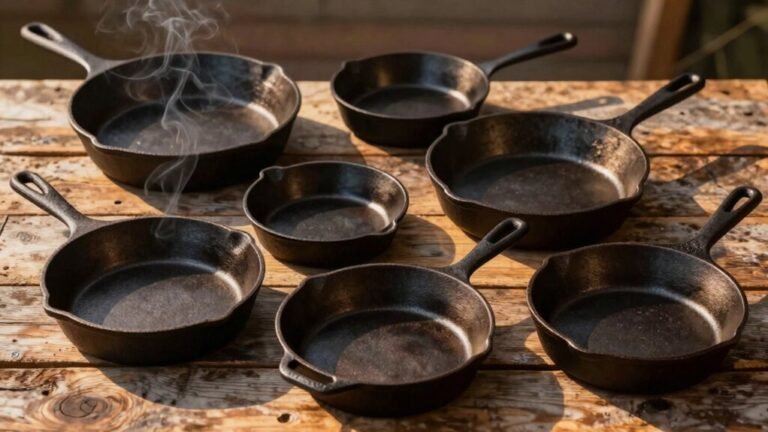
The dark, slick surface you’ll find on well-maintained cast iron isn’t just a coating—it’s a polymerized layer of carbonized oil that bonds molecularly to the metal’s surface. This seasoning develops when you heat unsaturated fats to high temperatures, transforming liquid oil into a hardened, non-stick barrier.
You’ll experience substantial seasoning benefits through consistent application. Multiple layers fill cast iron’s microscopic pores, creating an increasingly smooth finish that prevents food adhesion while protecting against rust. These seasoning techniques—applying thin oil coats and baking at 350-500°F—require repetition for ideal results. The hydrophobic surface created through this process actively repels water and enhances your cooking results. Traditional fats like lard remain effective seasoning options due to their ability to create durable polymerized layers, though lard’s smoke point of around 375°F may require careful temperature management.
The molecular bond between polymerized oil and iron strengthens with each cooking session. Unlike traditional non-stick cookware, your cast iron improves over time, developing superior performance through regular use and proper maintenance. With proper care, cast iron cookware can last for decades, making it a worthwhile long-term investment for any kitchen.
Preheating Your Skillet Properly
Before you add any food to your cast iron skillet, you’ll need to preheat it properly—a critical step that many home cooks skip, only to find their ingredients sticking stubbornly to the surface. Start your preheating techniques on low heat for three to five minutes on electric or induction stovetops, then gradually increase to medium-high over ten minutes total. This gradual warming guarantees even heat penetration across the pan’s surface while activating your seasoning’s polymerized oil layer.
Test your skillet temperature by dropping water onto the surface; it should jump and bead rather than evaporate immediately. Match your burner size to your skillet for best heat distribution. Since cast iron retains heat more than other cookware, you may need to adjust your burner temperature downward for optimal cooking results. A heat setting above medium is unnecessary due to cast iron’s superior heat retention capabilities. The non-stick layer created through proper seasoning and maintenance significantly reduces sticking when your skillet is preheated correctly. Always use a hot handle mitt—cast iron retains significant heat throughout the preheating process.
Choosing and Using Oil Correctly
Selecting the right oil makes the difference between a skillet that develops a durable, nonstick seasoning and one that flakes or sticks stubbornly to your food. You’ll want to prioritize oil types with high smoke points and robust unsaturated fat content. Algae oil leads at 535°F with superior oleic acid bonding, while grapeseed oil offers 421°F with excellent polyunsaturated ratios. Avocado oil provides 350–400°F for post-seasoning refinement. Avoid flaxseed oil; its 225°F smoke point causes burning and brittle finishes. Grapeseed oil’s ability to polymerize effectively creates a hard, protective coating that enhances your seasoning’s durability. You can develop custom oil blending strategies by testing combinations for your specific pan. Start with grapeseed as your foundation, then layer avocado oil once seasoning establishes, creating a sleek, resilient surface. Proper storage techniques will help maintain your oils’ effectiveness and prevent them from becoming rancid. While cast iron remains the traditional choice for many recipes, alternative cooking methods can also yield excellent results for dishes like frittatas. It’s permissible to switch between different oils during the seasoning process as you refine your technique. With consistent maintenance after each use, applying a light layer of oil while the pan is warm will help preserve your seasoning between deep seasoning sessions.
Mastering Temperature Control
Once you’ve selected the right oil and established your seasoning foundation, temperature control becomes the primary determinant of cooking success in cast iron. You’ll achieve ideal results by preheating gradually—5–15 minutes on low-to-medium heat allows pan mass to reach uniform temperature without creating hot spots.
Target a surface temperature of 375–450°F for effective searing and natural release. Use temperature monitoring through auditory cues: steady sizzling indicates proper contact, while vigorous sputtering signals excessive heat. Perform skillet rotation every few minutes when using uneven burners to redistribute heat evenly across the cooking surface. Gradual warming is crucial for preventing warping and ensuring even heat distribution before you begin cooking. Heavy-duty oven mitts should always be used when handling the skillet since handles become hot during the preheating process and cooking. Proper temperature management ensures the polymerized oil layer protecting your skillet remains intact and performs optimally throughout the cooking process.
After initial browning, reduce heat to allow proteins to release naturally. Adjust temperature in small increments, anticipating cast iron’s slow thermal response. This measured approach prevents sticking and promotes consistent, controlled cooking throughout.
Selecting Foods and Timing Techniques
Your success with cast iron hinges on matching food selection to the pan’s strengths and understanding the precise sequence of oil application, heat timing, and flipping mechanics. Choose high-fat proteins, foods that brown easily, and firm vegetables—they release predictably. Avoid delicate fish, acidic simmered dishes, and crowded leafy greens, which stick readily.
For timing techniques, preheat your pan thoroughly before adding oil, then wait until oil shimmers before introducing food. Don’t flip until a clear crust forms and food naturally releases. Pat-dry all ingredients beforehand to eliminate steam-causing moisture. With thick cuts, allow longer searing; with thin items, use lower heat and shorter contact time. Start cooking at medium-low temperatures to prevent overheating and ensure even browning throughout your meal. Unlike techniques such as precise temperature control used in other cooking methods, cast iron relies on your sensory judgment and experience. A well-seasoned cast iron surface with a nonstick matte finish will perform better and require less oil during cooking. These deliberate timing techniques guarantee reliable results and preserve your seasoning.
Cleaning and Maintaining Your Pan
Proper cleaning and maintenance separate seasoned cast iron from neglected cookware destined for rust and decay. Your cleaning methods should prioritize gentle handling: wipe excess oil with paper towels, then scrub stuck residue with chain-mail or a stiff brush using warm water. For heavy buildup, briefly heat the pan, add water to loosen food, then scrape with a nonmetal spatula. Never use the dishwasher, as it strips seasoning.
After washing, immediately dry your skillet thoroughly with lint-free cloth, then heat it briefly on the stovetop to eliminate residual moisture. Apply a thin oil layer once completely cool. These maintenance tips—combined with frequent use and occasional oven seasoning at 400–500°F—build a durable, nonstick surface that improves over time. Store your cookware in a dry place to prevent moisture-related rust and preserve the seasoning. Over time, layers of cooked oils bond to the surface of your cast iron, creating an increasingly smooth cooking surface.
Common Sticking Problems and Solutions
Even with meticulous seasoning and maintenance, you’ll still encounter sticking—and that’s normal. Most problems stem from heat-management errors, insufficient fat, or food-preparation factors.
For effective sticking prevention, preheat your pan for 4–5 minutes on medium heat, allowing cast iron to reach even temperature. Oil should shimmer before you add food. Bring ingredients close to room temperature to avoid thermal shock.
Apply oil thinly but completely across the cooking surface. Use fats with appropriate smoke points—combine butter with higher smoke-point oils for high-heat searing. The even heat distribution of cast iron ensures that fat polymerizes uniformly across the cooking surface. Building up multiple layers through repeated seasoning rounds strengthens the non-stick surface over time. Excess oil or incomplete polymerization can create splotchy residue, which may cause sticking if not addressed. For tasks requiring more intense heat, consider using specialized equipment like dedicated cooking torches designed for culinary applications rather than general-purpose tools.
Critical cooking tips include patting food dry before searing, avoiding pan crowding, and cooking in batches to maintain surface temperature. Address flaky seasoning immediately by periodic reseasoning your pan to restore the protective coating. These practices eliminate most sticking issues systematically. When reducing temperature after preheating due to heat retention, you prevent oil from smoking and food from burning on the cooking surface. Rubbing oil into the pan while it is warm helps maintain the non-stick, rust-resistant layer that prevents future sticking problems.
Building Your Cast Iron Expertise Over Time
As you move beyond foundational techniques, you’ll reveal that cast iron mastery develops through deliberate seasoning strategies and consistent maintenance habits that compound over months and years. Building confidence requires understanding polymerization fundamentals—applying thin, repeated oil layers at 450–500°F creates durable patina far superior to single heavy coats. Your skill refinement accelerates through high-fat cooking practices like searing and pan-frying, which deposit fats that strengthen seasoning naturally. Proper preheating techniques ensure even heat distribution across your skillet’s surface before you begin cooking. Inspect your pan periodically for dull or sticky zones, addressing them with targeted reseasonings rather than full overhauls. For stubborn spots or rust, gentle scrubbing with salt can help restore your skillet’s cooking surface. When rust damage is more severe, electrolysis tanks can remove all rust and buildup thoroughly for a complete restoration. Store properly between uses with light oil films and dry conditions. Oven seasoning can be performed a few times a year to restore and enhance your cookware systematically. Similar to how precise temperature control enhances cooking results in specialized techniques like sous vide cooking, maintaining exact oven temperatures during your seasoning cycles ensures optimal polymerization and consistent seasoning development. You can also use your well-seasoned cast iron for Dutch oven desserts like cobblers and cakes when camping. This methodical approach—progressive layering, consistent use, and preventive maintenance—transforms your skillet into a reliable, non-stick workhorse that improves with age.