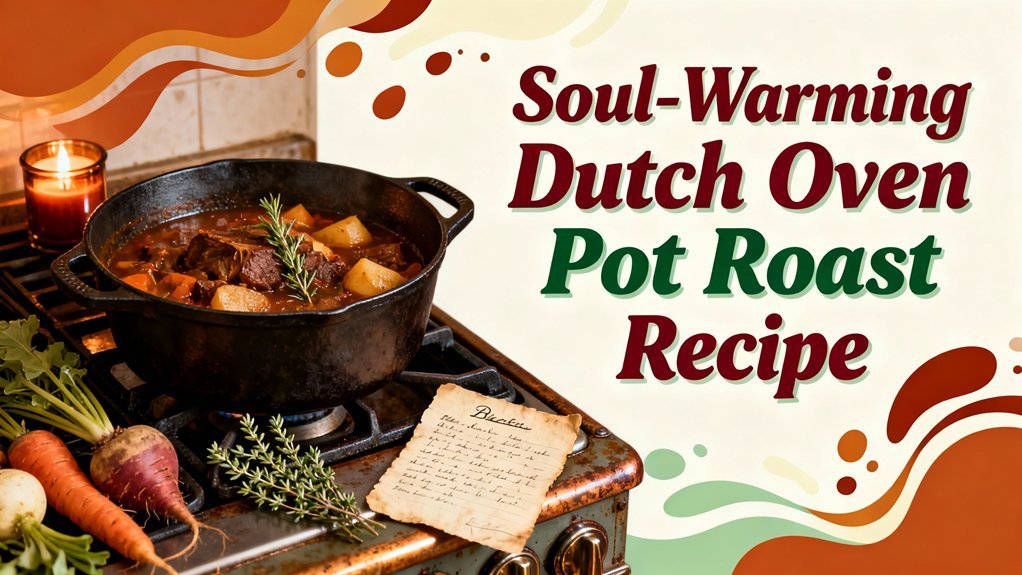
You’ll transform a tough chuck roast into fork-tender, deeply savory meat by searing it in a hot Dutch oven, then braising it low and slow with beef broth, red wine, and aromatic herbs. The gentle heat breaks down connective tissue into silky gelatin that coats every bite. Layer in carrots and potatoes for natural sweetness. Cover tightly and let time work its magic at 300°F for 2.5 to 4 hours. The result? A soul-warming masterpiece that rewards patience with every spoonful.
Essential Ingredients for Your Pot Roast
Because a pot roast‘s success hinges on quality components, you’ll want to start with a 3- to 4-pound chuck roast—the shoulder cut’s marbling and connective tissue are precisely what braise into silken tenderness. For perfect seasoning, gather kosher salt, black pepper, minced garlic, and fresh thyme. You’ll need one to two large onions and essential tools like a Dutch oven for even heat distribution.
Your ingredient variations should include olive oil for searing, tomato paste for depth, and beef broth as your braising liquid. Red wine adds complexity to your flavor profile, while Worcestershire sauce contributes umami richness. Don’t overlook carrots and potatoes—these vegetables transform during extended cooking techniques, becoming fork-tender while infusing the pot roast with natural sweetness and substance. Yellow potatoes are the classic choice, as Russet potatoes should be avoided due to their high starch content, which can result in a mushy texture. For optimal results, allow the roast to rest for several minutes after cooking to retain its juices before slicing or shredding. The slow-roasting method at low temperatures ensures the connective tissue breaks down completely, creating that fall-apart tender texture that defines a truly exceptional pot roast. Searing the meat on all sides develops a brown crust that locks in flavor and enhances the overall depth of your finished dish. Many recipes incorporate pepperoncini peppers and juice along with seasoning mixes to create a tangy, buttery sauce that complements the tender meat. Like the one-pot Dutch oven chicken legs approach, this pot roast method combines all components in one pot for simplified preparation and enhanced flavor melding. After searing, the roast is submerged in a savory cooking liquid made from deglazing the pot with red wine and adding broth, herbs, and seasonings that infuse the meat with rich, complex flavors throughout the braising process.
Step-by-Step Cooking Instructions
With your ingredients assembled, you’re ready to transform them into a deeply flavorful pot roast through deliberate technique and patient cooking. Start by patting your sourced meat dry and letting it reach room temperature for ideal browning. Heat your Dutch oven until oil shimmers, then sear the roast on all sides until a deep crust forms—resist moving it frequently. Deglaze the pot with red wine, dissolving the flavorful fond. Build your braising liquid with beef broth and herb combinations like thyme, rosemary, and bay leaves for layered depth. Pour liquid to cover one-third of the roast, then braise at 300°F for 2.5–4 hours. The low, steady heat breaks down collagen into gelatin, yielding fork-tender results. As with short ribs, the slow-braising technique transforms tough cuts into melt-in-your-mouth tenderness through patient, low-temperature cooking. To monitor doneness accurately, use a probe thermometer to check the internal temperature of the roast, as it provides reliable readings that infrared thermometers cannot match for internal meat temperature verification. A wooden spoon is advised to prevent scratching the cast-iron surface while stirring, and maintaining your Dutch oven with proper seasoning techniques will preserve its non-stick qualities for years of cooking. The same cast iron Dutch oven used for savory pot roasts can also be utilized for baking delicious desserts like cobblers and cakes when your outdoor cooking adventure calls for something sweet. Remember to use a handle cover or oven mitt when removing your Dutch oven from the oven, as the handles become extremely hot during cooking and can cause severe burns. For a secure, oven-safe lid, ensure it fits tightly during the entire braising process to retain moisture and prevent the roast from drying out.
Equipment You’ll Need
Successful pot roast cooking hinges on having the right tools at your disposal, and the Dutch oven stands as the most critical piece. You’ll want a Lodge enamel-coated or cast iron model, as cast iron guarantees even heat distribution and retention—essential for developing that tender, flavorful roast. A 5.5 to 8-quart capacity gives you adequate space for vegetables and braising liquid.
You’ll need tongs for flipping, a wooden spoon for deglazing, and heatproof gloves for safe handling. A lid lifter prevents burns when accessing your dish. Measuring cups and spoons guarantee precise seasoning and stock proportions. For temperature monitoring, a digital thermometer takes the guesswork out of doneness. Like cast iron skillets used for stovetop and oven cooking, Dutch ovens excel at maintaining consistent temperatures across their surface. Consider investing in a pellet grill like the Yoder Smokers YS640 for outdoor indirect cooking at precise temperatures. An enamel-coated Dutch oven is preferable as it prevents the beef stock and seasonings from reacting with cast iron, which can affect flavor and appearance. When selecting your Dutch oven, consider size considerations for different household needs to ensure it meets your cooking requirements. Quality cast iron Dutch ovens can last for generations when properly maintained, making them a worthwhile long-term investment for your kitchen. Proper Dutch oven care—regular seasoning and appropriate storage—extends your equipment’s lifespan and maintains peak performance throughout countless cooking adventures.
Timing and Temperature Guide
Getting your pot roast right isn’t guesswork—it’s a matter of understanding how temperature and time work together to transform tough cuts into fork-tender masterpieces.
You’ll find cooking temperatures range from 250 to 350 degrees F, each serving distinct purposes. Lower temperatures like 250 degrees F enable slow, gentle cooking that yields incredibly tender results over extended periods. Meanwhile, 300 to 350 degrees F accelerates the process while maintaining quality. Dutch ovens excel at maintaining these precise temperatures due to their superior heat retention and even heat distribution across the cooking vessel.
Timing variations depend on your chosen approach. At 300 degrees F, expect 3.5 to 4 hours total for fall-apart texture. Higher heat at 350 degrees F reduces cooking to 2.5 to 3 hours. You’ll sear your meat for 5 to 8 minutes per side first, building flavor through browning. Add vegetables strategically—either after 1.5 hours or in stages for optimal doneness, depending on your recipe variation. The key is ensuring that Worcestershire sauce, thyme, and bay leaves are incorporated into your braising liquid to enhance the depth of flavor throughout the cooking process. For best results, plan for overnight refrigeration after the initial cooking to allow flavors to meld and improve upon reheating. You can further deepen your stew’s complexity by deglazing with wine or adding tomato paste to the braising liquid. Covering the pot during cooking traps steam and moisture, which is essential for breaking down the connective tissues in your chuck roast and creating that tender, succulent texture that defines an exceptional pot roast. The resulting silky gravy can be poured over the meat and vegetables for a complete one-pot meal. To prevent lid vacuum, consider leaving the Dutch oven lid slightly ajar before turning off the heat to ensure easy removal after cooking.
Serving Suggestions and Storage Tips
Once you’ve achieved that perfect fall-apart texture, the way you present and preserve your pot roast matters just as much as the cooking itself. Your portion presentation should showcase 3-4 ounces of beef separated elegantly from vegetables and starch, restaurant-style. Fresh garnish options like parsley or thyme elevate the dish’s visual appeal. Consider complementary side dish pairings—garlic mashed potatoes, roasted carrots, or Yorkshire pudding enhance the experience beautifully.
For storage guidelines, cool your pot roast completely before transferring it to airtight containers with vegetables and broth. You’ll keep refrigerated leftovers fresh for up to four days. Freezer-safe bags extend storage to three months. After storing your Dutch oven, place paper towels inside to absorb any moisture that could affect future cooking. Proper cleaning methods that preserve your Dutch oven’s seasoning will ensure it remains in excellent condition for future campfire meals. Your Dutch oven’s heat retention properties mean reheating covered with added broth will restore moisture and flavor efficiently. The Dutch oven’s thick cast iron and tight-fitting lid create an ideal environment for preserving the flavors of your pot roast during storage and reheating. A tempered glass lid with steam vents can also help monitor reheating progress while maintaining moisture levels. Reheat covered with added broth to restore moisture and flavor. Complement your pot roast with fresh garnishes like herbs such as chimichurri or mint sauce to add brightness and zesty flavors that cut through the richness of the dish. Both plated and rustic serving styles result in the same taste, so choose the presentation method that best suits your personal preference and dining occasion.