You’ll master restaurant-quality meals by leveraging your Dutch oven‘s heat-retention powers for low-and-slow cooking. Start with crowd favorites like braised chicken thighs, hearty stews, and vibrant curries—they’re forgiving for beginners. Layer hardy vegetables and meat strategically, sear proteins for depth, and let the tight-fitting lid work its magic. Stock your pantry with essentials like stock, wine, and spices. These versatile techniques transform weeknight dinners and impress at gatherings, but you’ll unearth specialized applications and seasonal showstoppers that truly reveal your Dutch oven’s potential.
Dutch-Oven Recipe Categories and Why They Work
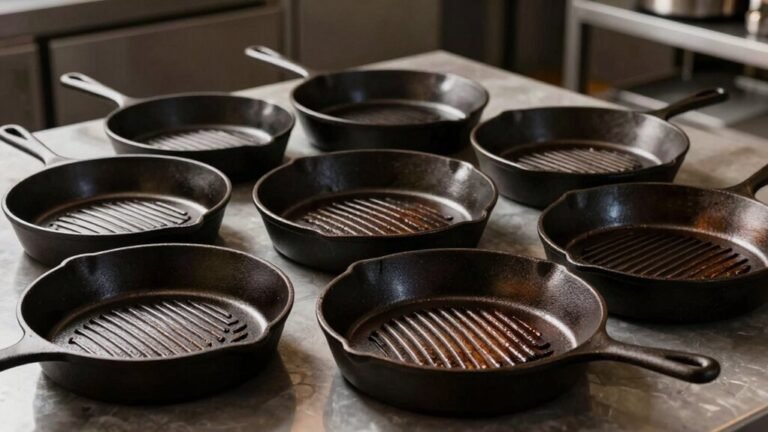
Whether you’re making a rustic potato leek soup or a hearty lentil stew, a Dutch oven‘s thick walls retain heat evenly, preventing the scorching that ruins stovetop batches while allowing flavors to deepen through unhurried, low-and-slow cooking. You’ll find that specific cooking methods work best with particular ingredient pairings. Braises benefit from searing meat before simmering in broths, while curries and chilis thrive with layered spice additions over time. Breads develop superior crusts through steam retention, and desserts bake perfectly in its insulated environment. The Dutch oven’s versatility means you’re not limited to soups—one pot handles everything from jambalaya to deep-dish pizza. For specialized applications like braising pork for sixteen hours or frying donuts at consistent temperatures, the Dutch oven’s heavy design ensures even heat distribution that transforms simple ingredients into restaurant-quality results. To preserve your cooked creations, consider using temperature resistance vacuum bags for any leftovers you plan to freeze for later enjoyment. A well-seared chuck roast submerged in savory cooking liquid with vegetables creates the fall-apart tender results that define classic pot roast dishes, especially when slow-roasted with pepperoncini peppers and seasoning mixes for optimal flavor development. Beef stew benefits from the same slow-cooking approach, with the meat developing rich, tender textures as it simmers in deglazing liquid for 1.5 to 2 hours alongside root vegetables. Enameled cast-iron Dutch ovens require no seasoning and can be easily cleaned with soap and water, making them ideal for home cooks seeking durability without extra maintenance. Most Dutch ovens are oven safe up to 500°F or higher, allowing you to seamlessly transition from stovetop searing to oven finishing without changing cookware. Each category leverages the vessel’s heat distribution properties differently, ensuring consistent, foolproof results regardless of your cooking experience.
Essential Techniques for Best Results
Understanding how a Dutch oven’s design prevents burning and deepens flavors is one thing; mastering the techniques that release its full potential is another. You’ll maximize your results by respecting the vessel’s superior heat retention—use medium to low settings to avoid scorching. Strategic ingredient layering guarantees perfect timing: place hardy vegetables and meat near heat first, then add delicate herbs and seafood toward the end. Always preheat your Dutch oven for 10+ minutes before cooking. Once you’re ready, a tight-fitting lid locks in moisture and flavors during the self-basting cycle, which utilizes the enamelled cast iron construction to provide superior heat retention. A light coating of oil before cooking enhances food release and simplifies cleaning without requiring excessive amounts. Protect your cookware investment by using specialized scrapers and chainmail scrubbers designed to clean without damaging your Dutch oven’s enamel finish. The Dutch oven’s ability to transition from stovetop to oven seamlessly allows you to start searing ingredients on the burner and finish cooking in the oven for perfectly executed dishes. To protect your Dutch oven’s enamel coating, avoid using high heat and use soft utensils like silicone or wood rather than metal. When using your Dutch oven on a ceramic grill like the Big Green Egg, placement techniques using the cooking grid or ConvEGGtor help you achieve optimal heat distribution for both searing and slow-cooking. Techniques like slow-braising] at lower temperatures, such as braising short ribs at 350°F for extended periods, develop complex flavors while ensuring meat becomes fall-apart tender. These foundational techniques transform ordinary meals into restaurant-quality dishes, letting you harness cast iron’s remarkable cooking properties effectively.
Pantry Staples for Versatile Dutch-Oven Cooking
Since a Dutch oven’s magic lies in its ability to transform humble ingredients into extraordinary meals, you’ll want to stock your pantry with versatile staples that’ll serve you across countless recipes. Keep flour, salt, and yeast on hand for no-knead bread dough that rises beautifully overnight. Steel-cut oats paired with milk create hearty morning porridge. Quality cooking oil and solid vegetable shortening maintain your Dutch oven’s seasoning while enabling everything from sautéing to deep frying. Stock, red wine, and water form the foundation of braises and stews. Essential herbs and spices—salt, pepper, and complementary blends—elevate every dish without scorching. These pantry essentials and versatile ingredients transform your Dutch oven into an indispensable kitchen workhorse. The one-pot approach reduces waste by allowing you to utilize vegetable scraps and tough cuts that become tender through slow cooking. A smaller 6-inch oven works perfectly for preparing sauces or side dishes that complement your main Dutch oven creations.
Time-Saving Recipe Ideas for Weeknights
Once you’ve stocked your pantry with those versatile staples, you can harness your Dutch oven’s efficiency to deliver satisfying weeknight dinners without sacrificing flavor or spending hours at the stove. One pot meals like lemon-garlic pasta or quick risotto cook in 20–30 minutes, collapsing prep and cleanup. Leverage convenience ingredients—rotisserie chicken, canned beans, jarred sauces—to accelerate quick proteins into braises and curries ready in under 40 minutes. Sear thin-cut meat, then finish covered with liquid for tender results fast. The tight-fitting lid and thick enamelled cast iron walls create a self-basting cycle that simplifies the cooking process and allows flavors to blend together on low heat. Start with simple recipes like stews and soups to build your confidence with the Dutch oven before attempting more complex weeknight dishes. These Dutch oven meals are ideal for family meals and batch cooking on busy weeknights. Batch-cooking doubles your efficiency: make extra portions for meal prep, refrigerating or freezing for future nights. Cool and portion immediately, preserving texture and freshness when you reheat.
Crowd-Pleasing Seasonal Recipes and Occasions
Your Dutch oven transforms into a celebration centerpiece when you shift from weeknight efficiency to holiday entertaining. For seasonal gatherings, you’ll find crowd favorites that impress without demanding excessive prep work. Turkey Chilli with caramelized peppers and jalapeños feeds groups effortlessly, while Dutch Oven Roast Chicken delivers crispy skin and juicy meat through lemon and herb butter. The Pot-Roast Chicken atop root vegetables offers comfort that resonates across generations.
Balance mains with Creamy Cheesy Mashed Potatoes and Brussels Sprouts & Kale Sauté featuring crispy salami. The enamelled cast iron material of your Dutch oven ensures superior heat retention for perfectly cooked vegetables and tender proteins. For optimal texture and flavor development, bone-in, skin-on chicken thighs deliver superior results when braised with complementary ingredients like white wine and fresh herbs. These dishes can be batch-cooked ahead of time for convenience during your busy holiday schedule. To maintain your Dutch oven’s performance throughout years of entertaining, regular maintenance using baking soda and water paste will keep the seasoning intact and prevent rust buildup. When selecting cookware for these preparations, consider that wooden handles remain cool during stovetop cooking, making them comfortable to grip while tending to your dishes. Allowing proteins to cook undisturbed until naturally released from the cooking surface promotes better browning and prevents sticking. For dessert, Cinnamon Buns bake in thirty minutes, serving four to six guests with soft interiors and crunchy exteriors. To ensure your roasted proteins reach the desired doneness, use an internal temperature thermometer inserted into the thickest part of the meat. Your Dutch oven’s versatility transforms these seasonal recipes into memorable moments that bring everyone to the table.
Troubleshooting and Safety Considerations
While your Dutch oven’s durability makes it a kitchen workhorse, understanding its thermal limits and handling requirements prevents damage and keeps you safe.
Always consult your manual for oven safe temperatures, typically reaching 500°F for enameled cast iron. Check that plastic lids and knobs won’t melt at high temperatures; remove them if necessary.
Prevent thermal shock by placing your cold Dutch oven in the oven as it preheats rather than into an already-hot one. Avoid adding cold liquids to hot surfaces and never submerge hot cookware in cold water.
On the stovetop, heat gradually on low to medium, always covering the base with oil or liquid before applying heat. Keep flames under the base only, and use appropriate utensils to protect the enamel surface from scratches. Using oils with high smoke points like avocado or grapeseed oil helps prevent burning and ensures better cooking results. Dutch ovens work across different stovetop types including gas, electric, ceramic, and induction cooktops. For optimal care and longevity, follow the maintenance and care tips specific to your cookware’s material and finish. Beyond everyday cooking, Dutch ovens are also excellent for campfire desserts like peach cobbler, expanding their versatility beyond traditional stovetop and oven use. When removing your Dutch oven from the oven, use thick, high-quality oven mitts to prevent burns from the retained heat.