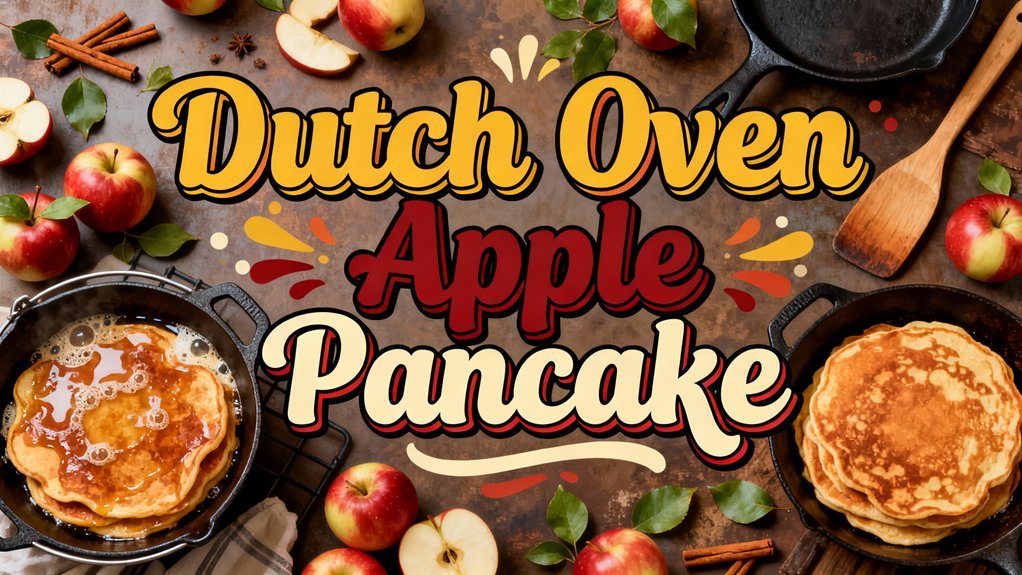
You’ll transform a simple batter into a dramatic Dutch oven apple pancake by combining room-temperature eggs, flour, and milk with caramelized apples. Preheat your cast iron skillet to 400–425°F for 5–6 minutes, then pour your batter over the buttered surface and top with prepared apple slices. Bake for 15–30 minutes until the edges puff dramatically and the center stays slightly jiggly. Dust with powdered sugar and serve immediately. Uncover how each step perfects your final presentation.
History and Origins of the Dutch Baby
The Dutch baby’s journey—from German kitchens to American cafes—reveals how a simple egg-based pancake became a beloved breakfast staple. You’ll find its cultural significance rooted in German Pfannkuchen, which inspired regional variations like Austrian Kaiserschmarren and Finnish Pannukakku. In early 1900s Seattle, Victor Manca introduced this dish at his cafe, oven-baking it for efficiency rather than using stovetop methods. The name “Dutch” likely came from his daughter’s mispronunciation of “Deutsch,” while “baby” referred to smaller portions. You’d recognize this distinction: unlike traditional pancakes, Dutch babies don’t use chemical leavening. Instead, they rise from oven steam, puffing dramatically before deflating like soufflés—a technique similar to slow-braising methods that require precise temperature control and timing. To achieve the perfect rise and dramatic puff, maintaining the correct distance-to-spot ratio ensures even heat distribution throughout the Dutch oven, much like how steam trapped in a Dutch oven creates the ideal environment for dramatic rises in baking. Manca’s trademarked the term in 1942, cementing its American identity. His loyal customers consumed them two at a time, demonstrating the dish’s immediate popularity. The specialty quickly spread to diners and restaurant chains across the country, becoming a signature offering at establishments like The Original Pancake House.
Essential Ingredients You’ll Need
You’ll need just a handful of simple components to create this dramatic oven pancake, each playing a crucial role in achieving that signature puffy texture and custardy interior. Start with 4 large eggs at room temperature—they’re essential for structure and that custardy finish when baked.
Combine 1 cup all-purpose flour with 1 cup milk, blending everything smooth. You’ll add 1/3 cup melted butter to your batter for richness and smoothness.
For your apples, choose from Honeycrisp, Gala, or Granny Smith varieties—each offers distinct flavor profiles. Slice 2-3 apples and layer them in your buttered skillet. Season generously with 1/2 to 1 teaspoon ground cinnamon and 1 to 3 tablespoons granulated sugar. This combination of spices and sugar enhances the natural tartness of the apples while adding warmth to your dessert. The recipe is praised for its ease and works comfortably for feeding four people. Preheat your oven to 400F before combining your ingredients to ensure proper rising and browning. A dutch oven’s tight-fitting lid creates optimal heat distribution for even browning and cooking. To prevent damage to your cookware, avoid rapid temperature changes when moving your Dutch oven between the refrigerator and stove. For long-lasting cookware, a well-seasoned cast iron skillet is ideal for this recipe and will develop a natural non-stick surface with regular use. If you’re working with a smaller Dutch oven, you can scale down recipe sizes proportionally to fit your cookware’s capacity. Finish with confectioners’ sugar dusting after baking.
Preparing Your Apples
Now that you’ve gathered your ingredients, it’s time to prep your apples—the star of this dish. Select sturdy, hard baking varieties that’ll maintain their texture during oven cooking. Start your cleaning process by removing stickers and washing the apples under cold running water. Use a melon baller or chef’s knife to remove the stems efficiently.
Next, decide whether you’ll peel based on your texture preference. Core the apples using a melon baller or half-teaspoon measure. Slice them into thin, even pieces for consistent cooking throughout the pancake. Consider using varieties like Granny Smith or Fuji apples, as these firm, tart varieties are ideal for baking and will hold their structure during the oven cooking process. Check your apples for firmness and weight to ensure they’re fresh and will maintain their quality through the cooking process. Proper seasoning and preparation of your cookware, much like preparing cast iron for cooking, ensures your Dutch oven will distribute heat evenly for optimal pancake results. Just as a well-seasoned cast iron surface creates a durable nonstick finish, a properly maintained Dutch oven enhances your cooking performance. The Dutch oven’s thick cast iron and tight-fitting lid create an ideal environment for even cooking and moisture retention.
To prevent browning, immediately soak your slices in a lemon juice solution—one teaspoon per cup of water for five minutes. Alternatively, toss them with sugar to create a protective barrier. This preparation guarantees your apples stay fresh and visually appealing until baking. Similar to how simmering corned beef requires gentle heat maintenance, Dutch oven pancakes benefit from the consistent temperature control that a covered Dutch oven provides. Like cast iron cookware, Dutch ovens benefit from proper maintenance to ensure durable seasoning that enhances cooking performance over time.
Making the Perfect Batter
Since a Dutch oven apple pancake rises on the power of whipped eggs and a thin, custardy batter, getting your ratios right is essential. Combine 1 cup flour, 3–4 large eggs, and 1 to 1¼ cups milk as your foundation. Add 1–3 tablespoons sugar, a pinch of salt, and optional vanilla extract.
For mixing methods, use a blender for the smoothest, most uniform batter—add liquid first, then flour and eggs. Whisking by hand works too, but strain through a fine sieve to eliminate lumps. Avoid over-mixing, which develops gluten and toughens your pancake.
Ensure batter temperature matters: room-temperature eggs and milk blend into a superior emulsion that rises higher in the oven. Your batter should pour thin and smoothly, almost like crêpe batter. A brief 5–15 minute rest hydrates the flour without sacrificing aeration. The essential tools include a blender to achieve the optimal consistency and smoothness needed for the best rise. You can also use gluten-free flour as an acceptable alternative to all-purpose flour for dietary preferences.
Prepping Your Cast Iron Skillet
With your batter resting and ready, proper skillet preparation becomes the foundation for a successful rise. Start with thorough skillet cleaning using warm, soapy water and a coarse salt scrub to remove any residue. Dry your cast iron completely with a lint-free cloth, ensuring you eliminate all moisture from the interior, handle, and exterior surfaces.
Next, heat your skillet on the stovetop over high heat for five to six minutes to evaporate any remaining water. Once fully dry, proceed with oil application by coating a thin layer of Crisco shortening or cooking oil across the entire pan, including the underside. The oil will undergo polymerization when heated, creating a molecular bond with the iron that strengthens your pan’s seasoning. For best results, avoid using soap when maintaining your seasoned cast iron between uses. Regular seasoning builds a resilient, non-stick layer that improves with use over time. Consider using high smoke-point oils like vegetable or avocado oil for optimal seasoning results. For finishing touches and precise heat application on your completed pancake, a culinary butane torch can caramelize the apple topping beautifully. Your seasoned skillet is now ready for baking your Dutch oven apple pancake.
Baking to Golden Perfection
Once you’ve placed your prepared skillet into a preheated 400–425°F oven, the transformation begins immediately. Your baking techniques directly control color formation: at 400°F, expect 20–30 minutes for even browning and a custardy center; at 425°F, you’ll achieve faster puffing with slightly deeper edges in 15–20 minutes.
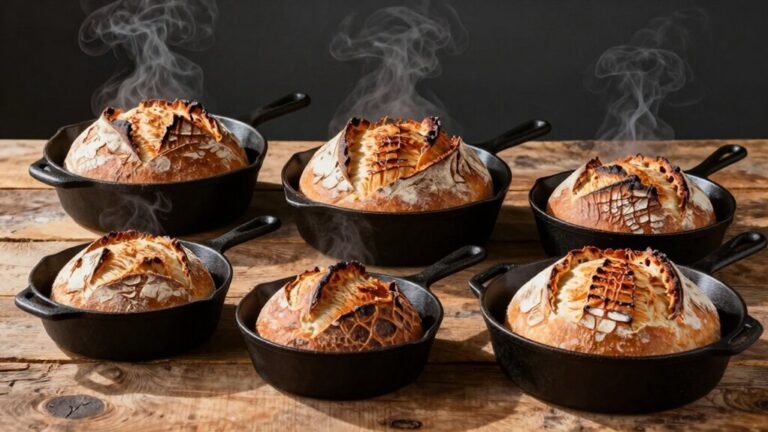
Watch for visual cues—puffed, golden-brown edges and a set but slightly jiggly center signal doneness. Your skillet’s thermal mass matters: cast iron’s heat retention creates consistent, even browning across the pancake’s surface. A 5-quart Dutch oven provides ideal proportions for baking individual or small-batch pancakes with balanced results. After the initial 12 minutes of baking, the oven temperature should be reduced to prevent over-browning while the center continues to cook through. Lodge Dutch ovens are designed to transition seamlessly from stovetop to oven, making them exceptionally reliable for baking applications like this Dutch oven apple pancake. To maintain your Dutch oven’s performance and prevent rust, apply a light coat of oil] before storage. For best results, serve warm cut into six pieces to enjoy the optimal texture and flavor.
If edges brown too quickly, reduce temperature by 25°F midway through baking. The butter and sugar-coated apples underneath contribute caramelized color that complements the batter’s golden exterior. Cast iron Dutch ovens are particularly effective for achieving even heat distribution and creating that desirable golden-brown finish, making them ideal for campfire cooking and satisfying dessert cravings. This balance between rapid initial heat and controlled finishing prevents burnt edges while achieving that perfect, appetizing golden hue throughout.
Plating and Presentation
Your Dutch oven apple pancake‘s golden exterior and perfectly puffed center won’t stay that way long—you’ll want to get it from oven to table quickly to preserve that dramatic height and caramelized apple finish. You’ve got two primary plating techniques to choose from. For casual family-style serving, place the skillet on a trivet and slice wedges directly in the pan. Alternatively, invert the pancake onto a large plate using oven gloves—this flips the caramelized apples face-up for an impressive presentation. Once plated, dust with powdered sugar through a fine mesh sieve for elegant contrast. Both presentation styles showcase your layered batter, softened apples, and golden crust effectively. An oven-proof pan is essential for ensuring your pancake bakes evenly and maintains its structural integrity throughout cooking. For maximum freshness, consider storing any leftover pancake using freezer-safe storage containers to preserve quality until your next meal. For the most dramatic effect, serve directly from the skillet to highlight the impressive puffiness that makes this recipe so beloved. Serve immediately while the custardy texture remains ideal.
Serving Suggestions and Pairings
Since the Dutch oven apple pancake‘s custardy interior and caramelized exterior demand immediate consumption, you’ll want toppings and sides ready before you plate.
Your syrup options include maple drizzle, honey, or caramel sauce applied immediately after baking. Dairy pairings enhance texture—dollop Greek yogurt, add a vanilla ice cream scoop, or top with whipped cream. For fruit toppings, serve fresh berries alongside your apple-studded pancake. Nut enhancements like toasted pecans or walnuts complement the existing caramelized apples beautifully.
Spice additions of cinnamon and nutmeg already infuse the batter, but dust additional cinnamon over finished slices for visual appeal and flavor intensity. For authenticity, consider applying stroop as an alternative topping for a traditional Dutch touch. Balance sweetness with savory side dishes: crispy bacon, maple sausage, or scrambled eggs provide protein and contrast, transforming your pancake into a complete breakfast experience. Like a Dutch oven chicken stew, this dish benefits from layering complementary flavors to create a satisfying meal.