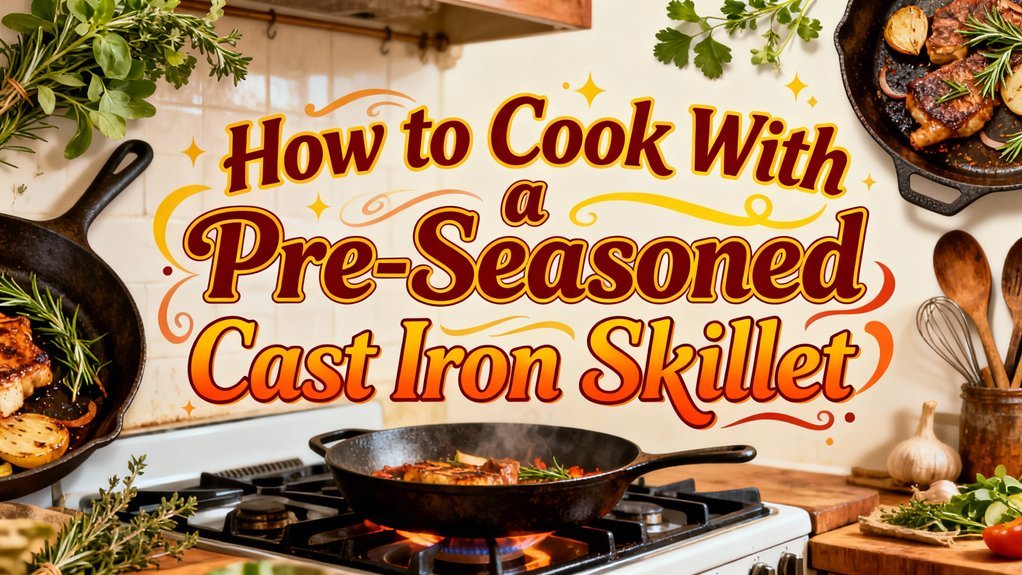
You’ll preheat your pre-seasoned cast iron skillet gradually on medium heat for 4-5 minutes until completely dry. Add a small quantity of high smoke-point oil, ensuring it slides freely across the surface before placing food. Monitor oil behavior closely to manage temperature effectively—cast iron’s exceptional heat retention means you’ll rarely need high settings. Use medium heat for most applications, maintaining 350°F–370°F for deep frying and 375°F–390°F for oven cooking. Consistent practice with fatty foods builds superior nonstick properties over time as polymerization strengthens seasoning bonds.
Initial Preparation and Cleaning
Properly maintaining your pre-seasoned cast iron skillet begins with immediate post-use care to preserve its protective seasoning layer and prevent rust formation. Execute your initial rinse under warm water promptly after cooking, focusing on removing loose food particles without prolonged submersion. Employ a chain mail scrubber to effectively dislodge stuck debris while minimizing water exposure. For your hand washing method, use warm, soapy water with a stiff-bristled brush, concentrating on food residue elimination. Dish soap proves safe when thoroughly rinsed afterward. If dried-on bits resist removal, gently heat your skillet before washing to loosen adherent materials. You can also use deglazing techniques with red wine or beef stock to help loosen stuck food particles before washing. Never use your dishwasher, as this strips seasoning and accelerates rust development. Immediately dry your skillet completely with a lint-free cloth, ensuring no moisture remains on any surface. For stubborn residue, you can pour a generous amount of kosher salt into the skillet and use a paper towel to rub it vigorously over the surface as a gentle abrasive. After drying, apply a light oil coating to your skillet to help prevent rust and maintain the seasoning, ensuring the oil is rubbed into the warm pan to create effective polymerization bonding. Proper storage with separators to allow airflow will help preserve the skillet’s cooking surface and ensure long-term durability. While cast iron is versatile, be cautious when using pre-seasoned skillets on glass top stoves to avoid scratching the cooktop surface. Store your skillet in a moisture-free environment after drying to prevent future rust formation and maintain long-term durability.
Starting to Cook Immediately
Once you’ve dried your skillet completely, you’re ready to begin cooking immediately—no extended waiting period required. Preheat your pan gradually on a medium or lower heat setting for 4-5 minutes, allowing uniform thermal distribution across the surface. When smoke or steam emanates from the empty pan, it signals ideal preheat conditions. Add a small quantity of oil or fat, which should slide effortlessly across the hot surface. For butter incorporation, apply oil first, then add butter immediately before introducing food. Quick recipes featuring simple ingredients work exceptionally well during this initial phase. Place your food directly into the pan without delay, initiating the cooking process while simultaneously building your skillet’s seasoning layer. Each meal progressively strengthens your nonstick surface through natural seasoning development, creating the classic black patina that characterizes well-maintained cast iron cookware. The seasoning process involves oil baked onto the pan via polymerization, which converts liquid fats into a hardened, bonded layer with each use. Avoid using harsh soaps or abrasive scrubbers that can damage the seasoning you’ve built. Just as space-saving storage solutions can maximize efficiency in other contexts, proper cast iron maintenance maximizes your cookware’s longevity and performance. To maintain your skillet’s performance, store it in a dry place to protect against rust and preserve the seasoning you’ve built. This resilient, non-stick layer improves with each cooking session and protects against rust. Consider preparing hearty side dishes like layered potato recipes on your seasoned cast iron for flavorful one-pan meals.
Heating and Oil Application Techniques
Two primary heating methods—oven and stovetop—offer distinct advantages depending on your seasoning goals and time constraints. For oven preheating techniques, you’ll start at 200 degrees Fahrenheit for 15-20 minutes with your skillet positioned upside down to prevent oil pooling. This initial phase guarantees even heat distribution before oil application.
During oil application, use a lint-free cotton rag to apply a liberal amount of high smoke point oil like grapeseed or avocado. Wipe excess oil immediately to avoid buildup. Progress your temperature to 300 degrees for 15 minutes, then conduct a second light wipe before your final 400-degree, 2-hour bake. Storing oiled pans upside down until smoke appears helps maximize oil absorption into the seasoning layers. This two-hour duration at 400 degrees results in a non-sticky, well-adhered oil coating that creates a beautiful black patina. The natural seasoning that develops over time through this process significantly improves the non-stick properties of your skillet for future cooking. Just as Dutch oven camping meals benefit from even coal placement for consistent results, cast iron requires uniform heat distribution throughout the seasoning process. After baking, allow your skillet to cool inside the oven to properly cure the seasoning layers. Many outdoor cooks use Dutch oven desserts as inspiration for mastering cast iron cooking techniques across multiple cookware types.
For stovetop use, heat your empty skillet on high until it’s ready, then apply a thin Crisco layer and cook 5-7 minutes to establish your heat benchmark. Always hand wash cast iron with warm soapy water rather than using a dishwasher, which will damage the seasoning and cause rust.
Cooking Methods and Temperature Management
Since cast iron’s exceptional heat retention eliminates the need for high stovetop settings, you’ll find that medium heat provides sufficient temperature for most cooking applications. Your searing techniques benefit from consistent heat management, as temperature fluctuations compromise cooking results. Monitor oil behavior closely—when fat slides smoothly across the surface, your pan has reached ideal readiness. To prevent food from sticking and enhance flavor, use a little butter or oil during the preheating process. Well-seasoned cast iron develops natural non-stick properties that improve with proper maintenance and use over time.
For stovetop preparations, expect cooking durations of 5-7 minutes at medium heat. When changing to oven cooking, employ broiler settings at 500°F for initial searing before reducing to standard roasting temperatures between 375°F and 390°F. Temperature monitoring prevents over-browning while ensuring thorough cooking of larger items. Extended oven times—20 minutes for vegetables, 90-95 minutes for poultry—accommodate cast iron’s heat distribution characteristics. For precise cooking results with moisture-heavy foods, consider using vacuum sealing techniques to prepare your ingredients before cast iron preparation. Cast iron’s versatility extends beyond traditional ovens to grills and campfires, offering flexible cooking options for various environments. Consistent cooking with fats reinforces the seasoning layer developed during your initial preparation process. This methodical approach maximizes both cooking efficiency and seasoning development.
Pan-Searing Vegetables and Meats
Mastering the sear requires methodical preheating to establish the thermal foundation for ideal browning. You’ll apply pan searing techniques by heating your cast iron until water visibly sizzles, then allowing 8-10 minutes until 75% of the surface hazes.
Add one tablespoon of avocado or olive oil, then incorporate your dried vegetables in a single layer. Toss every 1-2 minutes for uniform caramelization, maintaining medium-high heat to develop crisp, golden-brown exteriors. Sauté 8-10 minutes until vegetables achieve tenderness. Cast iron skillets provide even heat distribution that prevents hot spots and ensures consistent browning across all vegetables.
For effective seasoning, you’ll add salt midway through cooking, then pepper during final stirring. Avoid using olive oil as your cooking fat since it has a low smoke point and may burn at high temperatures. This methodology builds layered flavor as vegetables release oils. Consider selecting a round skillet shape for optimal heat distribution and burner compatibility. Beef tallow is a superior cooking fat option due to its high smoke point of around 400 degrees Fahrenheit, allowing it to withstand high heat without burning or smoking. A fitted lid transforms your skillet into a multi-functional cooking tool by enabling braising and steaming techniques that retain moisture and heat. For foods you plan to store after cooking, consider using vacuum sealer bags to extend freshness and prevent freezer burn. Sear meats similarly afterward, utilizing accumulated fond for enhanced depth. Serve immediately to preserve textural integrity.
Deep Frying in Cast Iron
While pan-searing builds flavor through direct heat contact, deep frying in cast iron employs complete oil immersion to achieve unparalleled crispness and golden-brown exteriors. Your oil selection proves critical—vegetable, peanut, canola, and grapeseed oils possess high smoke points that prevent burning. Maintain 2 to 3 inches of oil depth and monitor temperature between 350°F–370°F using a digital probe thermometer.
Cast iron Dutch ovens excel here due to superior heat retention and high walls that prevent splattering. Avoid overcrowding your pan; this drops oil temperature considerably. Lower food items gently to preserve batter integrity and maintain even cooking. Allow items to float freely for uniform browning on all sides. Remove any floating debris during frying to prevent bitterness in the oil. A tight-fitting lid reduces splatter while allowing controlled ventilation during the frying process. Between batches, return oil to target temperature before adding subsequent items. Proper seasoning maintenance ensures your cast iron remains in excellent condition for future frying sessions. After frying, cool oil to room temperature before straining it into a container for future use. Pat fried items dry with paper towels and let them rest briefly before serving to ensure maximum crispness and optimal texture.
Maintenance Between Uses
Three critical steps—immediate cooling, thorough drying, and protective oiling—form the foundation of cast iron maintenance between uses. You’ll allow your cookware to cool completely before cleaning, then hand wash with warm water and gentle dish soap using a natural fiber brush. Rinse thoroughly without soaking to prevent water retention.
Next, you’ll dry the entire surface immediately with a clean towel, including the handle, bottom, and exterior. For rust prevention, verify no moisture remains; heat briefly on the stovetop if needed to evaporate residual water. A brief stovetop heating ensures complete moisture removal before oil application. For heavy buildup or rust spots, steel wool scrubbing may be necessary, though this requires re-seasoning the skillet afterward. When dealing with stuck-on food, stiff-bristled brushes are essential for removing buildup without damaging the seasoning layer. If rust develops despite your efforts, surface rust can be treated with vinegar before re-cleaning and seasoning the skillet. For particularly stubborn burnt areas, boiling water with baking soda in the skillet can help lift burnt food before scrubbing.
Finally, you’ll apply oil maintenance by coating the cooking surface with a thin layer of neutral oil like a vegetable-based product. Wipe excess oil with a cloth to prevent sticky buildup. The layers of oil you build through consistent cooking and maintenance will enhance the cookware’s easy-release finish over time. Re-seasoning by applying oil and heating in the oven at approximately 350°F can restore the seasoning if the non-stick surface becomes compromised. This systematic approach preserves your skillet’s seasoning and extends its lifespan appreciably.
Long-Term Seasoning Development
Once you’ve established your cast iron’s foundation with initial seasoning layers, you’ll build a durable, nonstick surface through polymerization—a molecular process where oils heated above 375°F (190°C) transform into hardened polymers bonded to the iron. Your seasoning evolution accelerates through consistent cooking with fatty foods like bacon, roux, or popcorn, which reinforce each layer systematically. Early patchy applications smooth into a glossy black finish as repeated cooking creates interlocking polymer chains. Layer reinforcement occurs naturally during regular use, eliminating the need for deliberate re-seasoning cycles. Avoid aggressive cleaning methods that compromise this developing surface, and wipe down with a thin layer of oil after each cleaning session to maintain the integrity of your seasoning. The best oil for this maintenance is 100% pure flaxseed oil, which polymerizes effectively and strengthens your seasoning bond. Over approximately one year of proper maintenance and frequent cooking, your pan develops exceptional nonstick properties and wear resistance, requiring only standard care to preserve the established patina.