You’ll create restaurant-quality cornbread by preheating your cast iron skillet with butter at medium heat, then pouring your batter and covering it with foil to trap steam. Cook for 15-20 minutes on medium-low, monitoring heat to prevent burning while ensuring thorough cooking. The result? A crispy, golden crust with a tender crumb. Uncover how proper seasoning, ingredient ratios, and cooling techniques elevate your stovetop cornbread to perfection.
Essential Equipment and Skillet Selection
Since cast iron’s superior heat retention and upward heat radiation are essential for achieving uniform cooking and crispy golden-brown edges, you’ll want to select the right skillet for your cornbread. Choose uncoated cast iron over enameled varieties—well-seasoned uncoated iron delivers the crispy results you’re after. A 10-inch skillet works perfectly for standard batches, though 10–12 inch options provide exceptionally crispy edges. Smaller 8-inch skillets finish cooking minutes sooner, while 12-inch pans yield thinner cornbread. If you don’t have cast iron available, oven-proof non-stick deep skillets or 8×8 inch aluminum baking pans serve as reliable alternatives. For optimal heat distribution during stovetop cooking, maintain medium-low heat control to prevent scorching and ensure even baking throughout.
Regarding preheating methods, you’ll achieve excellent results by preheating your skillet in the oven at 450°F for maximum crust crispness. Position it on the second rack from the top, placing oil or drippings inside during preheat. This technique guarantees your batter hits a properly heated surface, developing that signature golden-brown exterior you’re seeking.
Gathering Your Core Ingredients
Now that you’ve got your skillet prepped and heating to temperature, gathering your ingredients becomes your next priority. You’ll need one cup each of all-purpose flour and yellow cornmeal, both spooned and leveled for accuracy. Combine these with ½ to ⅔ cup granulated sugar, ½ to 1 teaspoon kosher salt, and 2 teaspoons baking powder.
Your wet ingredients include 1 cup buttermilk paired with ½ to 1¼ cups whole milk, balancing richness with proper batter consistency. For fats, measure ½ cup unsalted butter—some melted for mixing, some reserved for greasing. Add 2 room-temperature eggs for binding structure. Buttermilk adds richness and tenderizes the cornbread, making it essential for achieving that perfect crumb texture. To prevent sticking and ensure even browning, only use enough butter to coat your skillet without excess pooling. Just as a cast iron skillet requires proper oil coating for pizza to achieve an optimal golden crust, your cornbread benefits from careful butter application.
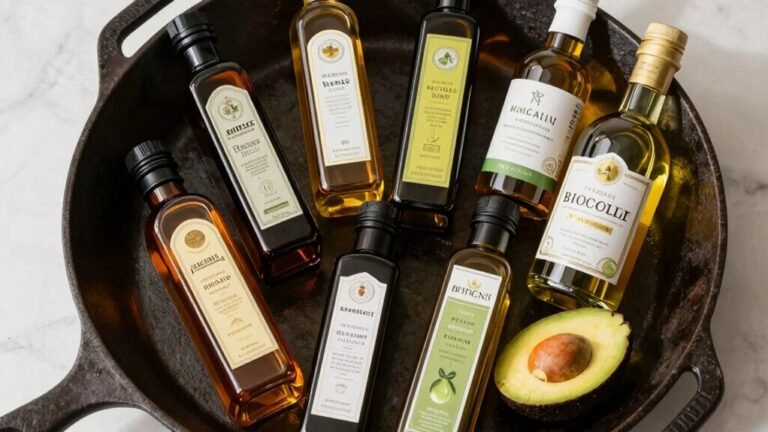
Understanding ingredient proportions guarantees success. You can employ choosing substitutes strategically: self-rising cornmeal eliminates separate leavening agents, or vegetable oil replaces butter when needed, maintaining moisture without compromising texture or flavor development. For a buttermilk-free approach, substitute whole milk and other common ingredients to achieve the same moist, flavorful result. Oils with high smoke points, such as vegetable oil or canola oil, are ideal fat choices for both seasoning cast iron and for cooking applications. The iron from a well-seasoned skillet can add trace minerals to food while enhancing the cornbread’s browning and texture. Building multiple layers of seasoning on your cast iron creates a durable non-stick surface that enhances the cornbread’s browning and texture.
Preparing and Mixing Your Batter
Getting your batter’s consistency right’ll make the difference between a tender, evenly-cooked cornbread and one that’s either cake-like or dense and dry. Aim for a pourable batter that flows slowly off your spoon—this allows even skillet spread during cooking.
Start with the dry-first mixing technique: whisk cornmeal, flour, sugar, baking powder, baking soda, and salt together until uniform. This guarantees even leavening distribution. Separately, whisk room-temperature eggs, buttermilk, and cooled melted butter for consistent emulsification.
Fold the wet ingredients into your dry mix with gentle strokes, avoiding overmixing that develops gluten and toughens your crumb. Stop when no visible dry flour remains; small lumps are acceptable. Let your batter rest 10–30 minutes, allowing cornmeal hydration and leavening activation to improve rise and texture considerably. Using House Autry White Self-Rising Corn Meal Mix ensures your cornbread has the quality foundation needed for optimal results. For best results, ensure your buttermilk and eggs are at room temperature before combining with the dry ingredients, as this promotes better integration and a more uniform bake.
Make sure your cast iron skillet has a protective seasoning layer to prevent rust and ensure your cornbread cooks evenly without picking up any metallic flavors. Enameled cast iron offers a non-toxic alternative that eliminates concerns about seasoning maintenance while providing the same superior heat retention. To maintain this protective layer, season your skillet with oil after each use by heating on a stovetop to evaporate any excess moisture. A well-seasoned skillet can be maintained by wiping away all excess oil after each use to prevent spots and blotches on your cookware. Proper cast iron care through regular use and maintenance ensures your skillet will perform reliably for years of cornbread baking.
Stovetop Cooking Method
Once your batter’s rested and your cast iron’s prepped, you’ll want to heat it thoroughly over medium heat with 2 tablespoons of butter, swirling to coat the entire pan including the sides—this dual-purpose coating creates both a non-stick surface and a golden, flavorful crust.
Pour your batter into the sizzling skillet, ensuring an even layer. Cover immediately with a lid or aluminum foil crimped at the edges with ventilation slits. This critical step traps steam, promoting rise while preventing excessive browning.
Reduce heat to medium-low and cook for 15-20 minutes until the top loses its gooey appearance. Heat control here prevents burning while allowing thorough cooking. These stovetop variations accommodate different burner intensities—monitor progress closely. This method works particularly well during power outages when traditional electric ovens are unavailable, allowing you to create warm, comforting meals using your gas cooktop or alternative cooking surfaces. The entire cooking process takes approximately 13 minutes, making it an efficient alternative to traditional oven baking.
After cooking, flip using a plate and pot holders, then finish the second side for 10-15 minutes until lightly browned.
Troubleshooting and Pro Tips
Why does your cornbread stick stubbornly to the pan or bake unevenly despite following the stovetop method? Sticking issues typically stem from inadequate seasoning or insufficient fat coating. You’ll prevent this by layering oil between uses and generously greasing your hot skillet with butter, oil, or bacon grease before pouring batter.
For cooling tips, resist the urge to remove cornbread immediately. Let it rest five to ten minutes in the skillet, allowing the crust to set and separate naturally from cast iron’s surface. Then shimmy the edges gently or run a knife around the perimeter for clean release. After each use, maintain your skillet’s seasoning by applying a thin layer of oil to prevent rust and keep the cooking surface in top condition. Proper seasoning creates a natural non-stick surface similar to how root vegetables develop caramelized exteriors in Dutch ovens during long cooking processes. Building multiple seasoning layers through repeated oiling and heating will develop a durable, nonstick surface that improves with time. Using a stiff-bristled brush after cooking helps remove stuck-on food while preserving your seasoning layer. Preheating your cast iron skillet ensures excellent heat retention and helps achieve a perfectly browned underside that enhances the overall quality of your cornbread. For best results, monitor the internal temperature for doneness to ensure your cornbread bakes evenly throughout.
Check doneness at fifteen minutes using the toothpick test at the thickest part. A golden top signals readiness. These pro strategies eliminate frustration and deliver perfectly browned, non-stick results consistently.