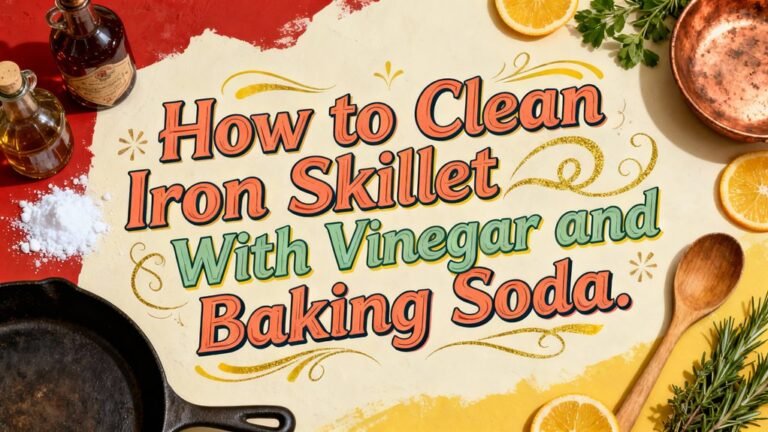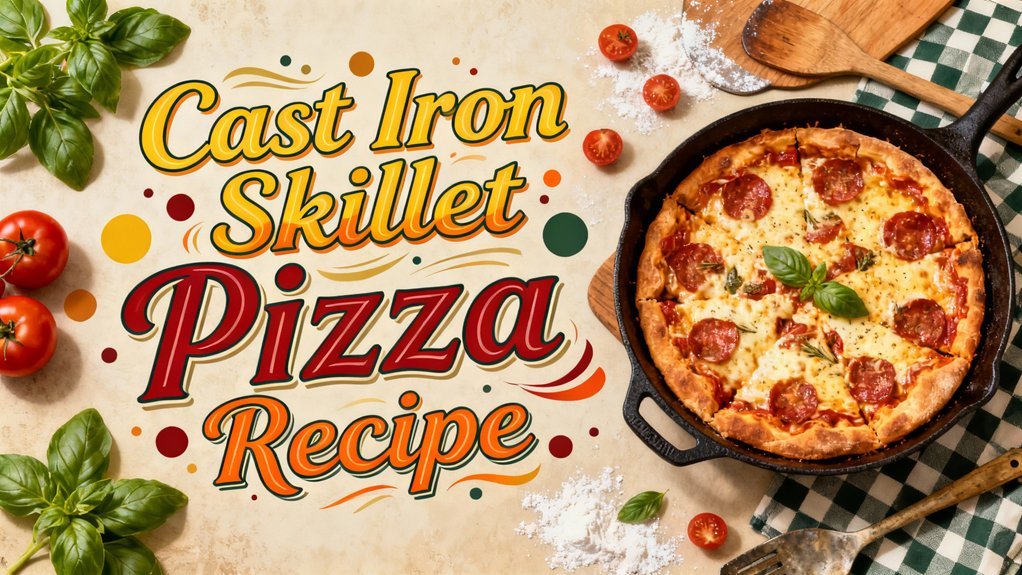
You’ll create restaurant-quality cast iron skillet pizza by starting with a well-seasoned 10–12 inch pan preheated to 500°F for 20–25 minutes. Mix bread flour, active dry yeast, salt, and olive oil, then let your dough rise 6–8 hours for ideal flavor. Par-bake for 4–8 minutes, add ¾ cup marinara and 1.5 cups mozzarella, then bake until cheese bubbles and edges brown. The techniques for achieving that perfect crispy, golden crust require precise temperature control and strategic topping placement you’ll uncover ahead.
Equipment & Pan Preparation
You’ll want to start with a well-seasoned cast iron skillet—the foundation of exceptional pizza in this cooking method. Inspect your pan for a dark, glossy finish that minimizes sticking and reduces added oil needs.
Choose a 10–12 inch skillet for single large pizzas or an 8–10 inch for individual servings. Before cooking, wipe the pan with a thin layer of neutral oil—roughly one tablespoon—tilting to coat the bottom and sides evenly. This light application prevents greasing while promoting crust release and browning. The non-stick surface created through proper seasoning reduces the need for excess oil during cooking.
If your pan seasoning shows wear or rust spots, use fine steel wool to remove debris, dry thoroughly, and perform immediate re-seasoning. A fitted lid can transform your skillet into a multipurpose cooking vessel for techniques beyond pizza-making. For food storage after your meal, consider using a vacuum sealer to preserve any leftover pizza slices by removing air and maintaining freshness. Proper vacuum sealing can prevent freezer burn and extend the shelf life of your pizza for future enjoyment. Unlike glass lids that limit temperature to around 400°F, cast iron’s oven-safe temperature ratings allow you to preheat and bake at much higher temperatures for superior crust results. Position your oven rack at the middle to top level depending on desired browning preference, then place the oiled skillet on a sturdy rack. The heavy construction of cast iron allows it to retain heat effectively during baking, which creates a crispy layer on the crust while maintaining an airy, chewy interior. For optimal results, preheat the skillet for at least 20-25 minutes at 500°F to ensure the cast iron radiates sufficient heat for a crispy crust.
Preheating Your Skillet
Once your skillet’s properly oiled and positioned on the oven rack, set your oven to 500°F and let the pan preheat for 20–25 minutes. This extended preheat duration guarantees even heat distribution throughout your cast iron, which is vital for achieving a uniformly crispy crust.
Your skillet selection matters here—cast iron heats faster than pizza stones, so you’ll need precise preheat techniques to avoid thermal shock. Don’t rush this step. Preheating an empty pan at high temperatures in the oven is the safest approach, allowing the metal to reach ideal temperature gradually. Cast iron’s thick construction enables superior heat retention compared to other cookware options. For optimal results in electric ovens, consider extending your preheat time to one hour for superior heat retention and more consistent cooking.
While your skillet heats, prepare your dough and toppings, leveraging the same Dutch oven versatility that makes holiday cooking more manageable. You’ll want everything ready before removing the hot pan. To prevent rapid temperature changes that could damage your cookware, avoid placing cold ingredients directly into the skillet immediately after preheating. After cooking, remember to re-season the pan by applying a thin layer of oil and heating it to maintain its protective coating. Like precise cooking methods such as sous vide techniques, achieving the perfect pizza crust requires careful temperature management and timing. The elevated heat develops that coveted golden-brown, crunchy bottom that rivals professional pizza ovens.
Dough Selection & Handling
The foundation of exceptional cast iron skillet pizza starts with three simple ingredients: bread flour, active dry rapid-rise yeast, and salt. You’ll combine ½ cup flour with the yeast and salt, then add your lukewarm water mixed with olive oil and honey. This honey activates yeast fermentation, ensuring proper dough rise.
Mix for 2-3 minutes until you achieve the correct dough consistency—it should be slightly tacky but manageable. You’ll then let your dough rise at room temperature for 6-8 hours, developing complex flavors through extended fermentation. For maximum versatility, you can also use store-bought pizza dough to save time on busy weeknights.
When you’re ready to shape, flour your work surface and dough generously to prevent sticking. Press your dough into the oiled skillet, stretching it gently to the edges. Allow 5 minutes for gluten relaxation before adding toppings. Avoid making the dough too thick for best results, as this ensures a perfectly crispy and evenly cooked crust. Proper storage techniques can help preserve any leftover dough by vacuum sealing it for future use. Cast iron skillets with wooden handles remain cool during stovetop cooking, making them ideal for pizza preparation.
Achieving the Perfect Crust
Since cast iron’s exceptional heat retention defines your pizza’s final texture, preheating your oven to at least 450–500°F and your skillet for 20–30 minutes isn’t optional—it’s essential to achieving rapid crust set and the deep Maillard browning that separates exceptional pan pizza from mediocre results.
Lightly oil your pan’s bottom and sides with high-smoke-point oil to encourage crisp, golden exteriors while preventing sticking. Dock your dough sparingly to maintain surface tension for edge rise, then apply a thin oil layer to the perimeter before baking. Par-bake for 4–8 minutes to set the bottom before adding wet toppings—this critical step prevents sogginess and maximizes crust flavor complexity. The perforations in specialty cast iron grill pans similarly allow excess fat to drain away from food, keeping your cooking surface cleaner. Use cheese bubbling and rim coloration as doneness indicators rather than relying solely on time. For best results, move the pan to the top rack for an additional 2–3 minutes to achieve a browner top and more evenly cooked surface. Cast iron’s tight-fitting lid and heavy construction also work to retain moisture during longer cooking processes, ensuring your crust develops optimal texture. The visual appeal post-baking is enhanced when you ensure generous distribution of olive oil throughout the skillet, including the sides, creating a beautifully golden and crispy exterior.
Sauce & Cheese Application
After your dough’s par-bake, you’ll apply sauce and cheese with deliberate restraint—this step determines whether you’ll achieve balanced flavor or a soggy, overwhelmed crust.
Master sauce portioning techniques by using ¾ cup marinara per pound of dough in a 10-12 inch pan. Spread thin layers evenly across the surface, leaving a quarter-inch border for crust development. Avoid overloading edges, as excess sauce migrates during baking. Alternative sauces like pesto can also be used as your base layer for different flavor profiles. For best results, homemade sauce adds more flavor compared to jarred options.
For cheese layering methods, apply 1.5 cups shredded mozzarella directly over sauce. Your cheese distribution strategies should extend coverage to all edges, creating an even blanket that absorbs excess moisture. Consider sauce spreading tips like dotting additional sauce over the cheese layer for upside-down pizza variations.
This measured approach prevents sogginess while ensuring complete flavor integration throughout your cast iron skillet pizza.
Topping Strategies for Success
Your topping choices will make or break the final pizza—selecting ingredients that tolerate intense, direct heat and layering them strategically guarantees you’ll achieve crispy edges, melted cheese, and fully cooked toppings without soggy spots.
Prioritize topping layering by cook time: place pre-cooked proteins and heat-tolerant vegetables first, reserving delicate herbs and tender greens for post-bake finishing. Pat-dry mushrooms and sauté watery produce beforehand to eliminate excess moisture that causes sogginess. Consider alternative cheeses like feta and provolone alongside traditional mozzarella to enhance the overall flavor profile of your pizza. After baking, allow the finished pizza to cool for several minutes before slicing to ensure toppings set properly.
Maintain ingredient balance by distributing toppings thinly across the skillet, keeping heavier items centered to prevent rim collapse. Leave a ½–1 inch border free of toppings for crust expansion and edge crisping. For optimal results, use low-moisture mozzarella rather than fresh varieties, which may not melt properly and can compromise your pizza’s texture. Cast iron’s superior heat retention ensures that your toppings cook evenly throughout the baking process without burning on the edges, while its natural seasoning develops over time to create improved non-stick properties. Preheating your cast iron skillet on the stovetop with cornmeal or flour creates the ideal surface for a crispy, evenly browned crust.
Use bold flavor anchors—cured meats, pungent cheeses, concentrated sauces—to cut through caramelization and richness.
Baking Temperature & Timing
Once you’ve layered your toppings with care, the oven’s heat becomes your primary tool for transforming that assembled dough into a finished pie. Set your oven between 475–500°F for best bake results with thin crusts, or lower to 425–450°F for thicker pan styles. Preheat your cast iron skillet inside the oven for 10–20 minutes to guarantee rapid crust texture development and even browning. Cast iron’s heat retention capabilities ensure consistent temperatures throughout the baking process.
Your bake time typically ranges from 6–12 minutes for thin crusts, adjusting based on oven type and topping distribution. Place the skillet on the bottom rack initially to crisp the base, then shift to the upper rack for final top browning. Monitor moisture management by watching cheese caramelization and edge blistering. Temperature adjustment accounts for dough thickness and topping load—thicker pies benefit from slightly lower heat and extended bake time. For accuracy, use an oven thermometer to verify your oven’s actual temperature, as regular ovens can vary by several degrees from their dial setting. Proper seasoning maintenance on your cast iron ensures the pan continues to develop its natural non-stick coating, which helps prevent sticking during pizza preparation and baking. To maintain your skillet’s performance, regularly season it with high smoke point oil applied in thin layers to build up a durable non-stick surface. Cast iron skillets deliver reliable, flavorful results when used with the right technique across different heat sources. For optimal results with cast iron pans, allow the pizza to cool briefly before cutting to prevent the crust from becoming soggy and to ensure cleaner slices.
Browning & Finishing Techniques
The shift from oven to table demands attention to both crust texture and visual appeal—browning isn’t incidental to the baking process, it’s central to it. Your browning techniques determine whether you achieve that coveted crispy-edged result.
Brush water on your crust edges post-topping to promote deeper browning during baking. Coat your pan sides with olive oil to create a fried crunch on the rim. Spread cheese directly to the edges, where it’ll form a crispy fried cheese outer crust.
For finishing touches, rest your pizza five minutes in the skillet—this sets the cheese and eases slicing while the base stays crisp. You can apply post-bake stovetop heat for up to five minutes at medium temperature to further crisp the bottom. Transfer carefully to preserve that browned crust integrity. Consider rotating your pizza during baking to ensure even heat distribution and consistent browning across the entire crust. The superior heat retention of cast iron allows the bottom to develop that essential golden-brown color while maintaining crispness throughout cooking.
Safety & Handling Precautions
Cast iron’s exceptional heat retention—while essential for achieving that perfectly browned crust—demands careful handling throughout the cooking process. You’ll want to wear heavy-duty oven mitts or leather gloves when moving your skillet, as handles become dangerously hot long after removal from heat. Never leave your hot skillet unattended on the stovetop; stored heat can ignite nearby combustibles or cause severe burns if knocked over. Place a heat-resistant trivet under the pan to protect your countertops from heat damage. Keep children and pets away from the cooking area to reduce contact burn risks. Allow gradual preheating rather than exposing cold cast iron to maximum temperature, preventing thermal shock and cracking, which can also occur with other cookware like Dutch ovens if not properly conditioned. When transferring dough or food into your preheated skillet, consider using a bread sling or parchment paper to safely lower items into the hot pan without risking burns to your hands. Proper seasoning methods ensure your skillet maintains optimal nonstick properties and heat distribution during cooking. After cooking, make sure to thoroughly dry your skillet either by towel or by heating it on the stovetop to prevent rust and maintain its integrity. Proper seasoning maintenance is also critical for safe cast iron use, as a well-maintained skillet performs more reliably during high-heat cooking applications. These essential safety tips and handling procedures protect you and your kitchen while delivering exceptional pizza results.
Troubleshooting Common Issues
Even with proper technique, you’ll encounter predictable challenges when mastering cast iron skillet pizza. Understanding common pitfalls helps you correct them systematically.
Your crust won’t brown adequately without sufficient oven preheat—aim for 30 minutes at 500°F minimum. Room temperature pans perform better than preheated ones when transferred to hot ovens. Ingredient ratios matter considerably; insufficient oil or sugar in your dough reduces browning potential. Preheating your skillet ensures even heat distribution throughout the cooking surface. To avoid thermal shock that can damage your cookware, place your skillet in the oven as it preheats so both heat up gradually together. Cast iron Dutch ovens and skillets benefit from the same gradual heating principles used in traditional baking methods.
Overcrowding your skillet prevents proper heat circulation, creating steam buildup that yields soggy, limp crusts. Distribute toppings strategically to maintain even cooking. Consider using an instant-read thermometer to verify your skillet has reached optimal temperature before adding dough.
Oil selection directly impacts results. Avoid unclarified butter, which burns quickly, and extra virgin olive oil, which breaks down and leaves tacky residue. Choose high smoke-point oils instead, similar to how proper storage techniques require selecting appropriate materials for food preservation.
Finally, avoid broiling cast iron pizza. Baking provides superior heat distribution, preventing over-browned toppings with underdone crusts.