You’ll transform tough top round steak by tenderizing it with a meat mallet, then marinating it in soy sauce, garlic, brown sugar, and vinegar for 2-4 hours. Pat it dry and sear it undisturbed in a preheated cast iron skillet with canola oil for 2-3 minutes per side. Monitor the internal temperature with a thermometer, aiming for 130°F. Rest it 5-10 minutes before slicing against the grain. Deglaze the skillet with wine or stock, finishing with cold butter for a restaurant-quality sauce that ties everything together.
Preparing Your Top Round Steak
How you prepare your top round steak makes the difference between a tough, chewy meal and a tender, flavorful one. Start by tenderizing steak using a meat mallet—pound both sides between parchment paper for 20-30 seconds to break down tough fibers and achieve uniform 1/2-inch thickness.
Next, employ marinating techniques to maximize tenderness. Place your steak in a Ziploc bag with soy sauce, garlic, brown sugar, vinegar, Worcestershire sauce, and oil. Refrigerate for 2-4 hours or overnight, turning occasionally for even coverage. This process adds moisture and acidity while breaking down proteins. For optimal results, consider marinating for 24 hours to allow the flavors to fully penetrate the meat. Using vacuum sealer bags instead of standard Ziploc bags can further enhance marinating by removing excess air and ensuring more consistent flavor absorption throughout the meat. When using vacuum sealed bags for marinating, you can safely refrigerate your steak for extended periods while maintaining superior flavor absorption and tenderness.
Before searing, pat your steak dry with paper towels to promote a crispy crust. Allow it to reach room temperature for 30 minutes. Trim any silver skin, then lightly oil the surface for ideal searing results. Cast iron skillets retain heat exceptionally well, which enables the development of a superior, savory crust through the Maillard reaction. Like the versatility of cast iron Dutch ovens, cast iron skillets excel at cooking steak and developing rich, flavorful crusts. Just as cast iron Dutch ovens can be used to create a hot and humid environment for baking, cast iron skillets maintain consistent heat for optimal cooking results. Round steak absorbs flavors exceptionally well, so these preparation steps working in tandem with butter, garlic, and rosemary will enhance the final taste of your dish.
Seasoning Your Meat Properly
Once you’ve prepared your steak through tenderizing and marinating, proper seasoning transforms it from good to exceptional. Apply a dry brine of coarse kosher salt—roughly 0.5–1 teaspoon per pound—one to 24 hours ahead to enhance tenderness and juiciness through protein interaction. If you’re cooking immediately, season both sides just before searing to prevent excess moisture loss. The dry brine mixture should include lemon pepper, salt, smoked paprika, garlic powder, and onion powder to enhance the meat’s natural flavor without overpowering it.
Pat your steak dry with paper towels to maximize crust development. Press coarsely ground black pepper evenly into the meat, then add complementary aromatics: garlic powder, smoked paprika, and dried thyme create a balanced rub that withstands high heat. For optimal results, apply the rub to a completely dry steak right before cooking to create an even medium coating that allows glimpses of meat through the seasoning. A well-seasoned cast iron skillet’s natural non-stick surface will help achieve an excellent sear on your steak. Ensure the surface is clean and dry before applying your seasoning rub to prevent uneven coating. Since cast iron retains heat exceptionally well, gradually preheat the skillet on a similar-sized burner at medium or lower heat to ensure even cooking. For precise internal temperature verification during cooking, consider using an oven-safe meat thermometer to monitor doneness without opening the skillet repeatedly.
In the final moments before resting, spoon hot butter infused with garlic and fresh herbs over the surface. Finish with a light sprinkle of flaky finishing salt to enhance perceived salinity and texture without penetrating deeply.
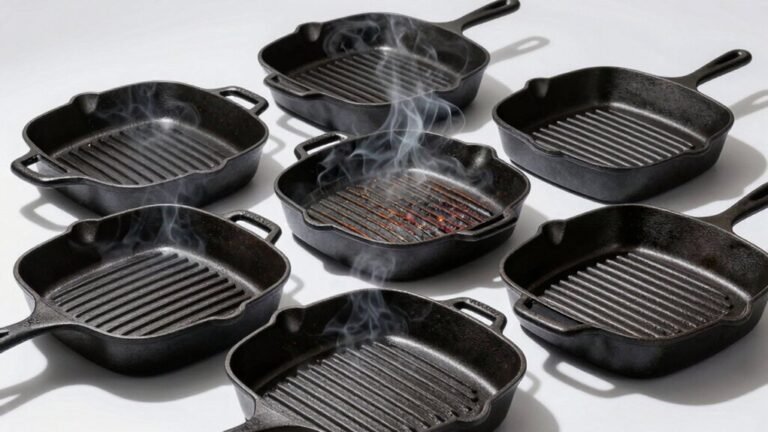
Preheating Your Cast Iron Skillet
Because cast iron’s superior heat retention demands gradual, intentional warming, you’ll want to start on medium heat for 3–5 minutes, then increase to medium-high for another 5–10 minutes to reach ideal searing temperature. This staged approach prevents thermal shock to your skillet.
Total preheat time should reach 8–12 minutes, depending on your stovetop type and pan thickness. Match your burner size to the skillet’s base for even heat distribution across the cooking surface. Always use a hot handle mitt to prevent burns when handling your preheated skillet. For cast iron that has accumulated buildup over time, consider using oven cleaner to restore the cooking surface before seasoning. Building and preserving your skillet’s seasoning through regular use will enhance the non-stick surface over time. Resting the skillet for approximately 10 minutes after reaching medium-high heat ensures even temperature distribution throughout the pan. Unlike recipes that rely on alternative cookware for convenience, cast iron’s heat retention properties make this careful preheating process essential for achieving optimal caramelized cooking surfaces.
Verify readiness using the water-droplet test: flick small drops onto the pan—if they dance and bead, you’ve reached searing temperature. Alternatively, a thin oil film should shimmer without smoking. Note that while infrared thermometers offer quick readings, they measure only surface temperature and may not accurately reflect the pan’s readiness throughout. Avoid the highest flame setting; cast iron’s heat retention makes medium–medium-high sufficient and safer. Similar to how glazes are brushed onto meat during cooking to enhance flavor and browning, monitoring your skillet’s surface condition throughout preheating ensures optimal results for searing and caramelization.
Achieving the Perfect Sear
Your oil selection sets the foundation for a flawless crust. Choose canola or vegetable oil, heating it to just below the smoke point until it shimmers—this visual cue signals ideal temperature for your top round steak.
Place your seasoned steak directly into the hot oil without moving it. Resist the urge to touch or flip; this stillness allows the Maillard reaction to develop that coveted golden-brown exterior. After two to three minutes, flip once and immediately add butter, smashed garlic, and thyme sprigs. For a 1½ inch medium-sized steak, bake for 4 minutes after searing to reach your desired doneness level. Ensure the steak reaches room temperature before cooking to promote even heat distribution throughout the meat. Cast iron’s superior heat retention ensures consistent searing performance and prevents temperature fluctuations during the cooking process.
Tilt your skillet and baste continuously for two minutes, spooning the foaming butter over the meat. Using an instant-read thermometer allows you to monitor the internal temperature and achieve your target doneness without overcooking. An infrared thermometer can also provide quick, non-contact temperature readings for additional verification. Resting the steak after cooking allows the internal temperature to rise approximately 10°F while redistributing juices for enhanced tenderness. When using cast iron on glass top stoves, gently place your skillet rather than sliding it to avoid surface damage. These sear techniques build layers of flavor while your crust formation reaches completion at medium-rare doneness around 135°F internal temperature.
Flipping and Monitoring Your Steak
Two key principles govern the flipping stage: timing your turns to balance crust development with even internal cooking, and using proper tools to preserve the meat’s integrity. Use tongs—never a fork—to prevent puncturing muscle fibers and losing juices. For flipping techniques, employ repeated flips every 1–2 minutes after your initial sear to promote even temperature rise, particularly with thinner cuts.
Temperature management relies on an instant-read thermometer rather than time alone. Check internal temperature at the thickest part after your initial sear, then after each flip cycle. Target 130°F for medium-rare, accounting for 5–10°F carryover rise during resting. Monitor your pan’s sizzle intensity; vigorous bubbling signals high heat—reduce temperature or increase flip frequency if the exterior risks charring before reaching your target internal temperature. Just as proper temperature control prevents overheating aluminum during brazing, careful heat management in steak cooking ensures the exterior develops flavor without the interior suffering damage. Cast iron’s superior heat retention allows you to maintain consistent high temperatures throughout the cooking process, preventing temperature drops that can hinder proper searing. Start with medium-high heat for a good sear, then reduce to medium-low afterward to ensure the interior cooks through without over-browning the exterior. Using a fitted lid during the latter stages of cooking can help trap heat and retain moisture while the steak finishes cooking to your target temperature. Pat the steak dry before searing to develop a nice crust and maximize browning for enhanced flavor. For added comfort and safety while handling your hot skillet, consider using a cotton yarn handle cover to protect your hands from the intense heat radiating from cast iron cookware.
Basting With Butter and Aromatics
Once your steak reaches 20–30 degrees below your target doneness, it’s time to introduce butter and aromatics to the pan. Add at least two ounces of quality salted butter, which enhances nutty flavors through browning milk solids. For aromatics selection, incorporate fresh thyme or rosemary sprigs alongside 3–4 peeled garlic cloves. The butter sizzles immediately, signaling ideal basting temperature.
Employ precise basting techniques by tilting the pan to pool butter, then spooning it repeatedly over your steak. Continue flipping throughout to guarantee even cooking. Use a large long-handled spoon, flicking bubbling butter across the surface for consistent color development. Monitor garlic and herbs carefully, moving them away if they risk over-browning. Ensure the butter bubbles aggressively to achieve proper fat application and avoid creating a soggy texture on your steak. This flavor infusion method penetrates the meat while building your crust, delivering complex depth to every bite. Allow the steak to rest for up to 10 minutes after cooking with aromatics and basting butter placed on top to lock in the enhanced flavors and ensure optimal tenderness.
Checking Internal Temperature
Precision thermometry determines when you’ll remove the steak from heat to achieve your desired doneness. You’ll want a reliable steak thermometer to guarantee temperature accuracy throughout your cooking process.
For top round steak, insert your thermometer into the thickest section, avoiding bone or fat. Rare reaches 120-130°F, medium-rare hits 130-135°F, and medium targets 135-145°F. Medium-well climbs to 145-155°F, while well-done achieves 155-165°F.
Pull your steak 5°F below your target temperature. Carryover cooking continues raising the internal temperature as residual heat distributes throughout the meat. Well-done is preferred for top round’s tenderness, so don’t hesitate reaching that higher range. Since top round is a lean cut, serving your steak with an accompanying sauce will help maintain moisture and enhance the overall dining experience. Digital probe thermometers use electronic sensors to convert temperature readings into precise digital displays for reliable monitoring. Proper thermometer calibration ensures your readings remain accurate for consistent results across multiple cooking sessions. Allow the steak to rest covered for 20 minutes after cooking to let the juices settle and redistribute throughout the meat. This precision prevents overcooking and guarantees ideal texture and flavor in your cast iron skillet preparation.
Resting Your Steak
After you’ve pulled your steak from the cast iron skillet at the target temperature, you’ll let it rest for 3–5 minutes on a plate or cutting board at room temperature.
Understanding resting importance helps you achieve superior results. During this period, carryover cooking raises the internal temperature 5 degrees, so you’ll remove your steak 5–10°F below your target doneness. This technique prevents overcooking while the residual heat finishes the cooking process. Using a meat thermometer ensures you remove your steak at the precise moment for optimal results.
Ideal techniques involve avoiding immediate cutting. When you slice too soon, precious juices escape onto the plate rather than redistributing throughout the meat. Resting allows muscle fibers to relax, enabling even juice distribution and enhanced moisture retention. For top round steak specifically, this lean cut benefits from the USDA food safety guideline of reaching at least 145°F internal temperature during the resting period. You can also enhance the dining experience by topping your rested steak with compound butter for added richness and flavor.
For top round steak, this step proves critical. The ideal resting window preserves tenderness and flavor in this lean cut, delivering the juiciest, most flavorful results.
Slicing and Serving
Identify the grain direction visually, then slice against it using a sharp, long-bladed knife angled 10–20° for broader slices. Maintain consistent stroke length and smooth single-stroke cuts rather than sawing motions. Hold the steak steady with a carving fork while keeping fingers clear. Letting the knife do the work prevents crushing the meat fibers and ensures cleaner cuts through the muscle structure.
For cast iron–seared top round, slice into 1/4–1/2 inch pieces immediately after your 5–10 minute rest to preserve warmth and juiciness. A properly rested steak allows the juices to redistribute throughout the meat, maximizing flavor retention during slicing. Consider storing leftover slices in vacuum seal bags for optimal long-term preservation and freshness. Proper preheating techniques ensure your cast iron reaches the ideal temperature for creating that restaurant-quality sear that enhances both flavor and texture. Your slicing technique directly impacts perceived tenderness and mouthfeel. To maintain your cast iron skillet’s performance over time, season it multiple times after each use with high-quality seasoning oil. Just as the Maillard reaction creates those signature crispy edges on properly seared meat, thorough preheating of your cookware is essential for achieving optimal browning.
For presentation tips, arrange slices slightly overlapped or fanned to showcase the sear crust and uniform interior doneness. Plate 3–5 slices per portion, garnished with fresh herbs or compound butter for flavor and visual impact.
Creating Pan Sauces From Fond
While your rested top round steak rests on a warm plate, you’ve got a brief window to transform the flavorful browned bits clinging to your cast iron skillet into a silky, concentrated sauce. Deglaze immediately with wine, stock, or water, scraping fond vigorously as the liquid simmers. Reduce by half over medium heat to concentrate flavors and achieve nappe consistency. Softening aromatics like shallots in fat before deglazing for deeper complexity allows garlic to develop during reduction and further enhance the sauce. During sauce reduction, whisk in mustard, tomato paste, or soy for umami layers. Finish off heat with cold butter or cream for emulsifying techniques that add gloss and mouthfeel. A well-seasoned cast iron skillet provides an ideal cooking surface that contributes to the development of fond through polymerized oil layers that enhance browning. For optimal results with cast iron cookware, ensure your skillet can withstand high temperatures necessary for proper fond development and sauce reduction. To maintain your skillet’s ability to develop fond effectively, apply a thin coat of high smoke-point oil after each use to preserve the seasoning. Adjust seasoning balancing with salt, pepper, and acid like lemon juice. Strain if needed for silky texture troubleshooting.