You’ll need to preheat your cast iron skillet for 15 to 25 minutes, depending on its size. An 8-inch skillet requires 15-20 minutes at 375°F, while a 10-inch needs 10-15 minutes at 400°F. Preheat the skillet inside the oven to guarantee gradual, uniform heating. You’ll know it’s ready when water droplets dance and evaporate instantly on the surface. This critical step determines whether you’ll achieve that shatteringly crisp crust or end up with soggy, unevenly baked cornbread. However, there’s more to master beyond timing alone.
Recommended Preheat Temperatures for Cast Iron Cornbread
You’ll find that cast iron cornbread recipes typically call for oven temperatures between 375°F and 425°F, with 400°F serving as the standard middle ground. Your preheat temperature ranges depend on your desired crust characteristics. Higher temperatures (420–450°F) produce immediate, aggressive crust formation and deep, crispy edges. Moderate temperatures (350–375°F) prioritize even baking and tender crumbs over dark browning.
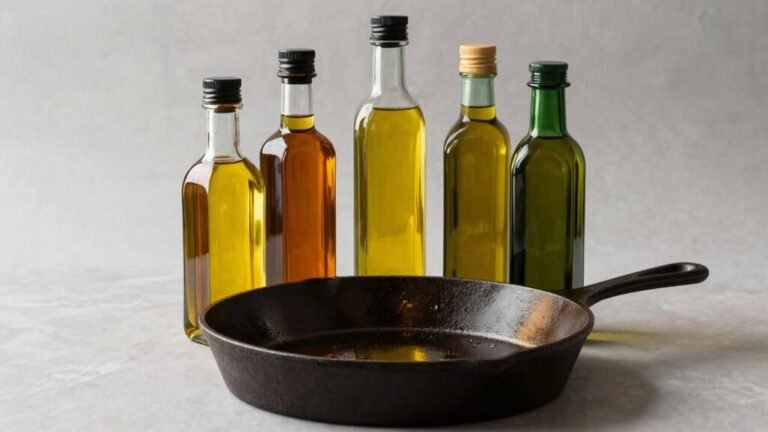
Skillet preheating benefits are significant. When you preheat your skillet at the oven setpoint, the pan temperature matches your baking environment, ensuring consistent results. Most cast iron manufacturers recommend warming your pan during the preheat cycle within the 375–425°F range. This approach eliminates temperature shock when you pour batter into the hot skillet, promoting uniform heat distribution and preventing uneven baking or surface scorching. Oils with a high smoke point, like peanut oil, help maintain the skillet’s seasoning at these elevated temperatures. For best results, ensure your skillet is clean and free of moisture by using proper storage techniques to maintain its seasoning between uses. A well-seasoned cast iron skillet develops a natural nonstick surface that improves with use and becomes a treasured heirloom in many kitchens. The hot skillet essential for achieving crispy edges that become a family favorite and the best part of cornbread. Cast iron skillets also distribute heat uniformly across the bottom and sides, creating uniform crust and soft center that makes homemade cornbread superior to boxed mixes. Similar to layering sliced potatoes in Dutch oven recipes, proper heat distribution ensures even cooking throughout your dish.
Optimal Preheat Times by Skillet Size
Because cast iron’s thermal mass varies markedly with skillet dimensions, your preheat duration must align with both oven ramp-up time and pan size. For an 8-inch skillet, you’ll preheat to 375°F for approximately 15-20 minutes, matching your oven’s warmup cycle. A 10-inch skillet requires 10-15 minutes at 400°F, as its larger surface area reaches uniform temperature faster relative to oven preheat completion. Larger skillets follow the same principle—preheat duration ties directly to your oven’s ramp-up time rather than pan size alone. The ideal duration across all skillet sizes typically ranges 15-25 minutes. You’ll know your skillet’s ready when it’s piping hot, ensuring immediate crust formation upon batter contact and achieving that signature crispy exterior. A well-seasoned skillet with a durable seasoning layer will perform even better during the cornbread baking process. The cast iron’s thick construction and tight-fitting lid properties, while designed for Dutch ovens, similarly contribute to superior heat retention in skillets. To protect your hands from the intense heat, consider using a cotton yarn handle cover while handling the hot skillet. Generously coating the hot pan with butter or oil before adding batter will enhance the browning process. For optimal results, ensure your oil or butter is completely dry and free of excess moisture before pouring in your cornbread batter, as airtight moisture-free storage techniques help maintain the quality of your ingredients throughout the baking process. The key to achieving maximum rise in baked goods is using room-temperature ingredients and ensuring the pan is thoroughly preheated to create steam. For best results, place your preheated skillet in the oven while you prepare the batter to maintain consistent heat throughout the baking process.
Preheating Techniques and Fat Application
The cast iron skillet‘s success hinges on two critical moves: preheating it inside the oven during the warmup cycle, then immediately applying fat to the piping-hot surface. Remove your hot skillet and apply one tablespoon to one-quarter cup of fat—butter, clarified butter, or high-smoke-point oil—depending on skillet size and seasoning level. Spread the melting fat across the bottom and sides using tongs and a heatproof utensil, creating a thin, even coating. The sizzling fat triggers instant browning techniques that develop your cornbread’s crisp exterior. Pour your batter within thirty to sixty seconds after fat application; delay risks cooling the pan and reducing crust formation. Avoid excessive fat pooling, which creates greasiness rather than desirable texture. Similar to sous vide cooking, which uses precise temperature control to achieve specific results, cast iron cornbread also demands accurate heat management for optimal texture development. For precise temperature monitoring during preheating, consider using an infrared thermometer to verify your skillet has reached the optimal heat. Preheating typically takes about 10 to 15 minutes to ensure the skillet reaches the necessary temperature for proper cornbread development. For optimal results, preheat the oven to 400°F to ensure the skillet reaches the necessary temperature for proper cornbread development. When selecting a temperature monitoring device, prioritize models with quick response time to ensure rapid and reliable heat readings throughout your preheating process.
How to Check If Your Pan Is Hot Enough
Before pouring your batter, you’ll need to verify that your cast iron skillet‘s reached the proper temperature—a critical step that determines whether you’ll achieve that coveted crispy crust or end up with a dense, crumbly cornbread. Employ the water drop test first: sprinkle droplets onto the surface and observe whether they dance and evaporate instantly, skipping across the pan like mercury beads. If they sit motionless, your skillet requires additional heating time. Next, add your fat to the preheated pan and listen for a distinct sizzle sound when batter contacts the surface. This audible confirmation guarantees immediate crust development. You’ll also notice thin smoke rising from the melted fat, signaling complete readiness for batter addition. For best results, ensure your cast iron has been properly seasoned with oil before cooking to promote even heat distribution and prevent sticking.
The Role of Pan Temperature in Crust Development
While you’ve confirmed your skillet’s readiness through the water drop test and fat sizzle, the actual temperature at which your pan’s surface sits—not merely the oven’s dial setting—determines whether you’ll achieve that prized crispy crust or settle for a pale, underdeveloped exterior. Pan dynamics govern how rapidly heat transfers into your batter upon contact. When your skillet reaches 425–450°F, the Maillard reaction initiates immediately, creating browning compounds that form crust chemistry. Lower temperatures delay this reaction, yielding weak, pale surfaces. Conversely, excessive heat risks burning edges before interiors set. Your cast iron’s even heat distribution ensures that your cornbread cooks uniformly throughout the skillet, preventing hot spots that could compromise texture. To maintain optimal skillet performance and protect your pan’s longevity, avoid overheating beyond recommended temperatures and allow the pan to heat gradually on low heat before increasing to your desired cooking temperature. Cast iron’s thermal mass sustains this temperature throughout the initial bake, enabling consistent crust development. For Lowcountry cornbread specifically, the sizzling hot skillet of butter creates that signature rich, crispy toffee-like crust that distinguishes this regional specialty. Understanding this relationship between surface temperature and chemical browning guarantees you’ll produce consistently golden, crispy cornbread rather than guessing based solely on oven setpoint.
Adjusting Preheat Duration for Batter Thickness
Because your batter’s depth directly influences how quickly heat penetrates to the center, you’ll need to adjust your preheat duration accordingly—thinner batters demand less time, while thicker ones require extended preheating to confirm your skillet’s thermal mass stores enough heat for consistent browning. For thin batter (under ½-inch), preheat 10–12 minutes. Medium batter (½–¾ inch) needs 12–15 minutes. Thick batter (¾–1½ inches) requires 15–20 minutes. Very thick batter demands 20+ minutes or a preheated Dutch oven. Cast iron’s substantial thermal mass retains heat effectively, but longer preheat times confirm adequate temperature throughout the pan, preventing soggy centers and uneven crust development across your cornbread’s entire batter depth. Unlike perforated grill pans designed for fat drainage, your solid cast iron skillet requires consistent heat distribution for optimal cornbread baking results. Many experienced bakers report that preheating for the full duration recommended for their specific batter thickness consistently produces superior results compared to shorter heating periods. Similar to how low-pressure environments force marinades deeper into meat for faster penetration, adequate preheating ensures heat distributes thoroughly through your cornbread batter.
Common Preheat Mistakes and How to Avoid Them
Even when you’ve mastered the fundamentals of preheating cast iron, subtle errors can sabotage your cornbread’s texture and crust development. The most critical preheat common errors involve skillet temperature inconsistency and insufficient heating duration. You must maintain 375°F for standard 8-inch skillets, allowing a full 5-10 minutes for uniform heat distribution throughout the cast iron. Failing to reach adequate temperature prevents proper crust formation, yielding soggy interiors instead of crispy edges. Additionally, you’ll want to avoid removing the skillet prematurely from the oven—cooling diminishes the sizzle effect necessary for immediate batter crust development. When checking your skillet’s temperature, be aware that infrared thermometers measure only surface temperature and may not reflect the uniform heat distribution needed throughout the cast iron. Using a fitted lid during the initial stages of cornbread baking can help maintain consistent moisture and heat retention for optimal texture development. Finally, neglecting to add fat during preheating compromises both flavor and browning. Like the buttery biscuit topping used in cast iron Dutch ovens, proper fat application creates a non-stick surface that enhances browning and prevents sticking during the critical initial batter contact. Just as seal strength is critical for maintaining food quality during extended cooking processes, consistent heat distribution is essential for achieving the desired cornbread texture and crust development. These preheat common errors are easily preventable through methodical temperature monitoring and strict adherence to timing protocols.
Troubleshooting Uneven Browning and Texture Issues
Once you’ve mastered proper preheating, you’ll reveal that uneven browning and texture inconsistencies often stem from issues beyond the skillet itself. Your batter consistency plays a critical role—too thick and you’ll develop dry centers; too thin results in limp textures. Maintain proper skillet maintenance by seasoning regularly to guarantee even heat distribution across the cooking surface. Understanding seasoning methods is essential, as well-seasoned vintage skillets provide superior non-stick properties compared to modern alternatives.
Overcrowding traps steam, eliminating the golden crust you’re pursuing. Space patties adequately for heat circulation. Avoid frequent flipping; wait for golden edges and bubbles on the uncooked side before turning. If your skillet’s surface shows rust spots or buildup, clean and season it thoroughly before cooking. Preheating the empty skillet over medium heat ensures the entire surface reaches optimal temperature for consistent results. Thin patties cook more evenly, reducing undone centers and uneven browning throughout your batch. Position your cast iron skillet on a lower rack if the cornbread is lacking bottom browning to ensure the bottom cooks properly. A 9-inch cast iron skillet with proper depth allows heat to distribute evenly across the batter for uniform browning. Using an instant-read thermometer helps you monitor doneness and prevent overcooking your cornbread. After cooking, heat your skillet to evaporate moisture and then coat it lightly with seasoning oil to maintain the non-stick layer.