You’ll season your cast iron skillet by applying a thin, even layer of refined olive oil (465°F+ smoke point) to a completely clean, dry pan. Wipe away excess to prevent pooling, then bake upside down at 450-500°F for one hour. Repeat this process 2-3 times to build durable polymerized layers. The key’s using thin coats—thick applications create sticky surfaces instead of hard nonstick protection. Uncover how proper technique and maintenance techniques reveal professional-grade results.
Why Olive Oil Works for Cast Iron Seasoning
Why does olive oil excel at seasoning cast iron? You’ll find that high-quality extra virgin olive oil reaches nearly 400°F, matching your typical seasoning temperatures perfectly. This smoke point compatibility allows the oil to polymerize effectively, bonding to your iron surface through heat application.
The polymerization process creates a hard, nonstick layer that fills microscopic pores, building durability with each application. Beyond performance, you’re gaining health benefits—olive oil contains monounsaturated fats that support heart health compared to saturated alternatives. The oil also contributes flavor enhancement, developing a complex patina over time that subtly enriches your dishes. Reseasoning your cast iron two to three times yearly maintains optimal coating thickness and prevents rust formation. A protective seasoning coating should be inspected regularly to ensure your pan remains in peak condition.
Additionally, the polymerized coating acts as a rust-preventing barrier, sealing reactive iron from oxygen exposure and maintaining your cookware’s integrity through storage and regular use. For stubborn rust spots that develop despite proper maintenance, gentle scrubbing with salt can help restore the surface before re-seasoning is necessary.
Choosing the Right Type of Olive Oil
Not all olive oils perform equally when you’re seasoning cast iron. Your best choice depends on the temperature you’ll reach during seasoning cycles.
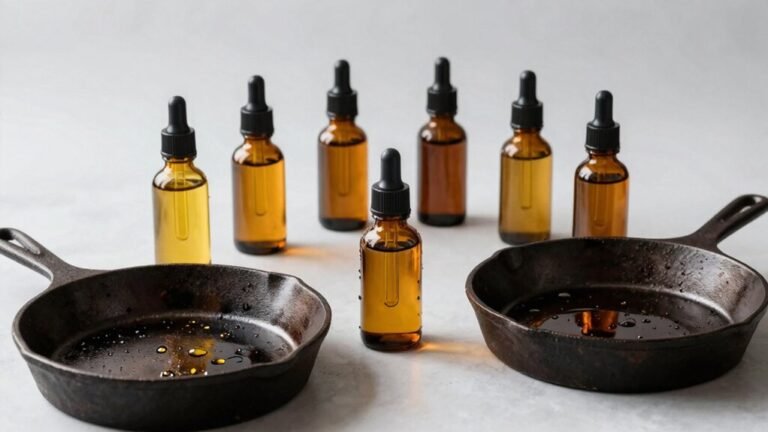
For high-heat seasoning, select refined, “light,” or “extra light” olive oil. These types have higher smoke points—around 465°F or above—allowing you to reach polymerization temperatures without excessive smoking or odor. They’ve undergone processing that removes free fatty acids, improving oxidative stability.
Avoid extra-virgin olive oil for traditional seasoning methods; its lower smoke point causes premature smoking and potential compound breakdown. If you prefer EVOO’s flavor, reserve it for low-temperature applications only. Extra-virgin olive oil also contains antioxidants and anti-inflammatory compounds that break down at high temperatures, making it unsuitable for seasoning cast iron. However, smoke point does not correlate to oil performance when heated, so some cooks experiment with EVOO despite conventional wisdom.
Virgin and blended oils occupy middle ground, offering moderate smoke points with retained olive character. The polymerized oil layer that forms during proper seasoning requires heating the oil to its smoke point so it bonds chemically with the cast iron. Just as internal temperature measurement ensures food safety in cooking, proper temperature verification during seasoning guarantees the oil reaches adequate heat for polymerization. Oils with smoke points above 400°F are generally recommended for cast iron maintenance and cooking to prevent burning and smoking during high-heat applications. As with all cooking methods, proper temperature control ensures even results throughout the process. Consider your seasoning method and oven temperature when selecting your olive oil type to guarantee peak polymer layer formation.
Preparing Your Cast Iron Before Seasoning
Before you apply oil to cast iron, you’ve got to prepare the surface properly—it’s the foundation for a durable, even seasoning. Start with surface cleaning and rust removal using a stiff wire brush or steel wool to expose bare iron where needed. For stuck-on food, use coarse kosher salt with a folded towel as an abrasive. Heavy rust requires a 50:50 white vinegar and water soak—check every 30 minutes to prevent pitting, then rinse thoroughly and dry immediately.
Next, remove all soap residue with hot water and dry completely with lint-free cloths. Heat the skillet briefly on low to evaporate trapped moisture. Finally, degrease with hot soapy water or solvent, rinse fully, and heat again. Your surface should feel clean and dry before oiling—never tacky. Remember that polymerization converts oils from liquid to hardened surface when heated, creating the slick, bonded seasoning layer. Once the rust is removed, the restoration process concludes with seasoning the cast iron multiple times to build a protective layer. Some methods advocate multiple rounds of oiling and baking to build up a more durable seasoning layer over time. For optimal results, consider using oils with high smoke point characteristics that can withstand the temperatures needed for proper seasoning. Based on testing various seasoning methods, lint-free cotton rags are essential for applying oil evenly and preventing lint debris from marring your final finish. After seasoning, cook with high smoke point oils to further enhance the non-stick surface over time.
Step-by-Step Seasoning Process
Three core techniques—oil application, oven temperature management, and repeated baking cycles—transform bare iron into a durable nonstick surface. You’ll begin by applying a thin, even layer of oil inside and out, then wiping away excess thoroughly to prevent pooling. Position your skillet upside down in a preheated 450-500°F oven, placing a baking sheet below to catch drips. Bake for one hour, allowing the oil to polymerize and bond permanently to the iron. After cooling completely, you’ll repeat your oil applications and baking cycles 1-3 additional times, building successive seasoning layers. Each cycle strengthens your nonstick base. These seasoning techniques and meticulous oil applications create a professional-grade patina that withstands years of cooking. While olive oil works well for seasoning cast iron, oils with higher smoke points like avocado oil can better withstand the intense heat of cooking. Proper technique requires applying thin layers and heating the pan past the oil’s smoke point to ensure effective polymerization. Beef tallow is favored for being natural, heat-stable, and free of added chemicals, making it a safer alternative to seed oils. Note that flaxseed oil is particularly recommended for achieving the best seasoning results compared to other oils. A well-seasoned cast iron skillet ensures even cooking across the cooking surface, just as professional chefs rely on their cookware for consistent results. After each seasoning cycle, apply a thin layer of oil to the cooking surface to prevent rust and maintain your skillet’s condition. Frequent use enhances seasoning strength over time, making your cast iron cookware even more effective with consistent application in the kitchen.
Building Multiple Layers for Durability
While a single cured layer provides basic rust protection, you’ll achieve superior durability and nonstick performance by building successive thin coats. Each layer application creates incremental hardness and hydrophobicity, improving slickness with every properly cured coat.
Apply olive oil as a microscopic film—visible shine should disappear after wiping. Excess oil pools and creates soft, uneven buildup that compromises durability. Use lint-free cloth to remove all perceptible residue before curing. For optimal results, ensure your skillet is completely dry before applying each new coat of oil.
Film formation occurs reliably when you repeat thin applications rather than applying heavy coats. Between cycles, cure completely at appropriate temperatures to guarantee polymerization. Similar to heating glass evenly through consistent rotation to prevent uneven stress, you should rotate your skillet during curing to prevent drip lines and guarantee uniform heat exposure. The skillet’s ability to retain heat makes even curing cycles especially important for developing a consistent seasoning layer. However, avoid oils with lower smoke points, such as butter and olive oil, as they may not polymerize as effectively as higher smoke point alternatives. Oils like peanut oil with high smoke points around 450°F are often preferred for their superior seasoning performance. Whether you’re seasoning a 10-inch or 12-inch skillet, these techniques apply equally to help you build a durable cooking surface.
This methodical approach builds resilient laminar structure while minimizing brittleness risk, delivering a durable, functional seasoning.
Common Mistakes to Avoid
Even with disciplined technique, you’ll undermine your work through common pitfalls that sabotage seasoning durability. Improper oil application—applying excess rather than a thin, even film—creates sticky, gummy surfaces instead of hard nonstick layers. Excess oil pools unevenly, leaving outer parts charred while inner sections remain uncured, causing flaking during use. Frequent use enhances the skillet’s seasoning properties over time, making regular cooking essential to building durable nonstick layers.
Temperature control errors equally compromise results. Baking at temperatures too low prevents proper polymerization; conversely, excessive heat burns oils into brittle, flaking layers. You must match time and temperature precisely—both must be sufficient for complete cure. Olive oil’s low smoke point makes it particularly unsuitable for achieving the high temperatures required for effective seasoning. For best results, use oils with higher smoke points like Crisco or avocado oil that can withstand progressive baking temperatures of 400-500°F or higher.
Additionally, season only clean, dry pans. Shipping grease, rust, or moisture prevents oil from bonding to metal, producing patchy, failing seasoning. Inadequate surface preparation embeds unstable layers, promoting delamination under heat and use. The polymerization of oils creates the resilient, non-stick protective layer that improves cast iron performance over time. After cleaning your skillet with kosher salt, ensure the surface is completely dry before applying any seasoning oil. Avoid placing cast iron skillets on glass top stoves until the seasoning has fully cured, as thermal stress during the seasoning process may cause damage. Regular maintenance after cooking helps preserve the seasoning and extends the skillet’s lifespan.
Maintaining Your Seasoned Cast Iron Skillet
Once you’ve built a seasoned cast iron skillet, maintaining that hard-won nonstick surface requires consistent, deliberate care after every use. Your cleaning techniques matter greatly—scrub with a nylon brush or salt to remove residue without compromising seasoning. Rinse with warm water, then dry immediately and thoroughly with a clean towel, including the handle. Heat briefly on the stovetop to evaporate residual moisture completely.
Next, apply a thin oil application using vegetable, canola, or shortening. Rub a minimal coat inside and out with a cloth or paper towel; excess oil prevents proper bonding. This protective layer prevents rust and oxidation during storage. Soap can be used safely on your seasoned pan without damaging the polymer layer that protects it. Store your pan in a warm oven to allow it to cool together with the oven, which ensures longevity of seasoning.
Regular cooking reinforces seasoning layers while patching minor damage. Consider using cost-saving strategies by making your own seasoning oils rather than purchasing specialty products. For stubborn debris that resists normal cleaning, soaking in warm water and gentle scrubbing can help restore your pan without harsh detergents. Each use builds upon previous polymerization, creating an increasingly uniform nonstick surface that improves over time.