You’ll submerge sterilized Mason jars filled with proper headspace in rolling boiling water for the recommended time. As water heats jars, internal pressure builds. When you remove them and they cool, pressure drops inside, creating a vacuum seal. Verify seal integrity by pressing the lid’s center—it shouldn’t flex. Let jars rest undisturbed for 24 hours. For extensive guidance on each step’s critical details, explore the complete process.
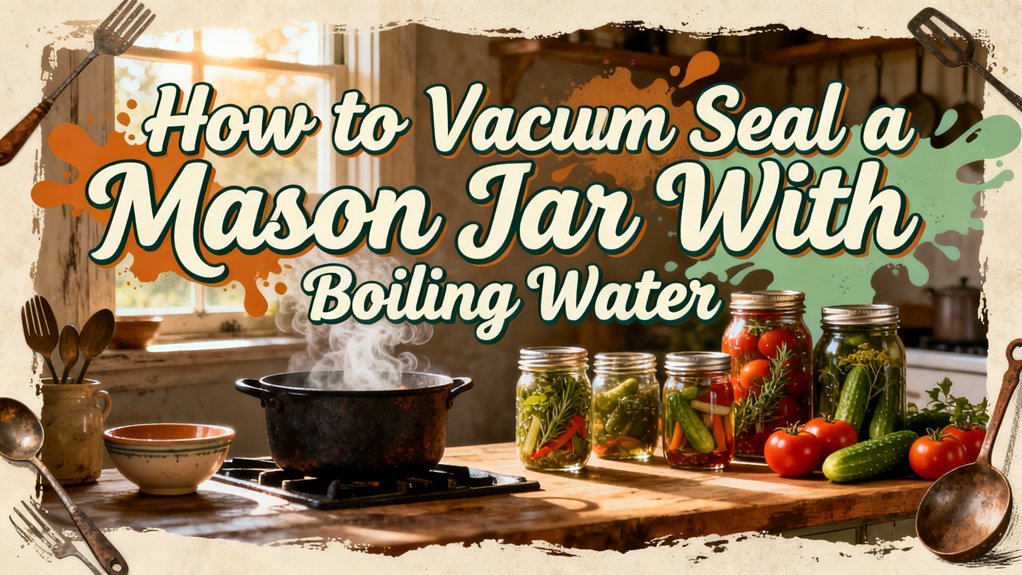
Understanding the Boiling Water Bath Method
When you’re vacuum sealing mason jars using the boiling water bath method, you’re relying on sustained heat at 212°F (100°C at sea level) to destroy spoilage microorganisms and inactivate enzymes in high-acid foods. This process reduces foodborne spoilage risk when jars seal properly. The acidity of your product—maintaining pH ≤ 4.6—combined with heat creates a safe preservation environment. As jars cool, the air and steam inside contract, pulling lids down and forming a vacuum seal. However, this method isn’t suitable for low-acid foods without pressure canning. Success depends on complete jar submersion during boiling water food preservation, ensuring even heat transfer and consistent vacuum seal formation throughout your processing cycle. Proper sterilization of jars is critical to prevent contamination, and ovens or dishwashers are not recommended for achieving adequate sterilization before use. It’s important to note that vacuum sealing is not a substitute for proper canning methods when preserving perishable items long-term.
Preparing Your Mason Jars for Sealing
Now that you understand how heat and vacuum work together to preserve your food safely, you’ll need to prepare your jars, lids, and equipment to execute the boiling water bath method properly. Start by selecting Mason jars—purpose-designed jar material guarantees proper sealing surfaces and thermal strength. Inspect rims carefully for chips or cracks that compromise seals. Match jar size to your recipe’s headspace requirements; jams need approximately 1/4 inch while whole fruits require 1/2 inch. Discard any jars showing signs of previous fractures or hardening. Keep jars warm in simmering water to prevent thermal shock, similar to how heat-resistant handles protect against burns during cooking. Heat lids briefly in hot water to soften sealing compounds. Use dedicated canning tools to avoid contamination and burns while transferring equipment. Wash jars and lids in hot soapy water before beginning the sealing process to ensure cleanliness and proper seal formation. For each canning season, use new lids to guarantee the highest likelihood of creating an effective vacuum seal.
Sterilizing Jars Before Use
Sterilization is your critical defense against microbial contamination, and whether you’ll need it depends entirely on your recipe’s processing time. If your recipe calls for processing times under 10 minutes, you must pre-sterilize jars before filling. For processing times of 10 minutes or longer, sterilization becomes optional since the boiling-water bath itself provides adequate sterilization.
Employ these sterilization techniques: submerge thoroughly washed jars in rolling boiling water for 10–15 minutes, ensuring at least one inch of water covers jar tops. Use a dedicated jar lifter to transfer jars safely. Meanwhile, boil lids separately for five minutes to protect their sealing compounds. As of 2014, lids no longer need simmering and warm soapy water suffices for cleaning new lids prior to use. Proper heat management is essential, as sufficient preheating of your equipment helps prevent thermal shock and ensures consistent results.
Following safe practices, keep sterilized jars hot in water until filling. Never towel-dry them; allow drainage instead. Place jars on clean cloth or board surfaces to prevent thermal shock and recontamination. For long-term storage, use new jar lids to ensure optimal preservation and sealing safety.
Filling Jars With Proper Headspace
Before you seal your jars, you’ll need to leave the correct amount of unfilled space between the food or liquid and the jar rim—a critical measurement called headspace. This gap’s headspace importance lies in facilitating proper vacuum formation during processing.
Standard guidelines vary by food type: use 1/4-inch for jams and pickles, 1/2-inch for fruits and tomatoes, and 1-inch for low-acid vegetables. For measuring techniques, employ a dedicated headspace tool with 1/4-inch increments, placing its tip directly on your food’s surface without submerging it. Position the tool upright on the jar’s rim and fill to the specified notch.
Verify measurements with a ruler, accounting for jar shape variations. Starchy foods may swell and require extra headspace to prevent overflow during processing. Remove any air bubbles trapped in raw packed food before measuring to ensure accurate headspace. Preheating your jars before filling, similar to how cast iron skillets require preheating in the oven, helps ensure proper vacuum formation during the sealing process. Like blanching in traditional food preservation, proper headspace preparation works to deactivate enzymes that can compromise food quality. Proper vacuum formation prevents freezer burn and oxidation that can compromise food quality over time. Accurate headspace also enables efficient space storage in your refrigerator or freezer by allowing proper sealing and compact organization. Like the seasoning process used in cast iron restoration, proper headspace preparation is essential for long-term food preservation. Accurate headspace prevents sealing failures and guarantees safe processing.
Removing Air Bubbles and Cleaning Rims
Once you’ve filled your jars to the proper headspace, you’ll need to eliminate trapped air and prepare the rims for sealing. Use a non-metallic tool like a plastic spatula to dislodge air pockets around fruit or vegetable pieces. Tap jars gently on a folded towel to encourage bubbles upward, then top up liquid to maintain correct headspace. Let jars rest 1–2 minutes before removing surface foam.
For rim inspection and cleaning, wipe rims immediately with a clean, damp lint-free cloth using hot water only—avoid soaps that interfere with sealing. Inspect visually and tactilely for chips, cracks, or stubborn residue. Discard damaged jars. Under good light, verify no particulates remain. Avoid touching cleaned rims with bare hands; re-wipe if contact occurs to remove oils and lint. Proper rim preparation is essential for achieving a food safety seal that prevents contamination and extends your preserved food’s shelf life. For alternative preservation methods, consider using a syringe-based vacuum sealer to create an additional seal that extends shelf life beyond traditional water bath canning.
Softening and Applying Lids and Rings
With your jar rims cleaned and inspected, you’re ready to prepare and apply lids and rings.
Keep lids warm in hot water until use—this maintains sealing compound pliability and facilitates proper sealing. Modern lids don’t require pre-simmering, though brief warming in hot water won’t harm them. Avoid boiling, which damages the liner. Simmering lids over medium heat for 10-15 minutes ensures effective sanitization before application. Grab lids by edges only to prevent contamination of the sealing surface.
Center a clean, warm lid on each jar rim, ensuring the sealing compound contacts evenly. Place the screw band over the lid and tighten to fingertip tight—just until you feel resistance. Proper sealing strength depends on following these application guidelines precisely to achieve an effective vacuum seal. Don’t overtighten; this prevents air escape during processing and causes seal failures. For outdoor cooking applications like Dutch oven camping desserts, proper jar sealing techniques ensure your preserved ingredients remain fresh and safe. Unlike cast iron cookware, mason jars with tight-fitting lids retain moisture and preserve contents effectively.
Fingertip-tight application allows trapped air to vent during boiling, which is essential for vacuum formation as jars cool. Use lids and rings promptly after heating to maintain sanitation and sealing properties.
Processing Jars in Boiling Water
Processing your filled jars in boiling water creates the heat environment necessary for vacuum sealing and food preservation. You’ll start timing only after water returns to a vigorous rolling boil with jars fully submerged. Maintain this steady boil throughout the entire processing period—you can lower heat slightly as long as the rolling boil continues. Ascertain water level stays at least 1–2 inches above jar tops; for processing times exceeding 30 minutes, maintain approximately 2 inches to account for evaporation. Keep a separate kettle of boiling water ready to top up the canner without cooling it. Pour boiling water around jars, never directly onto them, to prevent thermal shock and seal disturbance. This consistent heat distribution ascertains proper processing and reliable vacuum seals, similar to how steam environment management is critical in other food preparation techniques, just as the controlled temperatures in soups and stews require precise heat management. Just as proper maintenance preserves cast iron performance, maintaining steady heat throughout processing ensures your sealed jars remain shelf-stable and extend the shelf life of your preserved foods. The water bath canner should have a flat bottom for electric ranges to ensure even heat distribution during the processing period.
Cooling and Seal Formation
After you’ve removed your jars from the boiling water bath, the cooling phase begins—and this is where the vacuum seal actually forms. Place your jars on a towel-covered surface, avoiding stone or metal to prevent thermal shock breakage. Let them stand undisturbed for 24 hours while the seal strengthens as contents gradually cool. A 5-minute water rest immediately post-processing improves seal integrity by allowing the sealing compound to properly adhere. As internal pressure drops below atmospheric pressure, the lid pulls downward, creating your hermetic seal. This process also kills molds, yeasts, and bacteria to ensure preservation safety. However, it’s important to note that vacuum sealing does not equate to shelf-stable canning, and this process lacks the heat treatment that destroys pathogens for true food safety. Proper vacuum sealing prevents bacterial growth and oxidation during storage, which is especially valuable when storing meats that can maintain best quality for extended periods when frozen properly. By eliminating oxygen through this cooling phase, you significantly extend the shelf life of food items compared to conventional storage methods. After 24 hours, test seal integrity by gently pushing the lid upward. A firm lid with no flex or pop indicates successful vacuum formation. Avoid disturbing jars during this critical resting period.
Testing Seals and Ensuring Food Safety
Though your jars have cooled and the lids’ve pulled downward, a successful vacuum seal doesn’t guarantee food safety—you must verify seal integrity and understand the microbial risks specific to vacuum-sealed mason jars. Perform immediate seal inspection by pressing the lid’s center; lack of concavity indicates failure. Recheck seals after 12–24 hours at room temperature to detect re-gassing or loss. Inspect lids and rims for rust, dents, or debris that compromise airtight sealing. Use a calibrated vacuum gauge when available to record pressure readings for quality control. During safe storage, monitor for bulging lids, leaks, or off-odors—discard contents immediately without tasting. Vacuum sealing cannot achieve the specific temperatures required for proper bacterial destruction in low-acid foods. Reserve vacuum sealing for dry goods only; perishable low-acid foods require refrigeration or approved canning methods for ambient storage. Bacteria such as Clostridium botulinum and Listeria monocytogenes can survive in oxygen-free environments created by vacuum sealing, making it unsuitable for moist or perishable items. Unlike regular vacuum cleaners, dedicated vacuum sealers create the strong, consistent vacuum needed to properly remove air and heat-seal bags for food storage. Different vacuum sealer models, including handheld and electric models, offer varying levels of suction power and sealing consistency for optimal results. For optimal results with dry goods, ensure your fuel selection and equipment maintenance practices are consistent with manufacturer specifications. Dry goods like flour, sugar, rice, and pasta can achieve extended shelf life when vacuum sealed compared to conventional storage methods.