You’ll achieve restaurant-quality results by removing your steak 20–30 minutes before cooking for even heat distribution. Pat it dry, season with coarse salt and pepper, then preheat your cast iron skillet to 500°F. Use the water drop method to confirm readiness—droplets should sizzle instantly. Sear 3–5 minutes per side without frequent flipping. Brush with high smoke-point oil beforehand. Add smashed garlic and sturdy herbs like thyme during final moments. Rest your steak minimum five minutes before serving to redistribute juices and maximize tenderness.
Preparing Your Steak for Optimal Results
Before you ever heat your pan, you’ve got to start with proper preparation—and that begins with tempering. Remove your steak from the refrigerator 20-30 minutes before cooking to guarantee even heat distribution throughout the meat. This critical step prevents a cold center and eliminates the steaming effect that compromises your sear.
Next, address moisture removal by patting your steak dry with paper towels. This essential step promotes the Maillard reaction, creating that coveted crust while preventing sticking. Cast iron skillets are particularly effective at achieving this superior, savory crust due to their exceptional heat retention and even heat distribution capabilities. Finally, apply your seasoning techniques strategically. Season both sides with coarse salt and pepper just 10 minutes before cooking—roughly ½ teaspoon of each per side. For ideal adhesion and flavor development, rub the seasonings directly into the steak’s surface. Using New York Strip or other premium cuts ensures you have the right amount of fat content for juiciness and optimal searing results. Fresh herbs like rosemary and thyme will further elevate the beef’s flavor profile when added to your cast iron during the final moments of cooking. Like cast iron’s versatility in Dutch oven desserts, a quality cast iron skillet’s even heat distribution makes it invaluable for both savory and sweet cooking. To achieve your desired doneness, use an instant-read thermometer to monitor the internal temperature throughout the cooking process. These preparation steps directly determine your final result’s quality.
Getting Your Cast Iron Skillet Ready
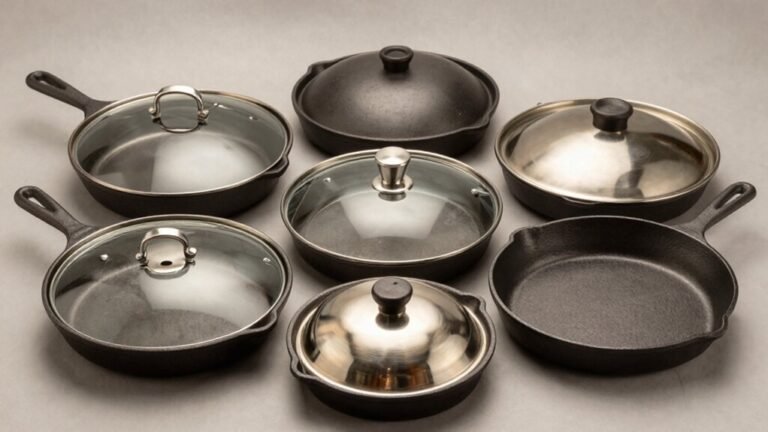
Your cast iron skillet’s performance hinges on proper preparation, so you’ll want to conduct a thorough pre-seasoning inspection first. Check the cooking surface for rust, pitting, or flaking that determines whether restoration or deep cleaning is needed. Verify the skillet’s construction—smooth vintage or rougher modern finish—since surface texture affects seasoning adherence. Inspect the handle, rivets, and underside for trapped food residue or moisture.
Next, apply targeted cleaning techniques. Remove rust using coarse steel wool, then degrease with warm soapy water and a stiff brush. Use kosher salt for mild abrasive scrubbing when restoring surfaces. Dry immediately on low stovetop heat to eliminate all moisture preventing flash rust. Avoid prolonged soaking that strips seasoning and promotes corrosion. Your skillet must be completely dry and room-temperature before oiling. After cleaning, allow the skillet to cool slightly but remain warm before applying your final seasoning layer. These skillets can be used safely on various heat sources, including stovetops and ovens, making them ideal for both stovetop preparation and finishing techniques. Remember that seasoning is oil baked onto the pan through polymerization], creating a natural, easy-release finish that functions similarly to how thermopiles convert thermal energy into measurable readings through material transformation. Building up multiple layers of seasoning strengthens the non-stick surface and improves durability with each use. For optimal seasoning results, use oils with high smoke points like vegetable oil or canola oil that can withstand the heat without breaking down, then preheat your oven to 200 degrees Fahrenheit before beginning the oil application process.
Managing Heat for Perfect Searing
Getting the cast iron skillet to the right temperature is absolutely critical for achieving that coveted crust, and it’s where precision matters most. You’ll maintain ideal temperatures by heating your skillet over medium-high heat for 5-6 minutes, allowing even heat distribution throughout the iron’s mass.
Test readiness using the water drop method—droplets should sizzle and vanish instantly. You’re aiming for oil that shimmers before you add your steak, signaling the pan’s reached proper searing temperature. An instant-read thermometer can help verify the skillet has reached the optimal temperature for the Maillard reaction. High-heat oil such as avocado oil is recommended to prevent smoking and ensure proper searing.
Once you’ve achieved this state, avoid frequent flipping. You’ll leave your steak undisturbed for 3-5 minutes per side, maximizing continuous skillet contact and crust development. Cast iron’s superior heat retention—sustaining temperatures beyond 1000°F—ensures you’ll achieve restaurant-quality results with single flips and consistent doneness throughout your steak. Consider finishing your steak in a preheated oven at 400-500°F to achieve your desired internal doneness while maintaining the crust you’ve developed. The even heat distribution of cast iron prevents temperature drops that can compromise the searing process and diminish crust quality. After cooking, allow your steak to rest for several minutes so the internal temperature rises and juices redistribute throughout the meat. For precise monitoring of your steak’s internal doneness, consider using response time as a key factor when selecting your thermometer to ensure accurate readings. For longer-term storage of leftover cooked steak, consider using vacuum sealer bags to maintain freshness and prevent freezer burn.
Mastering Crust Formation Techniques
Since a perfect crust requires the Maillard reaction—the chemical transformation that occurs when amino acids and sugars interact at high heat—you’ll need to prioritize three essentials: a bone-dry steak surface, precise pan temperature, and unwavering heat management.
Pat your steak thoroughly with paper towels to eliminate moisture that’d inhibit browning. Brush with high smoke-point oil immediately before searing. Your cast iron skillet preheated to 500°F guarantees the oil shimmers instantly, initiating crust formation.
Flip every 30 seconds initially, then every 60 seconds, rotating your steak across different pan zones. This frequent-flip technique reduces cooking time while promoting even heat distribution. Hold the steak upright with tongs to brown fat edges, creating distinct crust variations and developing complex flavor profiles throughout the exterior. A deep-brown caramelized crust indicates successful Maillard reaction completion and proper heat management throughout the searing process. Cast iron’s superior heat retention ensures consistent temperature maintenance during the searing process, preventing temperature fluctuations that could compromise crust development. After searing, transfer the steak to a preheated oven set between 400–450°F to finish cooking to your desired doneness. For best results, consider choosing premium steak cuts with adequate marbling to complement the crust formation techniques. For optimal food preservation after cooking, store leftover steak in vacuum sealer bags designed to maintain freshness and prevent freezer burn. Allow steaks to reach room temperature for 30-40 minutes before cooking to promote even cooking throughout the meat.
Using Butter, Garlic, and Herbs for Enhanced Flavor
Once you’ve achieved that mahogany crust through precise heat management, butter, garlic, and herbs transform the steak’s surface into a vehicle for aromatic depth. Select clarified butter or ghee for superior heat tolerance, and choose unsalted varieties to control final seasoning. Introduce butter late—after crust formation—to prevent bitter compounds from developing. Cooking with cast iron ensures that iron leaches into the food, enriching your meal with essential minerals while you develop those perfect flavors.
Employ garlic techniques strategically: smash whole cloves rather than mincing them, and add them when basting begins to minimize burned fragments darkening your pan juices. For herb infusion, use sturdy varieties like thyme and rosemary, bruising sprigs to release volatile oils. Reserve delicate herbs for post-cooking application. Allowing resting time after cooking lets juices redistribute for a more flavorful steak. Proper cast iron maintenance through seasoning multiple times preserves your skillet’s non-stick properties for consistent cooking results.
Master basting methods by tilting your skillet to pool fat, then spooning continuously every 5–10 seconds during final minutes. This steady technique guarantees even heat distribution and glossy surface development.
Checking for Doneness and Temperature
All the precision you’ve invested in heat management and butter-basting amounts to nothing without mastering the final checkpoint: internal temperature. You’ll rely on a meat thermometer for accuracy—it’s non-negotiable. Insert it horizontally into the thickest section, avoiding bone contact. For best results, use an oven-safe probe thermometer designed to remain in the meat throughout cooking for continuous monitoring.
Your temperature checks should account for carryover cooking‘s 10°F rise during resting. Pull rare steaks at 120°F, medium-rare at 120°F, and medium at 130°F. These visual cues—bright red centers progressing to pink then brown—confirm your thermometer readings. While visual indicators can be helpful for steak, remember that visual cues alone are unreliable for determining if meat has reached a safe temperature. To ensure both safety and quality, calibrate your thermometer regularly to maintain accuracy across multiple cooking sessions. An instant-read thermometer provides quick verification of your steak’s doneness at critical moments during the cooking process.
Rest your steak minimum five minutes post-sear. This stabilizes temperatures and redistributes juices throughout the meat. Cast iron‘s retained heat amplifies carryover effect, so timing matters critically. For optimal results, allow the steak to sit for at least five minutes to ensure the juices redistribute evenly and the temperature stabilizes. Similar to how moisture retention is critical when storing food, preserving the steak’s juices during rest is essential for texture and flavor. Lightly cover with foil during the resting period to retain heat and maintain warmth. Monitor consistently. You’ve earned perfectly cooked steak through methodical technique.
The Reverse-Sear Method for Thick Cuts
The reverse-sear method inverts conventional steak cooking by prioritizing gentle, low-temperature heating before the final crust-building sear—a technique that’s particularly effective for thick-cut steaks where you’d otherwise risk an overcooked interior chasing an exterior crust. Ribeye, strip, porterhouse, and filet mignon are ideal steak cuts for this approach because their marbling and thickness accommodate the two-phase process without drying out. You’ll cook steaks 1.5–2+ inches thick in a 250–275°F oven until reaching 10–15°F below your target doneness, then sear briefly in preheated cast iron. This method works exclusively on thick cuts of meat at least 1.5 inches thick, making it unsuitable for thinner steaks that would overcook during the low-heat phase. For optimal results, dry-aging steaks in the refrigerator for at least a day enhances tenderness and improves the final texture. After searing, rest the steak for several minutes to allow juices to redistribute throughout the meat before serving. The reverse sear benefits include precise temperature control, superior crust formation, and consistent doneness throughout. Monitor internal temperature with a probe thermometer rather than relying on timing alone.
Resting and Serving Your Steak
After you’ve achieved your target internal temperature, resisting the urge to slice immediately separates a mediocre steak from an exceptional one. Your rest duration directly impacts juice redistribution—allow 3-5 minutes minimum for ideal moisture retention. During this period, carryover cooking raises internal temperature 2-5°F, so remove your steak 5°F below your target. For rare, pull at 115°F; it’ll finish at 120°-125°F. Medium rare reaches 130°-135°F when removed at 125°F. This carryover effect means that removing steak early prevents the meat from overshooting your desired doneness level.
Once rested, verify serving temperature with an instant-read thermometer inserted into the thickest section. The exceptional heat retention of cast iron ensures your steak remains at your preferred temperature throughout the resting period. Employ proper cutting techniques by slicing against the grain to maximize tenderness. Top your steak with compound butter, then serve immediately at your preferred final temperature. This methodical approach guarantees juiciness, flavor, and ideal texture.