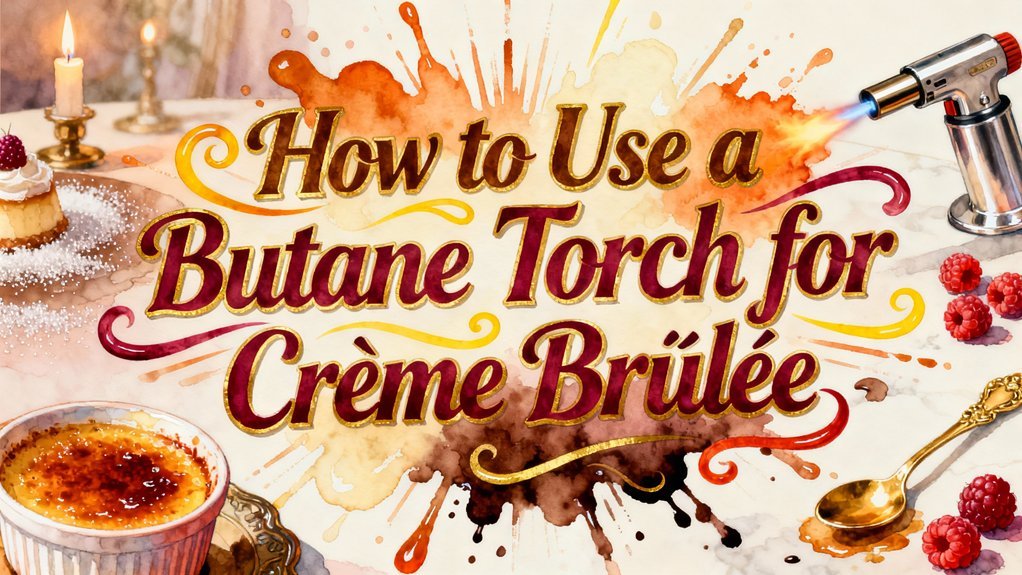
You’ll torch crème brûlée by first chilling your custard for at least two hours, then applying a thin, even layer of granulated sugar to the dry surface. Hold your butane torch 2–4 inches away on medium flame, using steady circular motions to melt the sugar into an amber-golden caramel. Rotate the ramekin to avoid hot spots. Let the hardened caramel cool undisturbed for 1–3 minutes before serving immediately. The specifics of technique and safety will transform your results considerably.
Choosing the Right Torch for Your Needs
When you’re shopping for a butane torch, you’ll want to take into account five key factors: fuel type, flame control, ergonomics, durability, and cost. Among torch types, single-flame models concentrate heat for precise calorization, while dual-flame heads cover larger surfaces. For fuel options, butane’s lower pressure and refillability make it ideal for home use compared to propane’s unnecessary power. Choose adjustable flame control to switch between focused streams and broader coverage. Prioritize compact, lightweight designs with ergonomic grips for steady handling during multiple brûlées. Invest in stainless steel construction with replaceable parts—they resist heat and extend lifespan. Look for models that include a fuel gauge to prevent running out of gas unexpectedly during your cooking process. Remember that a butane gas canister is not included with most torches, so you’ll need to purchase fuel separately. Proper torch technique requires maintaining appropriate distance from food to achieve even heating without over-browning. These torches work beautifully for caramelizing dessert toppings, much like how whipped cream or ice cream enhance Dutch oven cakes. Dutch oven cooking also demonstrates how even heat retention is crucial for achieving perfectly cooked dishes. Testing for ignition reliability and temperature consistency will help you identify which models perform best for your needs. Following proper maintenance techniques will help ensure your torch operates safely and reliably for years to come. Entry-level butane torches deliver adequate performance affordably, while established culinary brands offer superior reliability and consistency.
Essential Safety Precautions Before You Start
Now that you’ve selected the right torch, you’ll need to establish proper safety protocols before you even strike a flame. Start by preparing your workspace with fire safety in mind: remove all flammable materials like paper, fabric, and solvents, and position your torch on a heat-resistant surface away from edges. Keep a fire extinguisher nearby for emergencies.
Next, prioritize personal protective equipment. Wear safety goggles to shield your eyes and protective gloves to guard against burns. Avoid wearing highly flammable synthetic fabrics. Verify your torch’s safety lock is engaged when not in use, and hold it firmly with a secure grip. Make sure to work in a well-ventilated area to prevent gas buildup during use. Proper heat retention and control during the cooking process depend on maintaining a clean, safe environment similar to how heat retention and distribution are essential characteristics of quality cookware.
Finally, inspect your torch thoroughly. Check for cracks, loose connections, or damaged components. Confirm the flame is completely out and the gas dial is turned off before handling. Use only refined culinary butane fuel to ensure safe and efficient torch operation. For cookware maintenance, similar techniques like using baking soda solution can help preserve your equipment’s longevity. Similar to how cooking techniques require heat retention and crust formation, proper torch maintenance ensures reliable performance. Just as a 12-inch skillet provides the ideal balance for practical cooking, a well-maintained torch offers reliable performance for consistent results. Always ignite the torch before bringing it to the food to avoid overheating and ensure optimal performance.
Preparing Your Crème Brûlée for Torching
Refrigeration timing is critical. Chill your custard for a minimum of two hours, though four hours to overnight yields best results—a fully firmed custard resists heat transfer during caramelization. Before sugar layering, verify the ramekin’s surface is completely dry; pat away any condensation that could cause clumping.
Apply an even, thin layer of granulated sugar—approximately one to one-and-a-half teaspoons per standard ramekin. Gently tilt or tap the dish to remove excess sugar, which burns unevenly and creates thick patches. Remove the custard from refrigeration just before torching to maintain that firm texture beneath your caramelized top. Hold the butane torch several inches away from the sugar surface and move the flame in a circular motion to ensure even caramelization. Lightly spray the sugar with water for more uniform melting before applying heat, ensuring a consistent golden finish across the surface. For optimal flavor development, ensure you’ve used vanilla pods during the initial milk infusion process, as this foundational step enhances the custard’s profile and complements the caramelized sugar topping.
Understanding Sugar Selection and Application
Sugar selection is your foundation for achieving the perfect brûlée crust. You’ll find that granulated white sugar offers the most reliable results, with fine crystals that melt evenly under torch heat. If you’re ready to experiment, consider alternative sugar types like turbinado or demerara, which provide deeper flavor profiles and satisfying crunch.
Apply an even layer of sugar across your custard’s surface—approximately 1/8 inch thickness guarantees uniform caramelization. Avoid confectioner’s sugar or moisture-laden varieties that won’t torch properly. Brown sugar, while flavorful, creates uneven melting and suits variations rather than classic crème brûlée. Proper caramelization technique is essential to developing the complex nutty and toasty notes that distinguish exceptional crème brûlée from standard versions. The size of sugar crystals directly impacts your final texture, with larger crystals yielding crunchier finishes than finer granulated options.
Your torching technique matters equally. Hold the flame steady, moving it consistently across the surface until the sugar transforms into a thin, glass-like caramel crust that develops complex nutty and toasty notes. For optimal results, set the butane torch on medium flame and hold it about 5 cm from the sugar layer to ensure even melting without burning. Similar to how Le Creuset skillets require gradual heat distribution to ensure even cooking results, maintaining consistent torch movement prevents hot spots and uneven caramelization on your dessert. When selecting your torch, prioritize models with flame control and safety mechanisms to ensure precise heat application and prevent accidents during the brûléing process. Just as programmable alarms alert you when monitoring cooking temperatures, a quality torch with clear visual feedback helps you recognize when caramelization has reached the ideal stage.
Igniting and Adjusting Your Butane Torch
With your sugar layer perfectly applied, you’re ready to ignite the torch and begin caramelizing. Start by depressing the safety lock, then press the ignition button firmly until a pilot flame appears. Point the torch tip away from your body and others during ignition to prevent accidental burns. Observe the flame’s stability for several seconds; if it sputters, turn off and wait before retrying. Before refilling your torch, always ensure it is turned off and cooled down to prevent accidents and ensure safe handling. Most professional butane torches include built-in automatic ignition systems like Piezo ignition technology, which provide easy and reliable lighting.
For peak flame adjustment, begin with a medium-small, focused blue flame to concentrate heat on sugar without overheating the custard beneath. Position the torch 10–20 centimeters from the sugar surface, moving continuously for even melting, similar to how even heat distribution is essential when searing steaks. Use your flame adjustment controls to narrow the jet for precise rim work or widen it for larger areas. Butane blow torches are particularly popular among chefs because they deliver concentrated intensity suitable for culinary applications like caramelizing desserts. A bain-marie technique ensures the custard underneath remains creamy and doesn’t overcook during the caramelization process. Just as Dutch ovens excel at slow-cooking and braising delicate dishes, the controlled temperature environment of a bain-marie protects your custard from direct heat damage. Regular maintenance with high-quality butane refills will keep your torch performing optimally for consistent results. This ignition technique and controlled flame adjustment guarantee professional, even caramelization.
Mastering the Caramelization Technique
Once you’ve ignited and adjusted your flame, the real artistry begins—mastering the caramelization technique transforms a good crème brûlée into an exceptional one. Hold your torch 2–4 inches from the sugar surface, maintaining steady circular motions to guarantee even sugar melting. Rotate the ramekin continuously rather than keeping the flame stationary, preventing hot spots and protecting the custard beneath. Begin with gentle heat to liquefy the sugar, then concentrate briefly for coloration. Watch for uniform amber-to-golden tones—your target caramel texture. Stop before the sugar darkens to brown or black, which creates bitterness and weakens the shell. For best results, apply a thin layer of sugar to avoid burning and achieve the ideal caramelized top. Similar to Dutch oven cooking, proper heat control is essential for preventing damage to your dessert and achieving consistent results. The adjustable flame control of your butane torch allows you to fine-tune your heat intensity for optimal caramelization results. Unlike quick desserts such as indoor s’mores dip, which require minimal prep time, crème brûlée demands precise torch control and attention to caramelization timing, much like the flavor layering required in slow-cooked braises. Serve immediately after caramelizing to maintain texture and prevent the shell from softening. The compact design and adjustable flame of your butane torch allows for precision browning that enhances the flavor profile of your dessert. Torching typically takes 20–60 seconds per ramekin. Allow the hardened caramel to cool undisturbed for 1–3 minutes before serving.
Achieving the Perfect Golden Brown Finish
Now that you’ve mastered the torching motion, focusing on the sugar selection and positioning will determine whether your crème brûlée achieves that coveted golden brown finish. You’ll want to use coarse grain sugar or caster sugar, applying a thin, even layer across your custard surface. Hold your torch at the proper distance, allowing the sugar to melt fully before caramelizing. Keep the flame moving constantly in circular motions, rotating your ramekin regularly to guarantee maintaining consistency throughout the process. Progress from melting to that glass-like golden brown stage, developing a toasty flavor without over-torching. To prevent cracks and achieve proper doneness, ensure your custard has been adequately chilled before torching the sugar topping. Culinary blow torches are specifically designed for quickly creating the characteristic crispy sugar crust without heating the custard underneath. For additional flavor complexity, consider mixing spices or citrus zest directly into your sugar topping before caramelizing. Stop when the entire surface achieves uniform caramelization. Just as cast iron requires even heat distribution to maintain its quality, your caramelized sugar needs consistent heat application to develop that perfect crisp shell. Maintain a proper distance-to-spot ratio between your torch and the sugar surface to ensure even caramelization across the entire ramekin. Proper technique also helps prevent oxidation of the sugar, ensuring it maintains its pristine appearance and delicate flavor. You’ll know you’ve succeeded when the top forms a crisp, crackable shell that shatters under your spoon.
Allowing Your Crème Brûlée to Set
Before you torch your crème brûlée, you’ll need to give the custard sufficient time to chill and firm up properly. A minimum of two hours’ chilling is essential, though four to twenty-four hours yields better texture stability and reduces custard breakage risk during torching.
After retrieving your ramekins from the refrigerator, allow them to rest at room temperature for five to fifteen minutes. This brief cooling method reduces thermal shock when you apply the torch’s heat. When using your butane torch, remember to maintain a relatively low flame to avoid overheating and damaging your dessert. Similar to how cooking temperature control is essential when preparing other dishes, monitoring your flame intensity ensures optimal results. Proper flame control prevents the sugar from burning while creating an evenly caramelized surface.
Once you’ve torched the sugar, patience remains critical. Let the caramelized shell cool undisturbed for one to three minutes on a flat surface. Avoid returning hot ramekins to the refrigerator immediately; instead, allow ambient cooling methods to harden the shell completely. For even greater precision, consider using an infrared thermometer to verify the sugar has reached the optimal caramelization temperature. If the sugar feels tacky, extend cooling for five to ten additional minutes before serving. For the best results, use smooth, even movements across the sugar surface to achieve consistent caramelization without burning.
Cleaning and Maintaining Your Torch
Your torch’s performance and longevity depend on regular maintenance, which begins the moment you’ve finished torching and the tool has cooled completely. Torch safety requires turning the flame control to its lowest setting before accessing any valves or nozzles.
Start by using compressed air to blow out loose debris from the nozzle. For stubborn buildup, gently brush with a soft-bristled brush or pipe cleaner, then apply isopropyl alcohol on a cotton swab. Dry thoroughly to prevent moisture-related malfunctions. Always use a damp cloth for general cleaning to avoid damage to delicate components. Just as even heat distribution is essential for consistent cooking results with outdoor equipment, maintaining your torch’s nozzle ensures reliable flame performance.
Monthly maintenance tips include deep cleaning and checking your fill valve. Store your torch detached from gas cartridges in a cool, dry location. Conduct the bleeding process monthly to purge old gas and prevent fuel contamination. Using high-quality, filtered butane designed for torches will improve your torch’s performance and lifespan. Similar to how slow-roasting brings out optimal tenderness in meat, proper torch maintenance ensures consistent results every time. These practices guarantee your torch remains reliable for every crème brûlée you create.
Beyond Crème Brûlée: Other Uses for Your Torch
A butane torch’s versatility extends well beyond the classic custard dessert. You’ll find countless applications in your kitchen that make this tool indispensable.
For produce, create blistered tomatoes by running the flame over skins until they shrivel and peel effortlessly. You can also prepare torched fruits like brûléed grapefruit with cinnamon and sugar or caramelized avocado toast. Middle-range culinary torches are easy to fill and handle, making them practical for frequent use in your kitchen. For an interactive dessert experience, invite guests to toast marshmallows using your culinary torch for custom dessert sandwiches.
In the protein sector, searing meats and seafood becomes effortless—torch tuna blocks for a seared exterior without dirtying pans. Melting cheeses happens quickly too; grate cheese over soup or chili, then torch until bubbly. For those seeking alternative cooking methods, cast iron cookware offers even heating and heat retention properties that complement torch-seared dishes beautifully. Pairing torch-seared proteins with cast iron cooking creates exceptional results, especially when using high smoke point oils to maintain the seasoning and prevent burning during preparation. Cast iron skillets provide superior heat retention for maintaining stable temperatures during extended cooking sessions. Like wireless meat thermometers that monitor internal temperature accuracy, a reliable culinary torch ensures precise heat application for consistent results. Always ensure your torch operates in a well-ventilated area to safely manage heat and fumes during cooking.
Don’t overlook desserts toppings beyond brûlée. Brown meringue on pies, toast marshmallows for s’mores, or create sugar crusts on cakes. Your torch transforms ordinary dishes into restaurant-quality creations.